How to Export Data from QuickBooks: A Comprehensive Guide
Exporting data from QuickBooks is an essential task for businesses that need to share financial information, analyze data, or transition to different systems. QuickBooks offers various options for exporting data, each tailored to different needs and purposes. This comprehensive guide will walk you through the steps and best practices for exporting data from QuickBooks, ensuring a smooth and accurate process.
Why Export Data from QuickBooks?
Exporting data from QuickBooks can be beneficial for several reasons:
- Data Analysis: Exporting data allows you to perform detailed analysis using tools like Excel or specialized analytics software.
- Reporting: Share financial reports with stakeholders who do not have access to QuickBooks.
- System Migration: Transitioning to a different accounting system or integrating with other business systems often requires exporting data.
- Backup: Keeping an external backup of your financial data can provide an extra layer of security.
Preparing for Data Export
Before exporting data from QuickBooks, it’s crucial to prepare adequately. Here are some steps to follow:
Step 1: Determine the Data You Need
- Identify Data Types: Decide which data you need to export. Common data types include transactions, customer information, vendor information, products and services, and reports.
- Specify Date Ranges: If applicable, specify the date ranges for the data you want to export. This is particularly important for transactions and reports.
Step 2: Back Up Your QuickBooks Data
Before exporting data, create a backup of your current QuickBooks file. This precaution allows you to restore your data to its previous state if something goes wrong during the export process.
- Go to File Menu: In QuickBooks, go to the “File” menu.
- Create Backup: Select “Create Backup” and follow the prompts to save a backup copy of your data.
Methods for Exporting Data from QuickBooks
There are several methods to export data from QuickBooks, each suitable for different types of data and purposes. The main methods include:
- Using QuickBooks Export Tools
- Exporting to Excel
- Using IIF Files
- Third-Party Integration Tools
- Manual Data Export
Method 1: Using QuickBooks Export Tools
QuickBooks provides built-in tools for exporting various types of data, including lists and transactions. Here’s how to use them:
- Open QuickBooks: Launch QuickBooks and sign in to your account.
- Navigate to the Export Tool: Go to the “File” menu, select “Utilities,” and then “Export.” Choose the type of data you want to export (e.g., Lists, Transactions).
Exporting Lists
- Select Lists to Export: Choose which lists you want to export (e.g., Customers, Vendors, Products and Services).
- Select Export Format: QuickBooks typically offers options like Excel or CSV. Choose your preferred format.
- Save the Export File: Follow the prompts to save the export file to your desired location.
Exporting Transactions
- Select Transactions to Export: Choose the types of transactions you want to export (e.g., Invoices, Bills).
- Select Date Range: Specify the date range for the transactions.
- Select Export Format: Choose your preferred format (Excel, CSV).
- Save the Export File: Follow the prompts to save the export file to your desired location.
Method 2: Exporting to Excel
Excel is a versatile tool for data analysis and reporting. QuickBooks allows you to export various types of data directly to Excel. Here’s how:
- Open QuickBooks: Launch QuickBooks and sign in to your account.
- Navigate to the Data You Want to Export: Go to the section of QuickBooks that contains the data you want to export (e.g., Customers, Vendors, Reports).
Exporting Reports to Excel
- Run the Report: Generate the report you want to export by navigating to the “Reports” menu and selecting the report type.
- Customize Report: Customize the report as needed (e.g., date range, filters).
- Export to Excel: Click the “Export” button at the top of the report and select “Export to Excel.” Follow the prompts to save the Excel file.
Exporting Lists to Excel
- Navigate to Lists: Go to the “Lists” menu and select the list you want to export (e.g., Customer List, Vendor List).
- Export to Excel: Click “Excel” at the bottom of the list and select “Export.” Follow the prompts to save the Excel file.
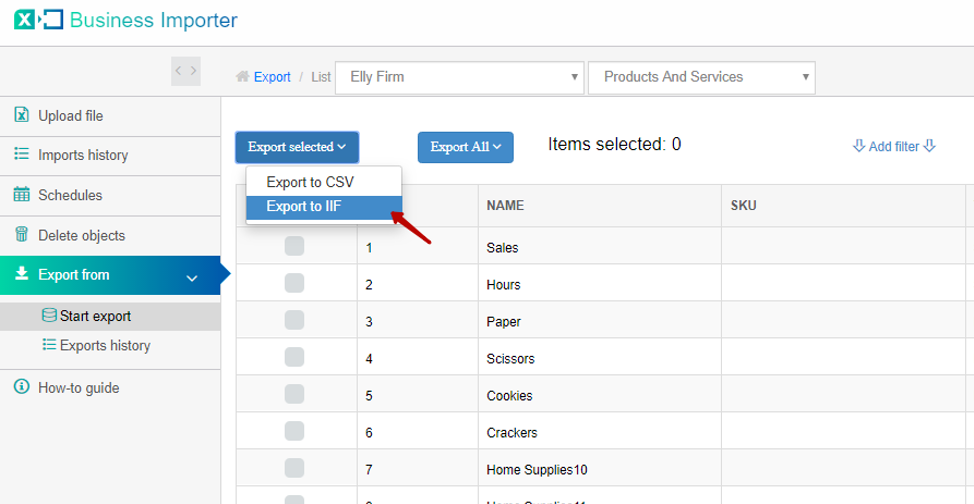
Method 3: Using IIF Files
IIF (Intuit Interchange Format) files are a versatile way to export data from QuickBooks. They can be used for exporting complex data types, including transactions and lists. Here’s how to use IIF files:
- Open QuickBooks: Launch QuickBooks and sign in to your account.
- Navigate to the Export Tool: Go to the “File” menu, select “Utilities,” and then “Export.”
- Select IIF Files: Choose “IIF Files” as the export format.
- Select Data to Export: Choose the data types you want to export (e.g., Lists, Transactions).
- Save the IIF File: Follow the prompts to save the IIF file to your desired location.
Method 4: Third-Party Integration Tools
There are numerous third-party tools available that can simplify the data export process. These tools often offer advanced features such as data validation, error checking, and automated field mapping. Some popular third-party tools include:
- Transaction Pro Exporter: This tool supports a wide range of export formats and offers advanced mapping and error-checking features.
- SaasAnt: Another powerful tool that supports exporting, importing, and deleting data in QuickBooks.
- Zed Axis: A versatile tool that allows for the export, import, and update of data in QuickBooks.
To use a third-party tool:
- Install the Tool: Download and install the tool from the provider’s website.
- Connect to QuickBooks: Follow the tool’s instructions to connect it to your QuickBooks account.
- Select Data to Export: Choose the data you want to export.
- Export Data: Use the tool’s interface to export the data and save it to your desired location.
Method 5: Manual Data Export
While not ideal for large volumes of data, manual data export can be useful for small datasets or specific entries. Here’s how to manually export data:
- Open QuickBooks: Launch QuickBooks and sign in to your account.
- Navigate to the Appropriate Section: Go to the section where you want to export data (e.g., Customers, Vendors, Products and Services).
- Copy Data: Select the data you want to export and copy it (Ctrl+C or Command+C).
- Paste Data: Open an Excel or CSV file and paste the data (Ctrl+V or Command+V).
- Save File: Save the file to your desired location.
Best Practices for Data Export
To ensure a smooth and accurate data export process, follow these best practices:
- Validate Data: Before exporting, validate your data to ensure it’s accurate and complete.
- Backup QuickBooks Data: Always create a backup of your QuickBooks data before exporting.
- Test with a Small Sample: If possible, test the export process with a small sample of data to identify any issues before exporting the full dataset.
- Use Templates: Utilize QuickBooks templates for Excel and CSV files to ensure correct formatting.
- Review Exported Data: After exporting, review the data to ensure it’s accurate and complete.
- Seek Professional Help: If you’re unsure about the export process or dealing with complex data, consider seeking help from a QuickBooks ProAdvisor or a professional accountant.
Troubleshooting Common Export Issues
Despite careful preparation, you may encounter issues during the data export process. Here are some common problems and their solutions:
- Data Format Errors: Ensure that your data file is in the correct format and follows QuickBooks’ guidelines.
- Incomplete Exports: If some data doesn’t export, check for errors in the source data and ensure all required fields are filled out.
- Connection Issues: If using a third-party tool, ensure it’s correctly connected to QuickBooks and has the necessary permissions.
- Export Limits: Be aware of any limitations in QuickBooks regarding the volume or types of data that can be exported. You may need to export data in smaller batches.
Exporting Specific Types of Data
Different types of data in QuickBooks may require specific steps for exporting. Here’s a closer look at how to export some common data types:
Exporting Customer Data
- Open QuickBooks: Launch QuickBooks and sign in to your account.
- Navigate to Customer Center: Go to the “Customers” menu and select “Customer Center.”
- Export Customer List: Click “Excel” at the bottom of the Customer Center window and select “Export Customer List.” Follow the prompts to save the file.
Exporting Vendor Data
- Open QuickBooks: Launch QuickBooks and sign in to your account.
- Navigate to Vendor Center: Go to the “Vendors” menu and select “Vendor Center.”
- Export Vendor List: Click “Excel” at the bottom of the Vendor Center window and select “Export Vendor List.” Follow the prompts to save the file.
Exporting Products and Services Data
- Open QuickBooks: Launch QuickBooks and sign in to your account.
- Navigate to Item List: Go to the “Lists” menu and select “Item List.”
- Export Item List: Click “Excel” at the bottom of the Item List window and select “Export Item List.” Follow the prompts to save the file.
Exporting Transaction Data
- Open QuickBooks: Launch QuickBooks and sign in to your account.
- Navigate to Reports: Go to the “Reports” menu and select the type of transaction report you want to export (e.g., Sales, Expenses).
- Customize Report: Customize the report as needed (e.g., date range, filters).
- Export Report: Click the “Export” button at the top of the report and select “Export to Excel.” Follow the prompts to save the Excel file.
Conclusion
Exporting data from QuickBooks can significantly enhance your ability to analyze and share financial information. By following the steps and best practices outlined in this guide, you can ensure a smooth and successful data export process. Whether you’re generating reports, migrating systems, or backing up your data, QuickBooks provides the tools and flexibility to meet your needs. Remember, thorough preparation and careful execution are key to a successful data export, so take the time to validate your data and back up your QuickBooks file before proceeding.


