How to Import Data into QuickBooks: A Comprehensive Guide
QuickBooks is a powerful accounting software that offers a range of features to help businesses manage their finances efficiently. One of its key capabilities is the ability to import data, which can save time and reduce errors when transitioning from another system or consolidating financial information. This comprehensive guide will walk you through the various methods and best practices for importing data into QuickBooks, ensuring a smooth and accurate transfer of your financial data.
Why Import Data into QuickBooks?
Importing data into QuickBooks can be beneficial for several reasons:
- Time-Saving: Manually entering data can be time-consuming and prone to errors. Importing data automates this process, saving valuable time.
- Accuracy: Automated data import reduces the risk of human error, ensuring your financial records are accurate.
- Transitioning Systems: If you’re switching from another accounting system to QuickBooks, importing data allows for a seamless transition.
- Data Consolidation: Businesses with multiple data sources can consolidate information into QuickBooks, providing a unified view of their finances.
Preparing for Data Import
Before importing data into QuickBooks, it’s crucial to prepare adequately. Here are some steps to follow:
Step 1: Review Your Data
- Data Accuracy: Ensure that the data you plan to import is accurate and up-to-date. Correct any errors in your source data before importing.
- Data Format: QuickBooks accepts data in specific formats such as CSV (Comma Separated Values), Excel (XLS/XLSX), and IIF (Intuit Interchange Format). Ensure your data is in one of these formats.
Step 2: Back Up Your QuickBooks Data
Before importing new data, create a backup of your current QuickBooks file. This precaution allows you to restore your data to its previous state if something goes wrong during the import process.
- Go to File Menu: In QuickBooks, go to the “File” menu.
- Create Backup: Select “Create Backup” and follow the prompts to save a backup copy of your data.
Step 3: Map Your Data
Mapping involves matching the fields in your import file with the corresponding fields in QuickBooks. This step ensures that data is imported into the correct locations.
- Identify Fields: Identify the fields in your import file and the corresponding fields in QuickBooks.
- Create a Mapping Document: Create a document that maps each field in your import file to the appropriate QuickBooks field.
Methods for Importing Data into QuickBooks
There are several methods to import data into QuickBooks, each suitable for different types of data and volumes. The main methods include:
- Using the QuickBooks Import Tool
- Importing Excel and CSV Files
- Using IIF Files
- Third-Party Integration Tools
- Manual Data Entry
Method 1: Using the QuickBooks Import Tool
QuickBooks provides a built-in import tool for importing various types of data, including customers, vendors, products, services, and transactions. Here’s how to use it:
- Open QuickBooks: Launch QuickBooks and sign in to your account.
- Navigate to the Import Tool: Go to the “File” menu, select “Utilities,” and then “Import.” Choose the type of data you want to import (e.g., customers, vendors).
- Select File: Click “Browse” to select the file you want to import.
- Map Fields: The Import Tool will prompt you to map the fields in your file to QuickBooks fields. Follow the on-screen instructions to complete the mapping.
- Import Data: Once the mapping is complete, click “Import” to start the process. Review the imported data to ensure accuracy.
Method 2: Importing Excel and CSV Files
Excel and CSV files are commonly used for data import due to their simplicity and compatibility. Here’s how to import data using these formats:
- Prepare Your File: Ensure your Excel or CSV file is formatted correctly. Each column should represent a field in QuickBooks (e.g., Customer Name, Address, Phone Number).
- Open QuickBooks: Launch QuickBooks and go to the “File” menu.
- Select Utilities: Choose “Utilities,” then “Import,” and select “Excel Files” or “CSV Files.”
- Select Your File: Click “Browse” to locate and select your file.
- Map Fields: QuickBooks will prompt you to map the columns in your file to the corresponding QuickBooks fields.
- Import Data: After mapping the fields, click “Import” to begin the process. Review the imported data to ensure accuracy.
Method 3: Using IIF Files
IIF (Intuit Interchange Format) files are a versatile way to import data into QuickBooks. They can be used for importing complex data types, including transactions and lists. Here’s how to use IIF files:
- Prepare Your IIF File: Ensure your IIF file is formatted correctly. IIF files have a specific structure that must be followed. You can find sample IIF files on the QuickBooks website.
- Open QuickBooks: Launch QuickBooks and go to the “File” menu.
- Select Utilities: Choose “Utilities,” then “Import,” and select “IIF Files.”
- Select Your File: Click “Browse” to locate and select your IIF file.
- Import Data: Click “Import” to begin the process. QuickBooks will process the IIF file and import the data.
- Review Data: Check the imported data to ensure it’s accurate and complete.
Method 4: Third-Party Integration Tools
There are numerous third-party tools available that can simplify the data import process. These tools often offer advanced features such as data validation, error checking, and automated field mapping. Some popular third-party tools include:
- Transaction Pro Importer: This tool supports a wide range of import formats and offers advanced mapping and error-checking features.
- SaasAnt: Another powerful tool that supports importing, exporting, and deleting data in QuickBooks.
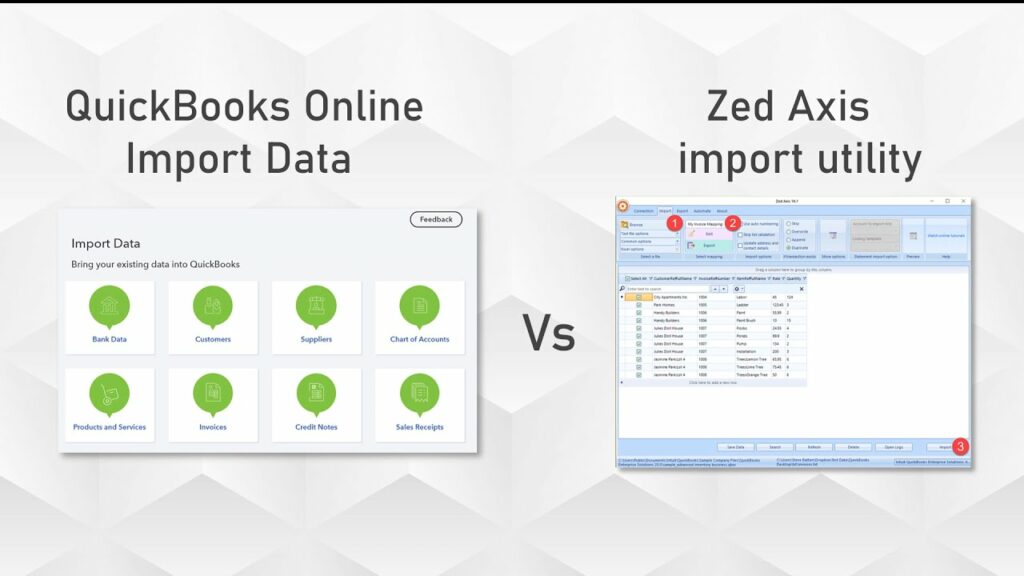
- Zed Axis: A versatile tool that allows for the import, export, and update of data in QuickBooks.
To use a third-party tool:
- Install the Tool: Download and install the tool from the provider’s website.
- Connect to QuickBooks: Follow the tool’s instructions to connect it to your QuickBooks account.
- Select Data File: Choose the file you want to import.
- Map Fields: Use the tool’s interface to map fields between your file and QuickBooks.
- Import Data: Start the import process and review the results.
Method 5: Manual Data Entry
While not ideal for large volumes of data, manual data entry can be useful for small datasets or one-time entries. Here’s how to manually enter data:
- Open QuickBooks: Launch QuickBooks and sign in to your account.
- Navigate to the Appropriate Section: Go to the section where you want to enter data (e.g., Customers, Vendors, Products and Services).
- Enter Data: Click “New” and enter the data manually. Ensure that all required fields are filled out.
- Save Data: Click “Save” to add the data to QuickBooks.
Best Practices for Data Import
To ensure a smooth and accurate data import process, follow these best practices:
- Validate Data: Before importing, validate your data to ensure it’s accurate and complete.
- Backup QuickBooks Data: Always create a backup of your QuickBooks data before importing new data.
- Test with a Small Sample: If possible, test the import process with a small sample of data to identify any issues before importing the full dataset.
- Use Templates: Utilize QuickBooks templates for Excel and CSV files to ensure correct formatting.
- Review Imported Data: After importing, review the data in QuickBooks to ensure it’s accurate and complete.
- Seek Professional Help: If you’re unsure about the import process or dealing with complex data, consider seeking help from a QuickBooks ProAdvisor or a professional accountant.
Troubleshooting Common Import Issues
Despite careful preparation, you may encounter issues during the data import process. Here are some common problems and their solutions:
- Data Format Errors: Ensure that your data file is in the correct format and follows QuickBooks’ guidelines.
- Mapping Errors: Double-check your field mapping to ensure that all fields are correctly matched.
- Duplicate Entries: If you encounter duplicate entries, verify your source data and use QuickBooks’ duplicate checking features.
- Incomplete Imports: If some data doesn’t import, check for errors in the source file and ensure all required fields are filled out.
- Connection Issues: If using a third-party tool, ensure it’s correctly connected to QuickBooks and has the necessary permissions.
Conclusion
Importing data into QuickBooks can significantly enhance your efficiency and accuracy in managing financial information. By following the steps and best practices outlined in this guide, you can ensure a smooth and successful data import process. Whether you’re transitioning from another system, consolidating data, or simply updating your records, QuickBooks provides the tools and flexibility to meet your needs. Remember, thorough preparation and careful execution are key to a successful data import, so take the time to validate your data and back up your QuickBooks file before proceeding.


