How to Install Linux on a PC

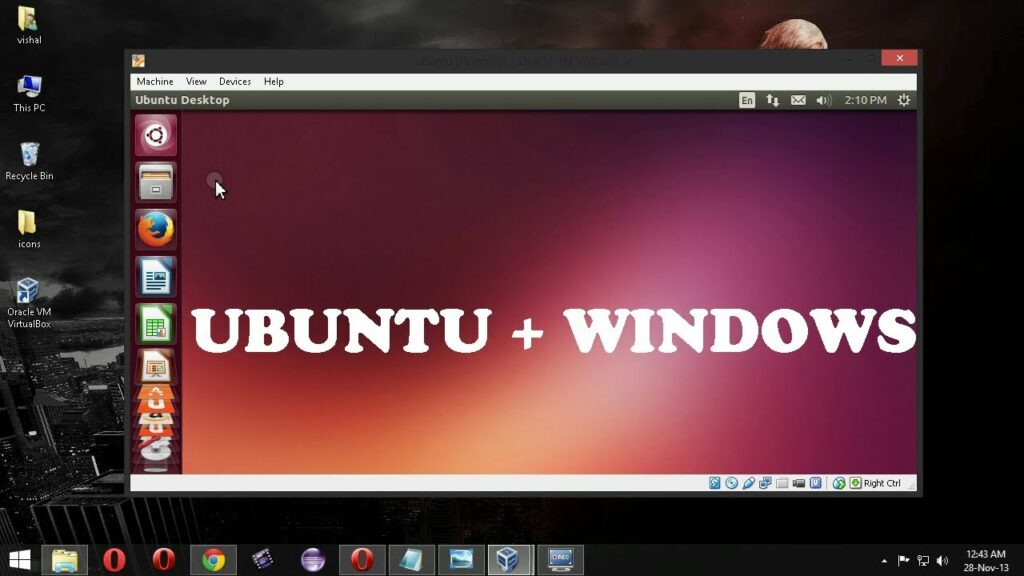
Linux, an open-source operating system, offers flexibility, security, and customization options that make it a popular choice among developers, IT professionals, and tech enthusiasts. Whether you’re looking to revive an old PC, enhance your knowledge of operating systems, or simply explore the world of Linux, this comprehensive guide will take you through the entire process of installing Linux on a PC.
Understanding Linux Distributions
Before diving into the installation process, it’s important to understand the concept of Linux distributions (distros). A Linux distribution is a version of the Linux operating system that includes the Linux kernel, system libraries, and a collection of software. Each distribution has its own features, package management system, and user interface. Some popular Linux distributions include:
- Ubuntu: Known for its user-friendliness and extensive community support.
- Fedora: A cutting-edge distribution with the latest software.
- Debian: A stable and robust distribution that serves as the foundation for many other distros.
- CentOS: A free, enterprise-class distribution based on Red Hat Enterprise Linux (RHEL).
- Arch Linux: A lightweight and flexible distribution for advanced users.
Prerequisites
Before starting the installation process, gather the necessary tools and information:
- A PC: The target machine for the Linux installation.
- A Linux Distribution: Download the ISO file of your chosen Linux distribution from its official website.
- A USB Drive (4GB or larger): To create a bootable USB drive.
- Rufus (Windows) or Etcher (Linux/Mac): Software to create a bootable USB drive.
- Backup Your Data: Ensure all important data on your PC is backed up as the installation process can erase existing data.
Step-by-Step Guide to Installing Linux on a PC
1. Download the Linux Distribution
- Visit the Official Website: Go to the official website of the Linux distribution you want to install.
- Download the ISO File: Locate the download section and choose the appropriate ISO file for your PC’s architecture (32-bit or 64-bit).
2. Create a Bootable USB Drive
Creating a bootable USB drive allows you to boot your PC from the USB and install Linux. Here’s how to do it on different operating systems:
On Windows:
- Download and Install Rufus: Visit the Rufus website and download the latest version. Install it on your Windows PC.
- Insert the USB Drive: Connect the USB drive to your PC.
- Open Rufus:
- Select your USB drive in the ‘Device’ dropdown.
- Click on ‘Select’ next to ‘Boot selection’ and choose the downloaded ISO file.
- Ensure ‘Partition scheme’ is set to MBR and ‘File system’ is FAT32.
- Start the Process: Click ‘Start’ and wait for the process to complete.
On Linux/Mac:
- Download and Install Etcher: Visit the Etcher website, download the latest version, and install it.
- Insert the USB Drive: Connect the USB drive to your PC.
- Open Etcher:
- Click on ‘Flash from file’ and select the downloaded ISO file.
- Select your USB drive as the target.
- Flash!: Click ‘Flash!’ and wait for the process to complete.
3. Configure BIOS/UEFI Settings
To boot from the USB drive, you may need to configure your PC’s BIOS or UEFI settings:
- Access BIOS/UEFI: Restart your PC and press the key to enter BIOS/UEFI setup (common keys are F2, F10, F12, Esc, or Del).
- Set USB as First Boot Device: Navigate to the Boot menu and set the USB drive as the first boot device.
- Save and Exit: Save the changes and exit BIOS/UEFI.
4. Boot from the USB Drive
- Insert the Bootable USB Drive: Ensure the bootable USB drive is connected to your PC.
- Restart Your PC: Your PC should boot from the USB drive and display the Linux installer menu.
5. Start the Installation Process
The installation process may vary slightly depending on the Linux distribution you are installing. Here, we’ll use Ubuntu as an example:
- Select ‘Install Ubuntu’: From the installer menu, select ‘Install Ubuntu’ to start the installation process.
- Choose Your Language: Select your preferred language and click ‘Continue’.
- Prepare to Install Ubuntu:
- Choose whether to download updates and install third-party software.
- Click ‘Continue’.
- Installation Type:
- Choose the installation type. For a clean installation, select ‘Erase disk and install Ubuntu’.
- If you want to dual boot with another operating system, select ‘Something else’ and manually partition the drive.
- Allocate Drive Space:
- If you chose ‘Something else’, create partitions for root (
/), home (/home), and swap space. - For a simple setup, you can use the default partitioning scheme.
- If you chose ‘Something else’, create partitions for root (
- Select Time Zone: Choose your time zone and click ‘Continue’.
- Create User Account: Enter your name, computer name, username, and password. Click ‘Continue’ to proceed.
6. Complete the Installation
- Wait for Installation: The installer will copy files and install the Linux operating system. This process may take some time.
- Restart Your PC: Once the installation is complete, you’ll be prompted to restart your PC. Remove the USB drive and press ‘Enter’.
7. Initial Setup and Configuration
After the first boot, there are a few initial setup steps and configurations to get your Linux system up and running:
- Login: Use the username and password you created during the installation.
- Update the System: Open a terminal and run the following commands to update your system:sh
sudo apt update
 sudo apt upgrade
- Install Additional Software:
- Use the package manager to install essential software. For Ubuntu, you can use the Software Center or the terminal.
- Example terminal commands to install common software:sh
sudo apt install vlc gimp libreoffice
- Configure System Settings:
- Adjust display settings, network settings, and other preferences.
- Set up printers, external devices, and additional user accounts if needed.
Customizing Your Linux Installation
One of the major advantages of Linux is its customization capabilities. Here are some ways to tailor your Linux system to your preferences:
1. Install a Different Desktop Environment
If you’re not satisfied with the default desktop environment, you can install a different one. Some popular desktop environments include:
- GNOME: A modern and clean interface (default for Ubuntu).
- KDE Plasma: Highly customizable and feature-rich.
- XFCE: Lightweight and fast, suitable for older hardware.
- Cinnamon: A traditional desktop experience, default for Linux Mint.
To install a new desktop environment, use the package manager. For example, to install XFCE on Ubuntu, run:
sudo apt install xfce4
2. Customize the Appearance
- Themes and Icons:
- Download and install new themes and icon sets from websites like gnome-look.org or pling.com.
- Use the system settings or a tool like GNOME Tweaks to apply them.
- Wallpapers:
- Change your wallpaper by right-clicking on the desktop and selecting ‘Change Background’ or through the system settings.
3. Add Useful Extensions and Applets
- GNOME Extensions: Visit the GNOME Extensions website to browse and install extensions that enhance the functionality of the GNOME desktop.
- KDE Plasma Applets: Add applets and widgets to the KDE Plasma desktop from the KDE Store.
4. Automate Tasks with Scripts
- Shell Scripts: Write shell scripts to automate repetitive tasks. Create a script file with the
.shextension and make it executable using:shchmod +x scriptname.sh
- Cron Jobs: Schedule tasks to run automatically using cron. Edit the cron table with:sh
crontab -e
Troubleshooting Common Issues
During the installation and initial setup, you might encounter some common issues. Here’s how to troubleshoot them:
1. Boot Issues
- No Bootable Device Found: Ensure the USB drive is correctly set as the first boot device in BIOS/UEFI.
- Black Screen After Boot: Try booting with safe graphics mode or nomodeset option. This can be selected from the boot menu.
2. Network Issues
- Wi-Fi Not Working: Ensure the Wi-Fi adapter is enabled and check for available drivers. Install additional drivers if necessary:sh
sudo apt install bcmwl-kernel-source
- Ethernet Not Working: Check network settings and ensure the correct driver is installed. Restart the network service:sh
sudo systemctl restart NetworkManager
3. Display Issues
- Incorrect Resolution: Adjust the display settings through the system settings or use xrandr command:sh
xrandr --output HDMI-1 --mode 1920x1080
- Multiple Monitors Not Detected: Ensure all monitors are connected properly and configured in the display settings.
4. Software Installation Issues
- Package Not Found: Ensure the repository lists are up-to-date:sh
sudo apt update
- Dependency Issues: Use a package manager to resolve dependencies automatically:sh
sudo apt install -f
Conclusion
Installing Linux on a PC can be a rewarding experience, providing you with a powerful and customizable operating system. This guide has walked you through the process from selecting a Linux distribution to customizing your installation. With patience and practice, you’ll become proficient in managing and utilizing your Linux system to its full potential. Whether you’re using it for everyday tasks, software development, or as a server, Linux offers endless possibilities for exploration and productivity.


