How to Set Up Remote Desktop Access: A Comprehensive Guide
Remote desktop access allows you to connect to and control a computer from a different location using another device. This capability is invaluable for remote work, technical support, and managing multiple systems. This comprehensive guide will walk you through the process of setting up remote desktop access on various operating systems, along with detailed steps, tips, and troubleshooting advice.
Understanding Remote Desktop Access
What is Remote Desktop Access?
Remote desktop access enables you to connect to a computer (host) from another device (client) over a network or the internet. Once connected, you can view the host computer’s desktop, use applications, transfer files, and perform administrative tasks as if you were physically present.
Benefits of Remote Desktop Access
- Remote Work: Access your work computer from home or while traveling.
- Technical Support: IT professionals can remotely troubleshoot and fix issues.
- Convenience: Manage multiple systems without physically moving between them.
- Collaboration: Share screens with colleagues for collaboration and presentations.
Requirements for Remote Desktop Access
- Host Computer: The computer you want to access remotely.
- Client Device: The device you will use to connect to the host computer.
- Network Connection: A stable internet connection for both devices.
- Remote Desktop Software: Software to facilitate the remote connection.
Setting Up Remote Desktop Access on Windows
Enabling Remote Desktop on Windows
1. Check Windows Version
Remote Desktop is available on Windows Professional, Enterprise, and Education editions. Ensure your host computer is running one of these versions.
2. Enable Remote Desktop
- Open Settings:
- Press
Win + Ito open the Settings app.
- Press
- Navigate to System Settings:
- Go to
System>Remote Desktop.
- Go to
- Enable Remote Desktop:
- Toggle the switch to enable Remote Desktop.
- Click on
Confirmto enable the feature.
- Allow Remote Connections:
- In the Remote Desktop settings, click on
Advanced settings. - Ensure
Require computers to use Network Level Authenticationis enabled for added security.
- In the Remote Desktop settings, click on
3. Configure Firewall Settings
- Open Firewall Settings:
- Press
Win + R, typecontrol, and pressEnterto open Control Panel. - Go to
System and Security>Windows Defender Firewall>Allow an app or feature through Windows Defender Firewall.
- Press
- Allow Remote Desktop:
- Find
Remote Desktopin the list and ensure bothPrivateandPublicnetworks are checked.
- Find
4. Find the Host Computer’s IP Address
- Open Command Prompt:
- Press
Win + R, typecmd, and pressEnter.
- Press
- Get IP Address:
- Type
ipconfigand pressEnter. - Note the
IPv4 Addressof the host computer.
- Type
Connecting to the Host Computer from a Windows Client
- Open Remote Desktop Connection:
- Press
Win + R, typemstsc, and pressEnter.
- Press
- Enter Host Information:
- In the Remote Desktop Connection window, enter the IP address or hostname of the host computer.
- Authenticate:
- Enter the username and password for the host computer.
- Connect:
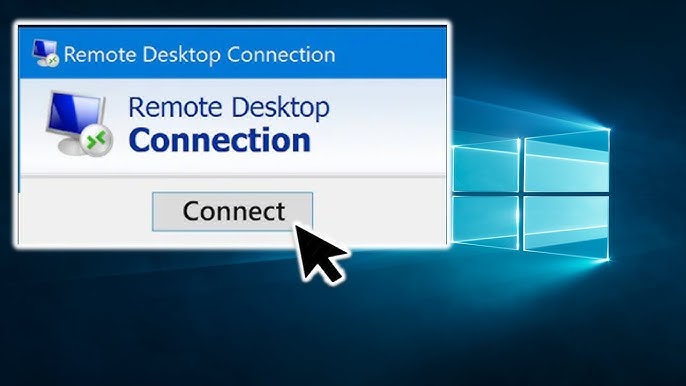
- Click
Connectto establish the remote desktop session.
- Click
Setting Up Remote Desktop Access on macOS
Enabling Remote Desktop on macOS
1. Enable Remote Management
- Open System Preferences:
- Click on the Apple menu and select
System Preferences.
- Click on the Apple menu and select
- Go to Sharing Settings:
- Select
Sharing.
- Select
- Enable Remote Management:
- Check the box next to
Remote Management.
- Check the box next to
- Configure Access:
- Click on
Optionsto specify the actions that remote users can perform.
- Click on
2. Configure Firewall Settings
- Open Firewall Settings:
- Go to
System Preferences>Security & Privacy>Firewall.
- Go to
- Allow Remote Management:
- Click on
Firewall Optionsand addRemote Managementto the allowed services.
- Click on
3. Find the Host Computer’s IP Address
- Open Network Preferences:
- Go to
System Preferences>Network.
- Go to
- Get IP Address:
- Select your active network connection and note the
IP Address.
- Select your active network connection and note the
Connecting to the Host Computer from a macOS Client
- Open Screen Sharing:
- Open
Finder, go toGo>Connect to Server, or pressCmd + K.
- Open
- Enter Host Information:
- Enter
vnc://followed by the IP address of the host computer.
- Enter
- Authenticate:
- Enter the username and password for the host computer.
- Connect:
- Click
Connectto establish the remote desktop session.
- Click
Setting Up Remote Desktop Access on Linux
Enabling Remote Desktop on Linux
1. Install Remote Desktop Software
Different Linux distributions have various remote desktop solutions. One common tool is Vino for GNOME.
- Open Terminal:
- Press
Ctrl + Alt + Tto open the terminal.
- Press
- Install Vino:
- Type
sudo apt-get install vinoand pressEnter(for Debian-based distributions).
- Type
2. Configure Remote Desktop
- Open Desktop Sharing Settings:
- Go to
Settings>Sharingor typevino-preferencesin the terminal.
- Go to
- Enable Desktop Sharing:
- Toggle the switch to enable desktop sharing.
- Configure Access:
- Set a password for remote access.
- Allow connections from any network if necessary.
3. Configure Firewall Settings
- Open Firewall Settings:
- Install
GUFWif it’s not already installed by typingsudo apt-get install gufwin the terminal. - Open
GUFWand add a rule to allow VNC connections on port 5900.
- Install
4. Find the Host Computer’s IP Address
- Open Terminal:
- Press
Ctrl + Alt + Tto open the terminal.
- Press
- Get IP Address:
- Type
hostname -Iand pressEnter. - Note the IP address.
- Type
Connecting to the Host Computer from a Linux Client
- Install VNC Viewer:
- If not already installed, type
sudo apt-get install remminain the terminal.
- If not already installed, type
- Open Remmina:
- Open Remmina from the applications menu.
- Enter Host Information:
- Enter the IP address of the host computer in the connection field.
- Authenticate:
- Enter the password you set for remote access.
- Connect:
- Click
Connectto establish the remote desktop session.
- Click
Setting Up Remote Desktop Access Using Third-Party Software
Popular Third-Party Remote Desktop Software
- TeamViewer:
- A popular, easy-to-use solution that supports Windows, macOS, Linux, iOS, and Android.
- AnyDesk:
- A lightweight remote desktop software known for its speed and ease of use.
- Chrome Remote Desktop:
- A free tool from Google that works with the Chrome browser and supports multiple platforms.
Setting Up TeamViewer
1. Install TeamViewer
- Download TeamViewer:
- Visit the TeamViewer website and download the software for your operating system.
- Install TeamViewer:
- Run the installer and follow the on-screen instructions.
2. Configure TeamViewer
- Open TeamViewer:
- Launch TeamViewer from the applications menu.
- Set Up Unattended Access:
- Follow the prompts to set up unattended access, which allows you to connect to your computer without needing to approve the connection each time.
- Note Your TeamViewer ID and Password:
- Write down the TeamViewer ID and password for the host computer.
3. Connecting to the Host Computer Using TeamViewer
- Open TeamViewer on the Client Device:
- Launch TeamViewer on the device you will use to connect.
- Enter Host Information:
- Enter the TeamViewer ID of the host computer.
- Authenticate:
- Enter the password for the host computer.
- Connect:
- Click
Connectto establish the remote desktop session.
- Click
Setting Up Chrome Remote Desktop
1. Install Chrome Remote Desktop
- Install Chrome:
- Ensure you have the Chrome browser installed on both the host and client devices.
- Add the Chrome Remote Desktop Extension:
- Go to the Chrome Web Store and add the Chrome Remote Desktop extension to Chrome.
2. Configure Chrome Remote Desktop
- Open Chrome Remote Desktop:
- Open a new tab and go to
chrome://apps, then click onChrome Remote Desktop.
- Open a new tab and go to
- Set Up Remote Access:
- Click
Set up remote accessand follow the on-screen instructions to configure your computer for remote access. - Choose a name for your computer and set a PIN.
- Click
3. Connecting to the Host Computer Using Chrome Remote Desktop
- Open Chrome Remote Desktop on the Client Device:
- Open a new tab and go to
chrome://apps, then click onChrome Remote Desktop.
- Open a new tab and go to
- Enter Host Information:
- Find the host computer in the list of available devices.
- Authenticate:
- Enter the PIN you set for the host computer.
- Connect:
- Click
Connectto establish the remote desktop session.
- Click
Security Considerations for Remote Desktop Access
- Use Strong Passwords:
- Ensure that all user accounts and remote access tools use strong, unique passwords.
- Enable Two-Factor Authentication (2FA):
- Use 2FA whenever possible to add an extra layer of security.
- Keep Software Up to Date:
- Regularly update your operating system and remote desktop software to protect against vulnerabilities.
- Use VPNs:
- Consider using a VPN to secure the connection between the client and host devices.
- Limit Access:
- Only allow remote access from trusted devices and networks.
- Monitor Connections:
- Regularly review and monitor remote desktop connections and logs for any suspicious activity.
Troubleshooting Remote Desktop Issues
- Connection Problems:
- Ensure both devices are connected to the internet and that the network is stable.
- Verify that the host computer is powered on and not in sleep mode.
- Check firewall settings to ensure remote desktop traffic is allowed.
- Authentication Issues:
- Double-check usernames, passwords, and any required PINs or authentication codes.
- Ensure the remote desktop service is properly configured on the host computer.
- Performance Issues:
- Optimize the host computer by closing unnecessary applications and services.
- Adjust remote desktop settings to lower the display quality if the connection is slow.
- Compatibility Issues:
- Ensure that both the host and client devices are running compatible versions of the remote desktop software.
- Check for updates to the remote desktop software that may resolve compatibility issues.
Conclusion
Setting up remote desktop access is a valuable skill that enables you to connect to and control computers from different locations, enhancing productivity, convenience, and collaboration. Whether you’re using built-in tools on Windows, macOS, or Linux, or opting for third-party solutions like TeamViewer or Chrome Remote Desktop, the steps outlined in this comprehensive guide will help you establish secure and efficient remote desktop connections. Remember to prioritize security by using strong passwords, enabling two-factor authentication, and keeping your software up to date. With these best practices, you can confidently set up and manage remote desktop access for personal or professional use.