How to Sync Audio and Video Clips in PowerDirector
Synchronizing audio and video clips is an essential task in video editing to ensure that the visual and auditory components of your project align perfectly. Whether you’re working on a simple vlog, a multi-camera shoot, or a complex film project, syncing audio and video is crucial for creating a professional and polished final product. CyberLink PowerDirector offers a variety of tools and techniques to help you achieve perfect synchronization. This comprehensive guide will walk you through the various methods available in PowerDirector to sync audio and video clips effectively.
1. Understanding the Basics of Syncing
Before diving into the specific tools and techniques in PowerDirector, it’s important to understand the basics of syncing audio and video:
- Sync Points: These are specific points in the audio and video tracks that you use to align the clips. Common sync points include claps, visual cues, or distinct sounds.
- Waveform Analysis: By visually analyzing the audio waveform, you can identify peaks and troughs that correspond to specific sounds, making it easier to match audio with video.
- Timecode: Some professional cameras and audio recorders use timecode, a sequence of numeric codes generated at regular intervals, to synchronize multiple devices. PowerDirector can read timecode to help with synchronization.
2. Manual Syncing
Manual syncing involves aligning audio and video clips by visually and audibly matching sync points. This method requires attention to detail but offers precise control over the synchronization process.
a. Importing Clips
- Open Your Project: Start by opening your project in PowerDirector.
- Import Media: Import your audio and video clips by clicking on the “Import Media” button in the Media Library.
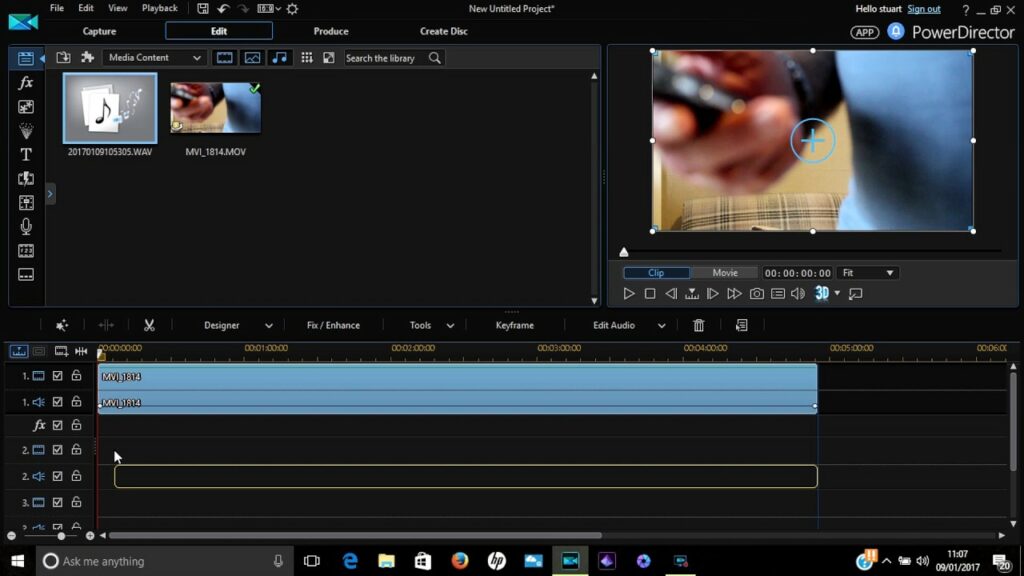
b. Placing Clips on the Timeline
- Add Video Clip: Drag your video clip to the timeline.
- Add Audio Clip: Drag the corresponding audio clip to the audio track below the video clip.
c. Identifying Sync Points
- Waveform Analysis: Enable the audio waveform display by right-clicking on the audio track and selecting “Show Waveform.”
- Visual Cues: Look for visual cues in the video, such as a clap or a specific movement, that correspond to distinct sounds in the audio waveform.
d. Aligning Clips
- Zoom In: Zoom in on the timeline for a more detailed view by using the zoom slider or pressing
Ctrl++. - Align Sync Points: Drag the audio clip left or right to align the sync points with the corresponding visual cues in the video clip.
- Fine-Tuning: Use the nudge tool (arrow keys) to make small adjustments for precise synchronization.
e. Preview and Adjust
- Play Back: Play back the synced section to ensure the audio and video are aligned.
- Adjust if Necessary: If the sync is not perfect, make further adjustments until the audio matches the video accurately.
3. Automatic Syncing
PowerDirector offers automatic syncing tools that simplify the process by using advanced algorithms to align audio and video clips. This is particularly useful for multi-camera projects or when working with separate audio recordings.
a. Using the Sync by Audio Tool
- Select Clips: Select the video and audio clips you want to sync by holding
Ctrland clicking on each clip in the Media Library. - Right-Click: Right-click on the selected clips and choose “Sync by Audio.”
- PowerDirector Syncs: PowerDirector will analyze the audio waveforms and automatically align the clips.
b. Multi-Camera Synchronization
PowerDirector’s MultiCam Designer allows you to sync multiple video clips from different cameras using audio.
- Open MultiCam Designer: Click on the “Plugins” menu and select “MultiCam Designer.”
- Add Clips: Add your video clips to the MultiCam Designer.
- Sync by Audio: Click on the “Sync by Audio” button. PowerDirector will align the clips based on their audio waveforms.
- Switch Angles: Use the MultiCam Designer to switch between different camera angles in real-time, creating a dynamic and synced final video.
4. Using Timecode
If your recording equipment supports timecode, you can use it to synchronize audio and video clips automatically.
a. Importing Clips with Timecode
- Import Media: Import your timecode-enabled audio and video clips into the Media Library.
- Place Clips on Timeline: Drag the clips to the timeline.
b. Syncing by Timecode
- Right-Click: Right-click on the video clip on the timeline.
- Align Timecode: Select “Align to Timecode.” PowerDirector will match the timecode of the audio and video clips, ensuring perfect synchronization.
5. Syncing Multiple Clips
For projects involving multiple video and audio sources, PowerDirector offers several tools to manage and sync multiple clips efficiently.
a. Using the Sync by Audio Tool for Multiple Clips
- Select All Clips: Select all video and audio clips you want to sync.
- Right-Click: Right-click on the selected clips and choose “Sync by Audio.”
- PowerDirector Syncs: PowerDirector will analyze and align all selected clips based on their audio waveforms.
b. Using the MultiCam Designer
- Open MultiCam Designer: Go to the “Plugins” menu and select “MultiCam Designer.”
- Add Multiple Clips: Add all your video clips to the MultiCam Designer.
- Sync by Audio: Click on the “Sync by Audio” button to align the clips.
- Switch and Edit: Use the MultiCam Designer to switch between different angles and make real-time edits.
6. Fine-Tuning Sync
After using automatic syncing tools, you may need to fine-tune the synchronization to ensure everything is perfectly aligned.
a. Manual Adjustments
- Zoom In: Zoom in on the timeline for precise control.
- Nudge Tool: Use the nudge tool (arrow keys) to make small adjustments to the clips.
- Scrub Through: Scrub through the timeline to check the sync at different points.
b. Split and Trim
- Split Clips: Use the split tool (
Ctrl+T) to cut the video and audio clips at specific points. - Trim Clips: Trim the edges of the clips to adjust their start and end points, ensuring better sync.
7. Syncing Dialogue and Voiceovers
When syncing dialogue or voiceovers, precise timing is crucial to match the speaker’s lip movements with the audio.
a. Importing Dialogue/Voiceover
- Import Media: Import your video and dialogue/voiceover audio clips.
- Place on Timeline: Drag the video clip and audio clip to the timeline.
b. Identifying Sync Points
- Visual and Auditory Cues: Identify specific visual and auditory cues, such as a speaker’s mouth movement and corresponding sounds.
- Waveform Analysis: Use the audio waveform to find peaks that match the spoken words.
c. Aligning Clips
- Zoom In: Zoom in on the timeline for a detailed view.
- Align Sync Points: Drag the audio clip to align the sync points with the visual cues.
- Fine-Tune: Use the nudge tool for small adjustments to achieve perfect sync.
8. Advanced Techniques for Complex Projects
For more complex projects, such as multi-camera shoots or scenes with multiple audio sources, advanced syncing techniques may be necessary.
a. Using Markers
Markers can help you keep track of sync points and make precise adjustments:
- Add Markers: Place markers at sync points by clicking the “Add Marker” button or pressing
M. - Align Clips: Use the markers as reference points to align audio and video clips.
b. Multi-Layered Sync
When working with multiple layers of audio and video:
- Layer Clips: Place the primary video and audio clips on the main tracks.
- Additional Layers: Add secondary audio or video clips on additional tracks.
- Sync Each Layer: Sync each layer individually using manual or automatic methods.
9. Previewing and Exporting Synced Clips
Once you’ve synchronized your audio and video clips, it’s crucial to preview the project and make final adjustments before exporting.
a. Previewing
- Play Back: Play back the project in the preview window to check for sync issues.
- Check Different Sections: Scrub through different sections to ensure consistent synchronization.
b. Making Final Adjustments
- Fine-Tune: Make any necessary fine-tuning adjustments to the clips.
- Adjust Audio Levels: Ensure that audio levels are balanced and consistent.
c. Exporting
- Export Settings: Click on the “Produce” button to open the export settings.
- Choose Format: Select the desired video format and quality settings.
- Export: Click “Start” to export the synchronized video.
Conclusion
Synchronizing audio and video clips in PowerDirector is a critical skill for producing professional-quality videos. By understanding the basics of syncing, utilizing manual and automatic tools, and applying advanced techniques for complex projects, you can achieve precise and seamless synchronization in your video projects. Whether you’re working on a simple vlog, a multi-camera shoot, or a complex film, PowerDirector provides the tools you need to sync audio and video clips effectively. Take the time to experiment with different methods and find the best workflow for your specific needs. Happy editing!


