How to trim a video clip in PowerDirector
Trimming a video clip is one of the most fundamental editing tasks in PowerDirector, allowing you to remove unwanted sections and ensure your project flows smoothly. This article will provide a comprehensive guide on how to trim video clips in PowerDirector, covering various methods, tips for precise trimming, troubleshooting common issues, and maximizing the efficiency of the trimming process.
Introduction
PowerDirector, developed by CyberLink, is a powerful and user-friendly video editing software widely used by both beginners and professionals. One of the essential skills for any video editor is trimming clips to remove unnecessary footage, refine the narrative, and enhance the overall pacing of the project. In this detailed guide, we will explore multiple ways to trim video clips in PowerDirector, ensuring you can achieve precise and effective edits.
Understanding Trimming vs. Cutting
Before diving into the trimming process, it’s important to differentiate between trimming and cutting:
- Trimming: This involves removing sections from the beginning or end of a video clip to shorten its duration.
- Cutting: This involves splitting a video clip into segments and removing or rearranging sections within the clip.
While both processes are essential, this guide focuses on trimming, specifically how to shorten clips by adjusting their start and end points.
Methods of Trimming Video Clips
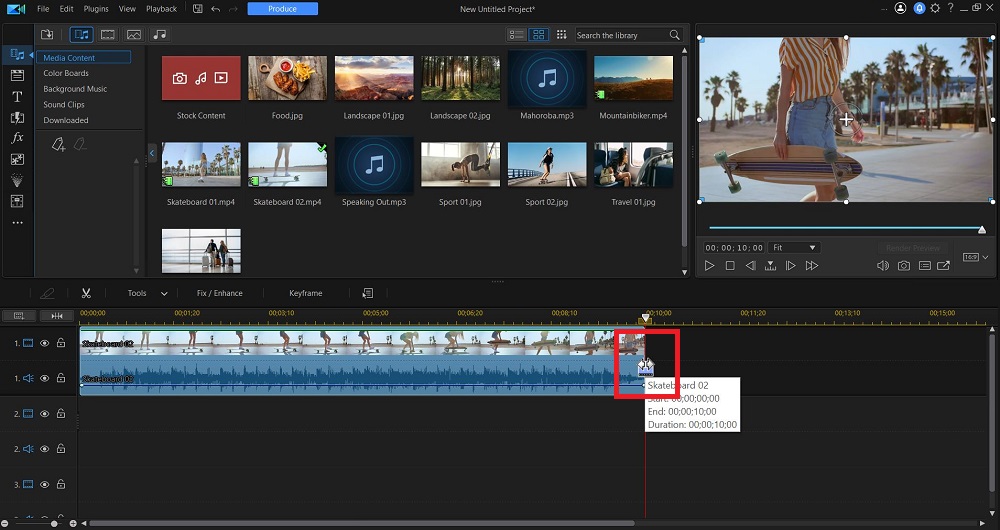
Method 1: Trimming in the Timeline
Trimming directly in the timeline is the most common and intuitive method:
- Open PowerDirector: Launch PowerDirector and open the project containing the video clip you want to trim.
- Import the Clip: If the clip is not already in your project, import it into the Media Room and drag it onto the timeline.
- Select the Clip: Click on the video clip in the timeline to select it. The clip will be highlighted.
- Trim the Start:
- Hover your mouse over the left edge of the clip until you see the trim cursor (a double-headed arrow).
- Click and drag the edge to the right to trim the beginning of the clip.
- Trim the End:
- Hover your mouse over the right edge of the clip until you see the trim cursor.
- Click and drag the edge to the left to trim the end of the clip.
- Preview the Trimmed Clip: Play the timeline to preview the trimmed clip and make any necessary adjustments.
Method 2: Trimming in the Trim Tool
The Trim Tool offers more precision and control over the trimming process:
- Open PowerDirector: Launch PowerDirector and open your project.
- Select the Clip: Click on the video clip in the timeline to select it.
- Open the Trim Tool: Right-click on the clip and select “Trim” from the context menu. Alternatively, you can click the “Trim” button in the toolbar above the timeline.
- Trim the Clip:
- Use the preview window to play the clip and find the exact points where you want to trim.
- Set the “Mark In” point by dragging the playhead to the desired start point and clicking the “Mark In” button.
- Set the “Mark Out” point by dragging the playhead to the desired end point and clicking the “Mark Out” button.
- Apply Trimming: Click “OK” to apply the trimming and return to the timeline with the adjusted clip.
Method 3: Using the Split and Remove Method
This method involves splitting the clip and removing unwanted sections:
- Open PowerDirector: Launch PowerDirector and open your project.
- Import and Select the Clip: Import the video clip into the Media Room and drag it onto the timeline.
- Split the Clip:
- Move the playhead to the point where you want to start trimming.
- Click the “Split” button (scissors icon) to divide the clip at that point.
- Move the playhead to the point where you want to end the trimming.
- Click the “Split” button again to create another split.
- Remove Unwanted Sections: Select the unwanted section of the clip between the splits and press “Delete” on your keyboard or right-click and select “Remove.”
- Adjust Remaining Clips: Drag the remaining clips together to fill the gap left by the removed section.
Method 4: Trimming Using Markers
Markers can help you identify and trim specific parts of the clip:
- Open PowerDirector: Launch PowerDirector and open your project.
- Select the Clip: Click on the video clip in the timeline to select it.
- Add Markers:
- Move the playhead to the point where you want to start trimming and press the “M” key to add a marker.
- Move the playhead to the point where you want to end the trimming and add another marker.
- Trim Using Markers:
- Right-click on the clip and select “Trim” from the context menu.
- In the Trim Tool, use the markers as reference points to set the “Mark In” and “Mark Out” points.
- Apply Trimming: Click “OK” to apply the trimming and return to the timeline.
Tips for Precise Trimming
Use Zoom In/Out
Zooming in on the timeline provides better control and precision when trimming clips:
- Use the zoom slider or the “+” and “-” keys to adjust the timeline view.
- Zoom in to fine-tune the trimming points and ensure accuracy.
Utilize Frame-by-Frame Navigation
For precise trimming, navigate frame-by-frame:
- Use the arrow keys on your keyboard to move the playhead one frame at a time.
- This method is particularly useful when trimming at exact points in the clip.
Preview Changes Frequently
Regularly preview your trimmed clips to ensure the edits are smooth and accurate:
- Play the timeline from a few seconds before and after the trimmed section.
- Adjust the trimming points as needed based on the preview.
Save Versions
To avoid losing any important footage, save different versions of your project:
- Save the original untrimmed version of your project.
- Create a new project file for the trimmed version, allowing you to revert to the original if needed.
Troubleshooting Common Issues
Trimming Accuracy
If you struggle with precise trimming, try these solutions:
- Zoom In: Zoom in on the timeline for better control.
- Frame-by-Frame Navigation: Use the arrow keys to navigate frame-by-frame.
Playback Issues
If playback is choppy after trimming:
- Render Preview: Use the “Render Preview” option to create a smoother playback experience.
- Proxy Files: Enable proxy files to reduce the load on your system and improve performance.
Missing Footage
If you accidentally trim too much footage:
- Undo: Press “Ctrl + Z” to undo the last action.
- Reimport Clip: Reimport the original clip from the Media Room and trim again.
Maximizing Efficiency During Trimming
Keyboard Shortcuts
Utilize keyboard shortcuts to speed up the trimming process:
- Split Clip: “Ctrl + T”
- Delete: “Delete” key
- Undo: “Ctrl + Z”
- Mark In: “I” key
- Mark Out: “O” key
Batch Trimming
If you have multiple clips to trim, consider batch trimming:
- Import all clips into the timeline.
- Trim each clip sequentially using the methods outlined.
- This approach saves time compared to trimming clips individually in separate projects.
Organize Media
Before trimming, organize your media files in the Media Room:
- Group similar clips together.
- Rename clips with descriptive titles for easy identification.
Use the Trim Tool for Fine Adjustments
For precise adjustments, rely on the Trim Tool:
- The Trim Tool offers greater control and accuracy compared to timeline trimming.
- Use the preview window and frame-by-frame navigation for fine-tuning.
Conclusion
Trimming video clips in PowerDirector is a crucial skill for creating polished and engaging video projects. By mastering various trimming methods, utilizing tips for precision, and troubleshooting common issues, you can streamline your editing workflow and achieve professional results. PowerDirector’s robust features and intuitive interface make it an excellent choice for editors of all skill levels, and with the techniques outlined in this guide, you’ll be well-equipped to handle any trimming task with confidence.


