Navigating the Digital Frontier: A Comprehensive Guide to Creating Reading Lists in Windows 10
Introduction
In the fast-paced digital age, the ability to organize and manage information efficiently is crucial. Windows 10, Microsoft’s operating system, offers a plethora of features to enhance productivity and streamline user experiences. One such feature that often goes underutilized is the Reading List. In this comprehensive guide, we will explore the significance of Reading Lists, delve into the advantages of using this tool, and provide step-by-step instructions on how to create and manage Reading Lists in Windows 10.
Understanding the Importance of Reading Lists
Reading Lists in Windows 10 serve as a dynamic tool to collect, organize, and manage content from various sources, ensuring a seamless reading experience. Whether you’re researching for work, saving articles for leisure reading, or curating a list of online resources, Reading Lists offer a centralized platform within the Windows environment to keep your content organized and easily accessible.
Advantages of Reading Lists
- Centralized Information Management: Reading Lists provide a centralized hub for collecting articles, web pages, and other content, reducing the clutter of bookmarks and downloads scattered across different browsers and folders.
- Cross-Device Synchronization: Windows 10 offers synchronization capabilities, allowing users to access their Reading Lists across multiple devices seamlessly. This ensures a consistent experience whether you’re working on a desktop, laptop, or tablet.
- Offline Reading: Perhaps one of the most significant advantages of Reading Lists is the ability to download content for offline reading. This is especially valuable for users who want to catch up on articles during commutes or in locations with limited internet access.
- Integration with Microsoft Edge: Reading Lists seamlessly integrate with Microsoft Edge, the default web browser in Windows 10. This integration enhances the browsing and reading experience, creating a cohesive ecosystem for users.
Step-by-Step Guide: Creating Reading Lists in Windows 10
Let’s now explore the step-by-step process of creating Reading Lists in Windows 10:
Step 1: Open Microsoft Edge
Launch Microsoft Edge, the default web browser in Windows 10. Ensure that you are using the latest version for optimal performance.
Step 2: Navigate to the Desired Content
Find the web page or article you want to add to your Reading List. Once on the page, click on the star icon in the address bar to open the Favorites menu.
Step 3: Add to Reading List
Within the Favorites menu, select the “Reading list” tab. Click on “Add” to add the current page to your Reading List.
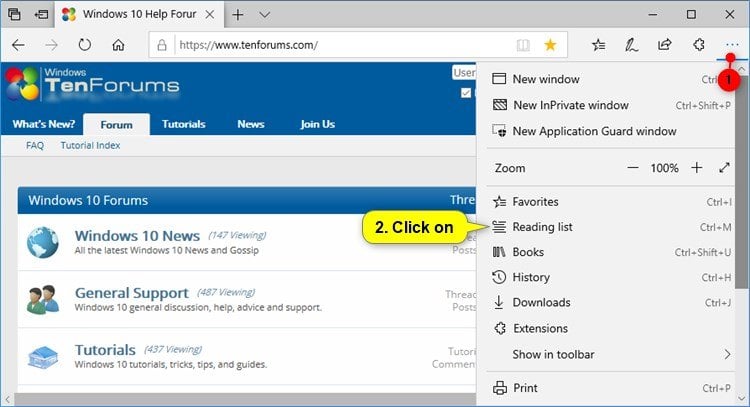
Step 4: Accessing and Managing Reading Lists
To access and manage your Reading Lists, click on the three horizontal lines in the upper-right corner of Microsoft Edge to open the menu. Select “Favorites,” then choose “Reading list” from the submenu.
Step 5: Organize and Customize
Within the Reading List, you can organize your saved content, mark items as read or unread, and remove articles you’ve already explored. Right-click on items to access additional options for customization.
Conclusion
Reading Lists in Windows 10 represent a valuable tool for users seeking an organized and efficient approach to managing digital content. By following the steps outlined in this comprehensive guide, users can harness the power of Reading Lists to create a curated space for their articles, web pages, and online resources. As our digital landscape continues to evolve, the ability to manage information effectively becomes increasingly important, making features like Reading Lists essential for a seamless and productive user experience within the Windows 10 environment.


