A Comprehensive Guide on Installing Windows 7

Windows 7, despite being released over a decade ago, remains a popular choice for many users due to its stability, user-friendly interface, and compatibility with a wide range of software and hardware. If you’re considering installing Windows 7 on your computer, whether for nostalgia, compatibility reasons, or simply because you prefer its interface, this comprehensive guide will walk you through the installation process step by step.
Pre-Installation Preparation:
Before you begin the installation process, there are several preparatory steps you need to take to ensure a smooth installation experience:
- Check System Requirements: Ensure that your computer meets the minimum system requirements for running Windows 7. These include a 1 GHz or faster processor, 1 GB of RAM (32-bit) or 2 GB of RAM (64-bit), 16 GB of available hard disk space (32-bit) or 20 GB (64-bit), DirectX 9 graphics device with WDDM 1.0 or higher driver, and a DVD-ROM drive (if installing from a DVD).
- Backup Your Data: Before proceeding with the installation, it’s crucial to back up any important data on your computer to prevent loss in case something goes wrong during the installation process.
- Create Installation Media: You’ll need a Windows 7 installation disc or a bootable USB drive containing the Windows 7 installation files. If you don’t have an installation disc, you can create a bootable USB drive using a Windows 7 ISO file and a utility like Rufus or the Windows 7 USB/DVD Download Tool.
- Gather Necessary Drivers: While Windows 7 includes many drivers out of the box, it’s a good idea to gather drivers for your specific hardware components (e.g., graphics card, network adapter) and save them to a USB drive in case you need them during or after the installation.
Installation Process:
Once you’ve completed the pre-installation preparations, you can proceed with the installation of Windows 7. Follow these step-by-step instructions:
- Insert Installation Media: If you’re using a DVD, insert the Windows 7 installation disc into your computer’s DVD-ROM drive. If you’re using a bootable USB drive, insert it into a USB port on your computer.
- Boot from Installation Media: Restart your computer and enter the BIOS or UEFI firmware settings. Configure the boot order to prioritize the DVD-ROM drive or USB drive, depending on which installation media you’re using. Save the changes and exit the BIOS/UEFI settings.
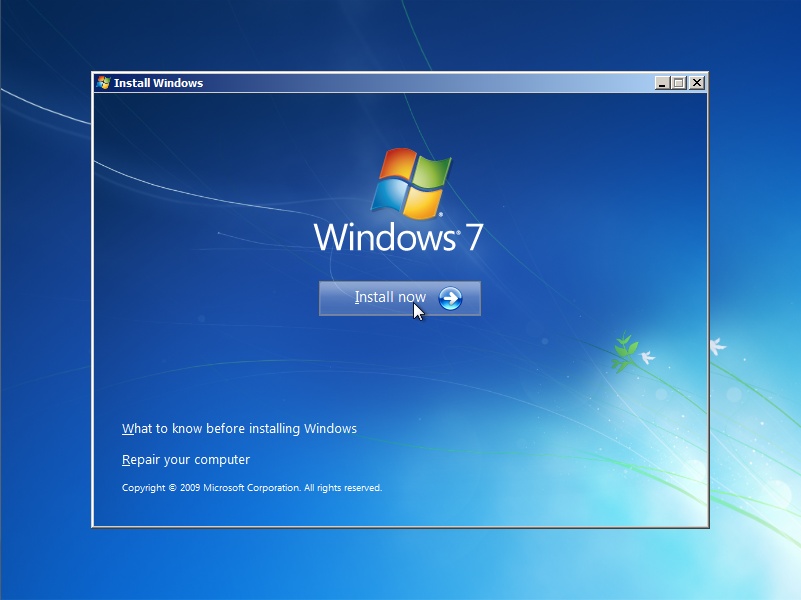
- Start the Installation Process: After rebooting, your computer should boot from the Windows 7 installation disc or USB drive. The Windows 7 setup process will begin, and you’ll see the “Windows is loading files” message followed by the Windows 7 installation screen.
- Select Language and Input Method: Choose your preferred language, time, currency format, and keyboard or input method, and then click “Next” to continue.
- Install Now: Click the “Install Now” button to begin the installation process.
- Enter Product Key: Enter your Windows 7 product key when prompted. This is typically found on a sticker on your computer or included with your Windows 7 installation disc.
- Accept License Terms: Read and accept the Microsoft Software License Terms, and then click “Next” to continue.
- Choose Installation Type: Select the type of installation you want to perform. If you’re upgrading from a previous version of Windows or performing a clean installation, choose the appropriate option. For most users, a clean installation is recommended for optimal performance.
- Partition Selection: If you’re performing a clean installation, you’ll need to select the partition where you want to install Windows 7. If you’re unsure, you can create a new partition or select an existing one. Click “Next” to continue.
- Install Windows: The installation process will begin, copying files, installing features, and updates. This may take some time depending on your computer’s hardware and the installation method.
- Complete Installation: Once the installation is complete, your computer will reboot, and you’ll be prompted to set up your user account, password, and other preferences.
- Install Drivers and Updates: After logging in to Windows 7 for the first time, it’s essential to install any necessary drivers for your hardware components. You can do this using the drivers you gathered earlier or by downloading them from the manufacturer’s website. Additionally, make sure to install any Windows updates to ensure your system is up to date and secure.
Post-Installation Tips:
After installing Windows 7, here are some additional tips to optimize your experience:
- Activate Windows: Ensure that Windows 7 is activated using your product key to access all features and receive updates from Microsoft.
- Install Antivirus Software: Install reliable antivirus software to protect your computer from malware and other security threats.
- Create System Restore Point: Create a system restore point to revert to a previous state in case of system errors or instability.
- Customize Settings: Customize Windows 7 settings according to your preferences, such as desktop background, theme, and screen resolution.
- Install Software: Install your favorite software applications and programs to enhance productivity and entertainment.
- Regular Maintenance: Perform regular maintenance tasks such as disk cleanup, defragmentation, and updating drivers to keep your system running smoothly.
By following this comprehensive guide, you can successfully install Windows 7 on your computer and enjoy its many benefits and features. Whether you’re upgrading from a previous version of Windows or installing it for the first time, Windows 7 provides a familiar and reliable operating system that meets your needs.


