How to Capture Higher-Quality Screenshots with the Windows Snipping Tool

How to Capture Higher-Quality Screenshots with the Windows Snipping Tool
One of the most helpful features available on a Windows PC is the ability to take screenshots. It makes a significant difference to be able to capture your screen quickly and effectively, whether you are archiving vital information, making lessons, or sharing a humorous moment with a buddy. The Snipping Tool, a built-in utility that comes with Windows, has developed into a versatile feature over the course of many years. It enables users to take, edit, and share screenshots with ease. If you utilize the Snipping Tool in an efficient manner, it may be an excellent resource for capturing just what you need without extraneous material or time spent.
What Can You Do with the Windows Snipping Tool?
Windows has a built-in screenshot application called the Snipping Tool. It gives you the ability to take photographs of various sections of your screen in a number of different ways, ranging from free-form forms to full-screen images. It allows you more control, more editing choices, and more flexibility than the conventional Print Screen button does.
How to Launch the Snipping Tool
There are a number of different methods to start the Snipping Tool quickly:
- Quickly access the snipping toolbar by using the keyboard shortcut: Win + Shift + S.
- Search Bar: Type the words “Snipping Tool” into the search bar on Windows and choose the application from the list.
- Pinned Application: For more convenient access, you may pin the application to the taskbar or the Start menu.
Snipping Tool’s Screenshot Modes
The Snipping Tool has a variety of capture options, including:
- Rectangular Snip — Drag a rectangle over the region that you wish to capture.
- Freeform Snip – Draw any shape around the item in order to capture irregular shapes.
- Window Snip — You may choose a particular window, such as a browser or an application, and capture just that window.
- Full-Screen Snip — This feature is similar to the Print Screen key in that it records all content that is visible on your screen.
- These choices make it simple to choose the most suitable capture type for the job at hand.
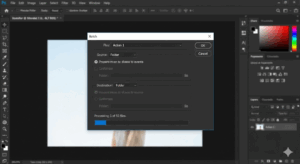
Using the Delay Feature
There are instances when it is necessary to take a screenshot of a drop-down menu or a tooltip, both of which vanish as soon as you click anywhere else on the screen. The Delay option lets you snap a screenshot after a timer has counted down, giving you between one and five seconds to prepare. This function is beneficial for the purpose of keeping a record of error messages, menus, or pop-ups that are only shown for a brief period of time.
Editing the Screenshot You’ve Taken
Once you have captured a screenshot, the Snipping Tool will launch an editing window that allows you to do the following functions:
- When a person experiences a traumatic event, it may have a lasting impact on their life.
- Utilize a variety of pen colors and thicknesses while you are drawing or annotating.
- To eliminate any components that are not essential, the picture should be cropped.
Erase mistakes with the eraser tool.
These built-in features often eliminate the need for additional editing software when it comes to taking fast notes or providing graphic explanations.
Saving and Distributing Screenshots
After you have finished editing, you can:
- Make sure that you save the file in formats such as PNG, JPEG, or GIF.
- Copy to clipboard for quick pasting into documents, emails, or chat apps.
- Share directly through Windows share options, making collaboration easier.
Advanced Tips for Better Screenshots
- Use Keyboard Shortcuts: Mastering Win + Shift + S speeds up the process.
- Combine with Clipboard History: Press Win + V to access multiple captured snips at once.
- Capture Multiple Screens: On multi-monitor setups, choose Full-screen snip to capture everything at once.
- Dark Mode Support: The Snipping Tool adapts to Windows dark mode, making it easier on your eyes during late hours.
Alternatives and Integrations
While the Snipping Tool is excellent for everyday use, Windows also supports other tools like Snip & Sketch, which has merged with Snipping Tool in newer updates. Together, they create a streamlined experience for editing and managing screenshots without needing third-party apps.
- Common Uses for the Snipping Tool
- Creating step-by-step guides or tutorials.
- Reporting software bugs with visual proof.
- Saving receipts, tickets, or online confirmations.
- Sharing memes, jokes, or visuals in chats.
- Capturing lecture slides or meeting notes quickly.
The Windows Snipping Tool is more than just a screenshot utility—it’s a versatile productivity tool that allows you to capture, edit, and share your screen with ease. By mastering its different capture modes, using the delay feature, and applying simple edits, you can create clean, useful screenshots that serve both professional and personal needs. Whether you’re working, studying, or simply sharing, the Snipping Tool helps you do it better and faster.