How to Install a PCIe Riser Cable: A Comprehensive Guide
Installing a PCIe riser cable is an essential process for various computer setups, particularly for those aiming to improve airflow, aesthetics, or fit a GPU in tight spaces. This detailed guide will walk you through every step, ensuring a successful installation of your PCIe riser cable.
Table of Contents
- Understanding PCIe Riser Cables
- What is a PCIe Riser Cable?
- Applications of PCIe Riser Cables
- Benefits of Using PCIe Riser Cables
- Types of PCIe Riser Cables
- Straight Riser Cables
- Right Angle Riser Cables
- Flexible Riser Cables
- Pre-Installation Preparation
- Tools and Materials Needed
- Ensuring Compatibility
- Safety Precautions
- Step-by-Step Installation Guide
- Opening the Case
- Installing the Riser Cable
- Installing the GPU
- Connecting the Riser Cable
- Securing the Setup
- Post-Installation Steps
- Verifying Installation
- Cable Management
- Ensuring Proper Ventilation
- Troubleshooting Common Issues
- No Display or Black Screen
- GPU Not Detected
- System Instability or Crashes
- Best Practices for Maintaining Your PCIe Riser Cable Setup
- Regular Inspections
- Cleaning and Maintenance
- Monitoring System Performance
- Conclusion
1. Understanding PCIe Riser Cables
What is a PCIe Riser Cable?
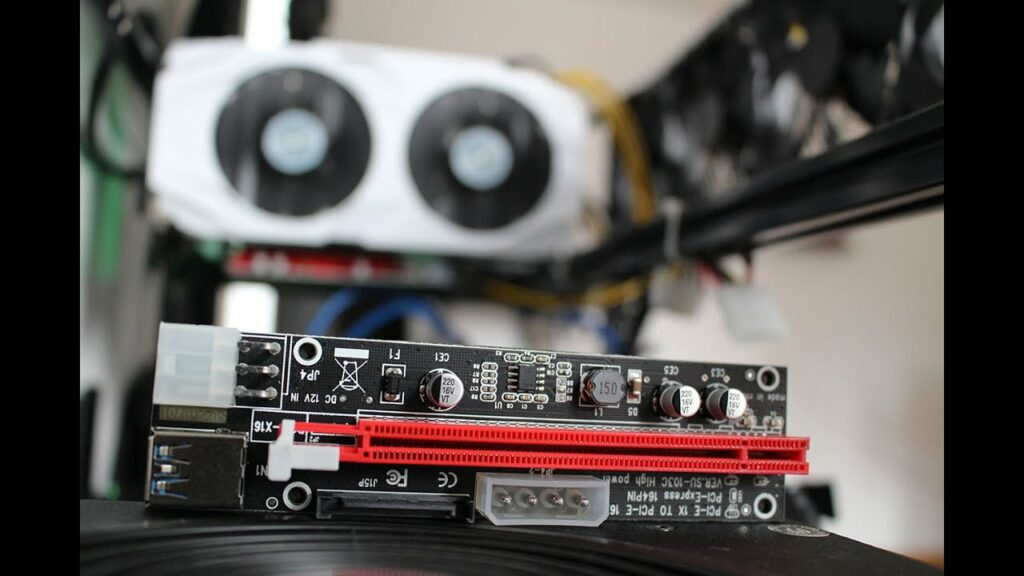
A PCIe (Peripheral Component Interconnect Express) riser cable is an extension cable that allows a PCIe card, such as a GPU, to be installed in a different location within the computer case. This can be particularly useful for specialized case designs, such as those used in mining rigs, custom builds, or small form-factor cases.
Applications of PCIe Riser Cables
PCIe riser cables are commonly used in:
- Mining Rigs: To space out GPUs for better cooling.
- Small Form-Factor Builds: To fit a large GPU in a compact case.
- Custom Builds: For aesthetic purposes or to showcase hardware through a case window.
- Server Racks: To mount GPUs or other PCIe cards in specific orientations.
Benefits of Using PCIe Riser Cables
- Improved Airflow: By repositioning the GPU, you can improve the airflow within the case.
- Aesthetic Enhancement: Custom builds can look cleaner and more organized.
- Flexibility: Allows for creative hardware placements in unique case designs.
- Space Optimization: Facilitates the use of larger GPUs in smaller cases.
2. Types of PCIe Riser Cables
Straight Riser Cables
Straight riser cables extend the PCIe slot directly, keeping the GPU in a straight line from the motherboard. These are simple and commonly used for minor repositioning.
Right Angle Riser Cables
Right angle riser cables turn the connection at a 90-degree angle. These are useful for cases with limited vertical space, allowing the GPU to be mounted parallel to the motherboard.
Flexible Riser Cables
Flexible riser cables offer the most versatility, allowing the GPU to be positioned in various orientations within the case. They are ideal for custom builds and small form-factor cases.
3. Pre-Installation Preparation
Tools and Materials Needed
- PCIe riser cable
- Phillips-head screwdriver
- Anti-static wrist strap (optional but recommended)
- Zip ties or cable management tools
- Flashlight (for better visibility inside the case)
Ensuring Compatibility
- Check PCIe Slot: Ensure your motherboard has an available PCIe slot compatible with your riser cable (typically x16 for GPUs).
- Check Case Space: Ensure there is enough space in your case for the GPU in the desired location.
- Riser Cable Quality: Use a high-quality riser cable to avoid signal degradation and ensure reliable performance.
Safety Precautions
- Power Off and Unplug: Ensure your PC is powered off and unplugged from the power source.
- Discharge Static Electricity: Use an anti-static wrist strap or touch a grounded metal object to prevent static discharge.
- Organize Your Workspace: Work in a clean, well-lit area to avoid losing small screws and components.
4. Step-by-Step Installation Guide
Opening the Case
- Remove the Side Panels: Unscrew and remove the side panels of your case to access the interior.
- Clear the Workspace: Remove any components or cables that might obstruct the installation process.
Installing the Riser Cable
- Locate the PCIe Slot: Identify the PCIe slot on your motherboard where you will connect the riser cable.
- Connect the Riser Cable: Insert the riser cable connector into the PCIe slot, ensuring it is firmly seated.
- Secure the Riser Cable: Use screws (if provided) to secure the riser cable to the case or motherboard.
Installing the GPU
- Align the GPU: Position the GPU in the desired location within the case, aligning it with the riser cable connector.
- Insert the GPU: Carefully insert the GPU into the riser cable connector, ensuring it is fully seated.
- Secure the GPU: Use screws to secure the GPU to the case, ensuring it is stable and does not sag.
Connecting the Riser Cable
- Route the Cable: Route the riser cable through the case, ensuring it does not obstruct airflow or other components.
- Connect Power Cables: Connect the necessary power cables to the GPU, ensuring they are secure and not putting stress on the card.
Securing the Setup
- Tighten All Screws: Double-check all screws and ensure they are tight but not overly tight to avoid damaging components.
- Organize Cables: Use zip ties or cable management tools to organize cables and keep the interior of the case tidy.
5. Post-Installation Steps
Verifying Installation
- Check Connections: Ensure all connections are secure and there are no loose cables.
- Inspect Alignment: Verify that the GPU and riser cable are properly aligned and not putting undue stress on any components.
Cable Management
- Organize Cables: Use zip ties or cable management tools to secure and organize cables, ensuring they do not obstruct airflow.
- Ensure Clearance: Ensure there is adequate clearance around the GPU and riser cable for proper airflow.
Ensuring Proper Ventilation
- Check Airflow Paths: Ensure the riser cable and GPU are not obstructing airflow within the case.
- Adjust Fans if Necessary: Adjust case fans or add additional fans if needed to maintain optimal airflow.
6. Troubleshooting Common Issues
No Display or Black Screen
- Check Connections: Ensure all connections are secure and the GPU is properly seated in the riser cable.
- Test Without Riser Cable: Remove the riser cable and connect the GPU directly to the motherboard to rule out a faulty riser cable.
- Check Power Supply: Ensure the power supply is adequate for the GPU and all power connectors are properly connected.
GPU Not Detected
- Update BIOS/UEFI: Ensure your motherboard’s BIOS/UEFI is up to date.
- Check Riser Cable Quality: Use a high-quality riser cable to avoid signal degradation.
- Reseat GPU and Riser Cable: Reseat the GPU and riser cable to ensure proper contact.
System Instability or Crashes
- Check Temperatures: Ensure the GPU is not overheating and the case has adequate airflow.
- Check Power Supply: Ensure the power supply is adequate for your system’s power requirements.
- Test Without Riser Cable: Remove the riser cable and connect the GPU directly to the motherboard to rule out a faulty riser cable.
7. Best Practices for Maintaining Your PCIe Riser Cable Setup
Regular Inspections
- Periodically inspect the riser cable and GPU for any signs of wear or damage.
- Check all connections to ensure they remain secure over time.
Cleaning and Maintenance
- Keep the inside of the case clean to prevent dust buildup, which can affect performance and cooling.
- Use compressed air to clean the GPU and riser cable regularly.
Monitoring System Performance
- Use software tools to monitor system performance and temperatures.
- Ensure the GPU and other components are operating within safe temperature ranges.
8. Conclusion
Installing a PCIe riser cable can significantly enhance your PC’s versatility, airflow, and aesthetics. By following this comprehensive guide, you can ensure a successful installation, protect your components, and achieve a clean and organized build. Proper installation and maintenance of a PCIe riser cable setup can prevent many common issues and contribute to the longevity and stability of your PC. Take your time, follow the steps carefully, and double-check your work to achieve the best results. With a well-installed PCIe riser cable, you can enjoy a flexible, efficient, and visually appealing computing experienc


