Illuminating Artistry: Enhancing Your Photography with a Spotlight Effect Using Adobe Camera Raw
Introduction:
In the vast landscape of digital photography, mastering post-processing techniques is essential for photographers seeking to elevate their craft. One such powerful tool that has become a cornerstone of image enhancement is Adobe Camera Raw. This article will delve into the art of adding a spotlight behind your subject using Adobe Camera Raw, a technique that infuses images with a captivating luminosity, drawing attention to the central subject. Join us on a comprehensive journey through the intricacies of this process, unlocking the full potential of your photographic vision.
I. The Power of Adobe Camera Raw:
Adobe Camera Raw serves as a gateway to professional-grade photo editing, providing photographers with a multitude of tools to enhance color, tone, and detail. Its versatility extends beyond mere exposure adjustments, allowing for creative enhancements that can transform a good photograph into a visual masterpiece.
II. Preparing Your Image for Spotlight Enhancement:
A. Raw Image Advantage: Start with a raw image file for maximum flexibility in post-processing. Raw files contain a wealth of data captured by the camera sensor, offering unparalleled latitude for adjustments.
B. Duplicate Your Layer: Before diving into the spotlight effect, create a duplicate layer of your image. This precautionary step ensures that you can always revert to the original state if needed.
III. Initiating the Spotlight Effect:
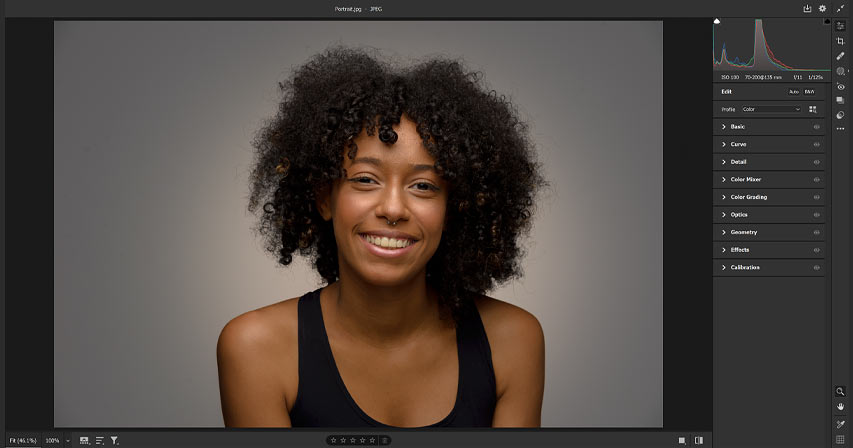
A. Accessing Adobe Camera Raw: Open your image in Adobe Camera Raw by selecting the image and choosing the “Open in Camera Raw” option. This opens a dedicated workspace where you can perform non-destructive edits.
B. Graduated Filter Tool: Navigate to the toolbar on the right side of the Camera Raw interface and select the Graduated Filter tool, often represented by a rectangle icon. This tool is the key to creating the spotlight effect.
IV. Creating the Spotlight:
A. Adjusting Exposure: With the Graduated Filter tool selected, draw a line or rectangle behind your subject, representing the direction of the spotlight. Increase the exposure slider to illuminate the selected area, simulating the effect of a spotlight casting its glow.
B. Fine-Tuning: Experiment with other settings like contrast, highlights, and shadows to achieve the desired balance of light and shadow. This step allows for a nuanced and realistic spotlight effect that complements the overall composition.
V. Enhancing Realism with Color Grading:
A. Temperature and Tint: To emulate the warmth or coolness of a spotlight, adjust the temperature and tint sliders in the Camera Raw interface. Tweak these settings to match the ambient lighting conditions and create a cohesive visual narrative.
B. Vibrance and Saturation: Fine-tune the vibrance and saturation settings to ensure that the spotlight-enhanced area seamlessly integrates with the rest of the image. Strive for a natural and balanced color palette.
VI. Advanced Techniques for Artistic Flourish:
A. Multiple Spotlights: For more intricate compositions, experiment with adding multiple spotlights. This technique allows for the creation of complex lighting scenarios, adding depth and dimension to your images.
B. Customizing Light Characteristics: Explore the various sliders in Adobe Camera Raw to customize the characteristics of the simulated light. Adjusting parameters like clarity and dehaze can impart a soft or dramatic feel to the spotlight, depending on your creative vision.
VII. Real-World Applications and Creative Possibilities:
A. Portrait Photography: Elevate your portrait photography by adding a subtle spotlight to accentuate the subject’s features. This technique can draw attention to facial expressions and create a captivating focal point.
B. Landscape Photography: Use the spotlight effect to highlight specific elements in your landscape compositions. Illuminate key elements like mountains, trees, or architectural details to guide the viewer’s gaze through the frame.
VIII. Conclusion:
In conclusion, the spotlight effect using Adobe Camera Raw is a transformative technique that adds a touch of magic to your photographs. By leveraging the Graduated Filter tool and the myriad of adjustment options in Camera Raw, you can infuse your images with a dynamic and captivating luminosity. As you embark on your journey to master this technique, remember that experimentation and creativity are your allies. So, open Adobe Camera Raw, embrace the power of the spotlight, and watch as your images come to life with newfound radiance and brilliance.