Mastering Project Preservation: A Comprehensive Guide to Backing Up and Restoring Projects in DaVinci Resolve
Introduction: In the world of video editing, projects are the culmination of creativity, effort, and countless hours of work. Protecting these valuable assets is paramount, ensuring that they remain safe from unexpected mishaps or technical glitches. DaVinci Resolve, a leading software in the realm of post-production, offers robust tools for project management, including backup and restoration features. In this comprehensive guide, we delve into the intricacies of backing up and restoring projects in DaVinci Resolve, empowering you to safeguard your creative endeavors and maintain peace of mind.
Understanding the Importance of Project Backup: Before delving into the specifics of backup and restoration procedures, it’s crucial to grasp why these processes are essential for any serious video editor. Consider the following scenarios:
- Data Loss: Hard drive failures, software crashes, or accidental deletions can result in the loss of precious project files.
- Corruption: Files may become corrupted due to unforeseen circumstances, rendering them unusable and jeopardizing the entire project.
- Version Control: Maintaining multiple versions of a project allows for experimentation and risk-free exploration without fear of irreversibly altering the original.
By implementing robust backup strategies, you can mitigate these risks and ensure the continuity of your creative work. Let’s delve into the intricacies of backing up and restoring projects in DaVinci Resolve.
Backing Up Projects: Effective project backup involves more than simply copying project files to an external drive. It requires a systematic approach that accounts for all project assets and dependencies. Follow these steps to create comprehensive backups of your DaVinci Resolve projects:
- Organize Project Files:
- Before initiating the backup process, organize your project files within DaVinci Resolve’s project manager. Create a folder structure that reflects the hierarchy of your project, including media files, timelines, and project settings.
- Consolidate media files within the project folder to ensure that all assets are contained within a single directory. This simplifies the backup process and minimizes the risk of missing files.
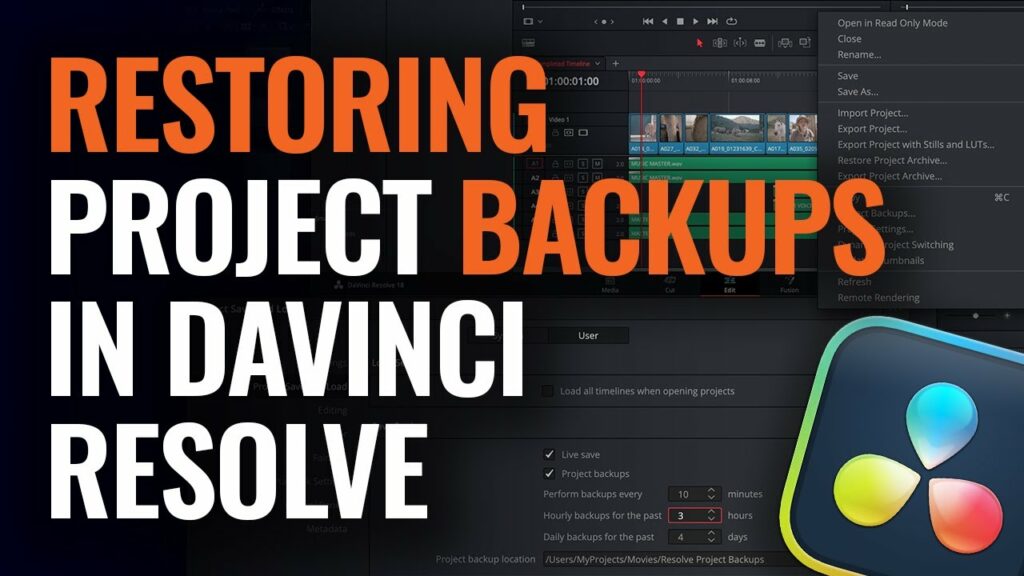
- Export Project Archive:
- DaVinci Resolve offers a convenient feature known as Project Archiving, which bundles all project assets into a single archive file for easy transportation and storage.
- To create a project archive, navigate to the Project Manager panel, right-click on the desired project, and select “Export Project Archive.” Choose a location and filename for the archive file, ensuring that it’s saved to a reliable storage device.
- Verify Backup Integrity:
- After exporting the project archive, verify its integrity by performing a test restoration. Open the archived project in DaVinci Resolve to ensure that all media files, timelines, and settings are intact.
- Check for any errors or missing assets during the restoration process. Address any discrepancies promptly to maintain the integrity of your backup files.
- Implement Redundant Backup Strategies:
- To further enhance data protection, consider implementing redundant backup strategies such as offsite backups or cloud storage solutions. Duplicate project archives and store them in separate locations to guard against catastrophic data loss.
Restoring Projects: In the event of data loss or corruption, the ability to restore projects quickly and efficiently is paramount. DaVinci Resolve provides intuitive tools for project restoration, enabling you to recover lost or damaged projects with ease. Follow these steps to restore projects in DaVinci Resolve:
- Locate Backup Files:
- Before initiating the restoration process, ensure that you have access to the backup files created during the project backup phase. These may include project archives, duplicate copies, or offsite backups stored on external drives or cloud storage platforms.
- Import Project Archive:
- To restore a project from a project archive, navigate to the Project Manager panel in DaVinci Resolve. Right-click within the project manager and select “Restore Project Archive.”
- Browse to the location of the project archive file and select it for import. DaVinci Resolve will automatically extract the project assets and settings, recreating the project within the software environment.
- Verify Project Integrity:
- After restoring the project, carefully review its contents to ensure that all media files, timelines, and settings are intact. Play back the project to verify audio/video synchronization and check for any anomalies or errors.
- If discrepancies are detected during the restoration process, consult the backup files to identify potential issues or missing assets. Make any necessary adjustments to restore the project to its original state.
- Implement Preventative Measures:
- Once the project has been successfully restored, implement preventative measures to mitigate the risk of future data loss or corruption. Regularly backup projects, maintain redundant copies, and adhere to best practices for file management and organization.
Conclusion: Backing up and restoring projects in DaVinci Resolve is a vital aspect of maintaining data integrity and preserving creative work. By following the guidelines outlined in this comprehensive guide, you can establish robust backup strategies and confidently navigate the restoration process when unforeseen challenges arise. Remember, proactive measures and meticulous attention to detail are the keys to safeguarding your projects and ensuring their longevity in the dynamic landscape of video editing.


