Mastering System Image Backup in Windows 7: A Comprehensive Guide
In the digital age where data is king, safeguarding your computer against unforeseen disasters is paramount. Windows 7 offers a robust built-in feature known as System Image Backup, allowing users to create a comprehensive snapshot of their entire system, including the operating system, installed programs, settings, and files. This guide will take you through the intricate process of creating a System Image Backup in Windows 7, ensuring your data remains secure and recoverable in the face of adversity.
Understanding System Image Backup:
Before diving into the intricacies of creating a System Image Backup, it’s essential to grasp the concept and significance of this feature. A System Image Backup is essentially a complete replica of your computer’s hard drive at a specific point in time. It captures everything from the operating system and installed programs to personal files and settings, providing a failsafe mechanism to restore your system to its exact state in case of hardware failure, data corruption, or other catastrophic events.
Preparing for System Image Backup:
To ensure a smooth and successful System Image Backup process, it’s crucial to undertake preparatory steps:
- Assess Storage Requirements: Determine the amount of storage space required to store the System Image Backup. This includes the size of the operating system, installed programs, and personal files. Ensure you have sufficient space on an external hard drive or network location to accommodate the backup.
- Perform Disk Cleanup: Before creating a System Image Backup, it’s advisable to perform disk cleanup to remove unnecessary files and temporary data. This not only conserves storage space but also streamlines the backup process.
- Connect External Storage: If you plan to store the System Image Backup on an external hard drive, ensure it is connected to your computer and recognized by Windows 7. Alternatively, set up a network location for backup storage if utilizing network-based storage solutions.
Creating a System Image Backup:
Now that you’ve prepared your system, follow these step-by-step instructions to create a System Image Backup in Windows 7:
- Open Backup and Restore: Click on the Start button and type “Backup and Restore” in the search box. Select “Backup and Restore” from the search results to open the Backup and Restore control panel.
- Initiate Backup Process: In the Backup and Restore window, click on the “Create a system image” option located in the left-hand pane. This will launch the System Image Backup wizard.
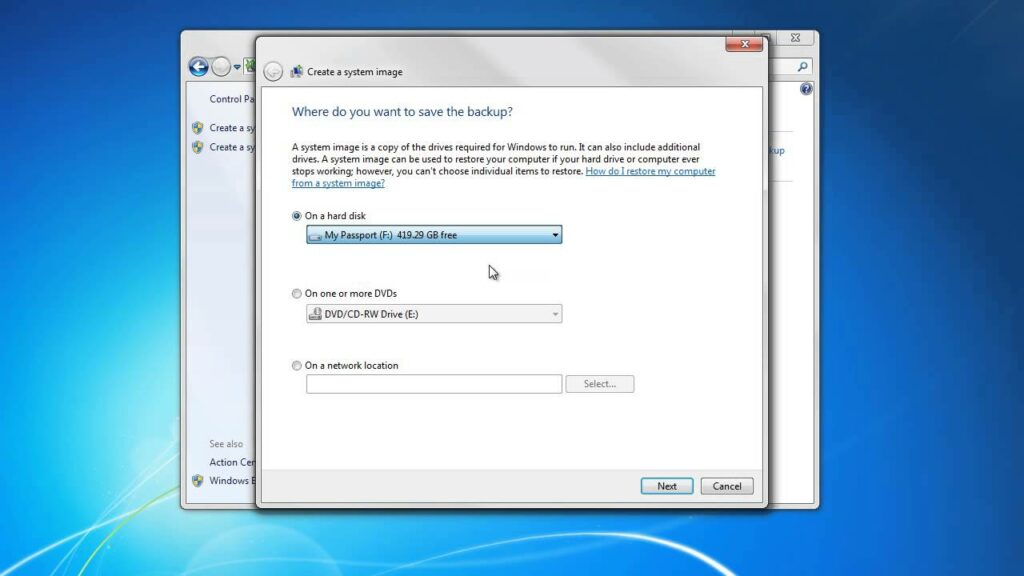
- Select Backup Destination: Windows 7 will prompt you to choose where you want to save the System Image Backup. Select the desired destination, which can be an external hard drive, network location, or DVDs. Click “Next” to proceed.
- Choose Drives to Include: On the following screen, Windows 7 will display a list of drives that can be included in the System Image Backup. By default, the system drive (usually C:) is selected along with any other drives containing system components or personal data. Optionally, you can include additional drives in the backup. Click “Next” to continue.
- Confirm Backup Settings: Review the backup settings to ensure everything is configured according to your preferences. Double-check the selected backup destination and included drives. If everything looks correct, click “Start backup” to initiate the backup process.
- Wait for Backup to Complete: Windows 7 will now begin creating the System Image Backup, which may take some time depending on the size of your system and the speed of your storage device. It’s essential to be patient and allow the backup process to complete without interruption.
- Verification and Confirmation: Once the backup process is finished, Windows 7 will display a confirmation message indicating that the System Image Backup was successfully created. You can now close the Backup and Restore control panel.
Managing System Image Backup:
After creating a System Image Backup, it’s important to understand how to manage and utilize the backup effectively:
- Verify Backup Integrity: Periodically verify the integrity of your System Image Backup by performing test restores on a separate system or virtual machine. This ensures that the backup is reliable and can be restored when needed.
- Schedule Regular Backups: Set up a regular schedule for creating System Image Backups to ensure that your data is continuously protected against potential threats or failures. Windows 7 allows you to schedule automatic backups using the Backup and Restore control panel.
- Monitor Storage Space: Keep an eye on the storage space available on your backup destination to prevent running out of space. Delete old backups or consider expanding your storage capacity if necessary.
- Emergency Recovery Options: Familiarize yourself with the process of restoring your system from a System Image Backup in case of emergencies. Windows 7 provides various recovery options, including booting from a recovery disc or accessing the System Image Recovery tool from the Windows Recovery Environment.
Conclusion:
In an era where data integrity and system reliability are paramount, mastering the art of System Image Backup in Windows 7 is essential for every user. By following the comprehensive guide outlined above, you can confidently create, manage, and utilize System Image Backups to safeguard your computer against unforeseen disasters and ensure continuity of operations. With Windows 7’s robust backup and recovery capabilities at your disposal, you can rest assured that your data remains secure and recoverable, no matter what challenges lie ahead.


