Mastering the Art of Photographic Inception: A Comprehensive Guide on Creating a Photo Within a Photo with Photoshop
Introduction:
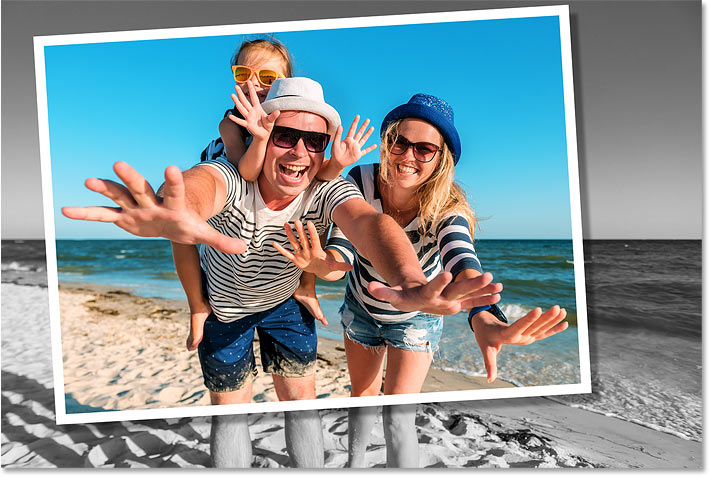
In the realm of digital artistry, the ability to seamlessly integrate multiple layers of visual elements has become a hallmark of creativity. One captivating technique that continues to captivate designers and photographers alike is the creation of a photo within a photo. This innovative approach adds depth, storytelling, and a touch of surrealism to your images, elevating them beyond the confines of conventional photography. In this extensive guide, we will delve into the step-by-step process of creating a photo within a photo using Adobe Photoshop, unlocking the potential to craft visually stunning and conceptually rich compositions.
Section 1: Setting the Stage
Before embarking on the journey of creating a photo within a photo, ensure that you have Adobe Photoshop open and ready for action. Open the primary image on which you want to superimpose another photo. Choose a base image that provides sufficient space and context for the secondary photo to seamlessly integrate.
Section 2: Selecting the Secondary Photo
The key to a successful photo-within-a-photo composition lies in the thoughtful selection of the secondary image. Consider the narrative or visual impact you want to achieve. Whether it’s a surreal juxtaposition, a nostalgic flashback, or a thematic connection, the secondary photo should complement and enhance the overall storytelling aspect of your composition.
Section 3: Placing and Scaling the Secondary Photo
With both images open in Photoshop, use the Move tool (V) to drag and drop the secondary photo onto the primary image. Adjust the size and position of the secondary photo to fit within the desired area of the primary image. Experiment with different placements to find the most visually compelling arrangement.
Section 4: Creating a Layer Mask
To seamlessly blend the secondary photo into the primary image, utilize layer masks. Select the secondary photo layer and click on the “Add Layer Mask” icon at the bottom of the Layers panel. This creates a mask that allows you to selectively reveal or hide portions of the secondary photo, ensuring a smooth integration with the primary image.
Section 5: Refining the Mask
With the layer mask applied, use the Brush tool (B) to refine the mask by painting on it with black or white. Black conceals, and white reveals – this allows you to control which parts of the secondary photo are visible and which parts blend into the background. Take your time to achieve a seamless transition between the two images.
Section 6: Adjusting Colors and Tones
To enhance the cohesion between the primary and secondary images, consider adjusting the colors and tones. Use adjustment layers such as Hue/Saturation, Curves, or Color Balance to match the color temperature, contrast, and overall mood of both photos. This step ensures a harmonious blend and a more polished, professional finish.
Section 7: Adding Shadows and Highlights
For a realistic integration, incorporate shadows and highlights. Create a new layer and, using a soft brush with a low opacity, paint shadows and highlights where necessary. This step adds a three-dimensional quality to the composition, making it appear as if the secondary photo is naturally part of the scene in the primary image.
Section 8: Enhancing Depth with Blurring
To enhance the illusion of depth, consider applying selective blurring. Create a duplicate of the primary image layer, and use the Gaussian Blur filter to blur the background slightly. Add a layer mask and paint over the areas where you want to maintain sharpness, directing the viewer’s focus towards the embedded photo.
Section 9: Adding Final Touches
As you near completion, add any final touches to refine your photo-within-a-photo composition. This may include sharpening specific details, adjusting overall saturation, or incorporating additional elements to enhance the narrative. Pay attention to the finer details to achieve a polished and compelling result.
Conclusion:
Creating a photo within a photo using Photoshop is a testament to the endless possibilities that digital artistry offers. This comprehensive guide has provided a detailed roadmap for designers and photographers to master the art of photographic inception. Whether you aim to tell a nuanced story, evoke a specific emotion, or simply showcase your creative prowess, the photo-within-a-photo technique allows you to transcend traditional boundaries and craft images that are both visually captivating and conceptually rich. Embrace the power of layering and integration in Photoshop, and let your imagination run wild as you bring a new dimension to your photographic compositions.


