Unleashing Artistic Borders: A Comprehensive Guide on Creating a Painted Edges Photo Border Effect in Photoshop
Introduction:
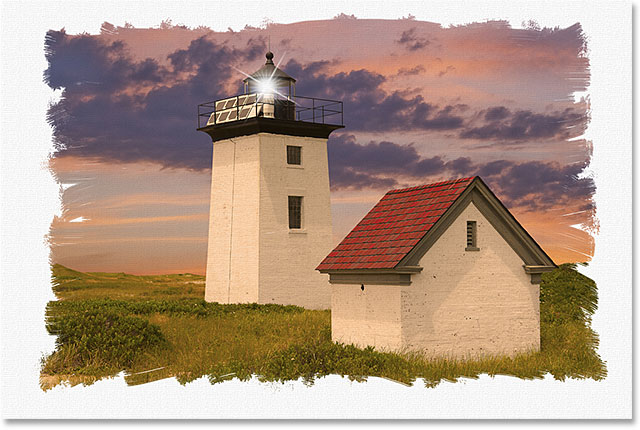
In the ever-evolving realm of digital design, artists continually seek innovative ways to elevate their creations. The painted edges photo border effect stands out as a distinctive and artistic approach to framing images, adding a touch of handcrafted charm and visual appeal. This comprehensive guide will navigate through the step-by-step process of creating a painted edges photo border effect using Adobe Photoshop. Unlock the potential to infuse your images with a unique, artistic border that transforms them into captivating masterpieces.
Section 1: Preparing Your Workspace
Before diving into the artistic process, ensure you have Adobe Photoshop open and ready. Open the image you want to enhance with the painted edges photo border effect. Choose a high-resolution image with distinct elements, as this effect works exceptionally well with a variety of subjects, from portraits to landscapes.
Section 2: Creating a New Layer
To maintain the integrity of your original image, start by creating a new layer for the painted edges effect. Click on the “New Layer” icon at the bottom of the Layers panel or use the keyboard shortcut Shift + Ctrl + N (Windows) or Shift + Command + N (Mac).
Section 3: Selecting the Brush Tool
The heart of the painted edges effect lies in the brushwork. Select the Brush tool (B) from the toolbar and explore the various brush options available in Photoshop. Opt for a soft, textured brush that complements the style you want to achieve. Experiment with brush size and opacity to control the intensity of the painted edges.
Section 4: Choosing Colors
Select colors that harmonize with your image and contribute to the overall aesthetic. The painted edges effect often involves using tones from the image itself or introducing complementary shades for a subtle contrast. Consider the mood and theme of your photo to guide your color choices.
Section 5: Applying Brush Strokes
With your brush and colors selected, begin applying strokes along the edges of your image. Focus on creating a painterly border that enhances the visual appeal without overshadowing the main subject. Experiment with brush direction, stroke length, and pressure to achieve a balanced and artistic look.
Section 6: Adjusting Brush Settings
To add depth and variety to your painted edges, experiment with brush settings. Use the Brush panel to adjust parameters such as spacing, scattering, and shape dynamics. This customization allows you to introduce organic variations in your strokes, creating a more natural and hand-painted appearance.
Section 7: Blending Modes and Opacity
To seamlessly integrate the painted edges with your image, explore different blending modes and opacity levels. Common blending modes for this effect include Multiply, Overlay, and Soft Light. Adjust the opacity until you achieve a delicate balance where the painted edges enhance the image without overshadowing its details.
Section 8: Adding Texture
To elevate the painted edges photo border effect, consider incorporating texture. Create a new layer and apply a textured brush or import a texture image. Experiment with blending modes and opacity to subtly infuse your painted edges with texture, adding another layer of visual interest.
Section 9: Fine-Tuning and Refining
As you near completion, take the time to fine-tune your painted edges photo border effect. Zoom in to inspect details, refine brush strokes, and ensure a cohesive integration with the image. Pay attention to areas where the effect may need adjustments, refining the borders for a polished result.
Section 10: Saving Your Masterpiece
Once satisfied with your painted edges photo border effect, save your masterpiece. Consider creating a duplicate of the original image with the painted edges layer merged for future reference, allowing you to showcase your artistic transformation while preserving the original file.
Conclusion:
The painted edges photo border effect in Photoshop offers a delightful fusion of digital precision and artistic expression. This comprehensive guide has navigated through the intricate steps of creating a captivating painted edges border, allowing you to infuse your images with a touch of handcrafted charm. Whether you’re enhancing portraits, landscapes, or any other photographic subject, the painted edges effect provides a versatile and visually appealing framing option. Embrace the artistry of digital brushwork, experiment with colors and textures, and elevate your images to a new level of creative expression with this unique and captivating photo border effect.