Mastering the Art of Stabilizing Shaky Footage in DaVinci Resolve: A Comprehensive Guide

In the realm of video production, capturing smooth and stable footage is crucial for creating professional-looking content. However, even with the best equipment and techniques, shaky footage can still occur due to factors such as camera movement, handheld shooting, or environmental conditions. Fortunately, DaVinci Resolve, a powerful video editing and color grading software, offers robust tools and features for stabilizing shaky footage. In this comprehensive guide, we’ll delve into the intricacies of stabilizing shaky footage in DaVinci Resolve, exploring techniques, workflows, and expert tips to help you achieve smooth and steady results.
Understanding the Importance of Stabilizing Shaky Footage
Before we delve into the practical aspects, it’s essential to understand why stabilizing shaky footage is crucial. Shaky footage can detract from the overall quality of your video, making it appear amateurish and distracting to viewers. By stabilizing shaky footage, you can improve the viewing experience, maintain focus on the subject matter, and convey professionalism in your production.
Step-by-Step Guide to Stabilizing Shaky Footage in DaVinci Resolve
- Import Your Footage: Begin by importing the shaky footage you wish to stabilize into DaVinci Resolve. Organize your media in the media pool to streamline your editing workflow.
- Create a New Project: Open a new project timeline in DaVinci Resolve and drag the shaky footage onto the timeline.
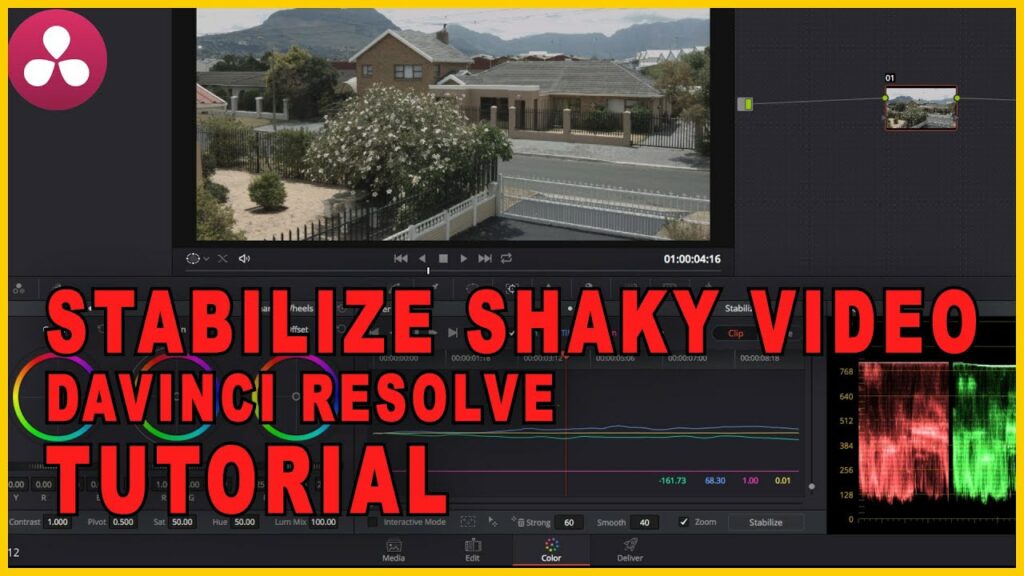
- Access the Stabilization Controls: Navigate to the ‘Color’ workspace by clicking on the Color tab at the bottom of the DaVinci Resolve interface. This action will reveal the color grading tools and stabilization controls essential for your editing tasks.
- Enable Stabilization: Select the clip containing the shaky footage in the timeline. In the Inspector panel, navigate to the Stabilization tab and enable the stabilization feature by checking the stabilization checkbox.
- Analyze and Adjust Settings: DaVinci Resolve offers various settings and parameters for fine-tuning the stabilization process. Adjust parameters such as smoothness, zoom, and crop to achieve the desired level of stabilization while minimizing any potential cropping or distortion artifacts.
- Preview and Refine: Continuously preview the stabilized footage in the viewer to assess the effectiveness of the stabilization settings. Make iterative adjustments based on visual feedback until you achieve smooth and steady results.
- Apply Stabilization: Once satisfied with the stabilization settings, apply the stabilization effect to the clip by clicking the ‘Apply’ button in the Stabilization tab.
- Review and Compare: Compare the stabilized footage with the original shaky footage to evaluate the improvement in stability and overall quality. Use the playback controls to toggle between the original and stabilized versions for a side-by-side comparison.
- Fine-Tune as Necessary: If further adjustments are needed, revisit the stabilization settings and refine them based on specific areas of concern. Pay attention to any residual motion artifacts or distortion and adjust parameters accordingly.
- Render and Export: Once satisfied with the stabilization results, render your project to create a final, stabilized version of the footage. Choose the desired output settings and export the stabilized footage for further editing or distribution.
Tips and Best Practices for Stabilizing Footage
- Shoot with Stabilization in Mind: Whenever possible, utilize stabilization techniques during shooting to minimize the need for post-production stabilization. Use tripods, gimbals, or stabilizers to achieve smooth and steady shots.
- Prioritize Smoothness: Aim for a balance between stabilizing the footage and maintaining natural motion. Over-stabilization can lead to unnatural-looking results, so prioritize smoothness while preserving the integrity of the original footage.
- Use Tracking for Dynamic Shots: For shots with moving subjects or dynamic camera movements, consider using tracking data to enhance stabilization accuracy. DaVinci Resolve offers robust tracking tools that can improve stabilization performance for complex shots.
- Experiment with Different Settings: Don’t be afraid to experiment with different stabilization settings and techniques to find the optimal solution for your footage. Every clip is unique, so it may require different approaches to achieve the best results.
- Combine with Other Effects: Stabilization can be combined with other effects and adjustments to further enhance the quality of your footage. Experiment with color grading, sharpening, or noise reduction to achieve a polished final result.
Conclusion
Stabilizing shaky footage in DaVinci Resolve is a fundamental skill that can greatly enhance the quality and professionalism of your videos. By following the steps outlined in this guide and embracing best practices, you’ll be equipped with the knowledge and tools to effectively stabilize your footage and achieve smooth, steady results. Whether you’re a seasoned editor or a novice filmmaker, mastering the art of stabilization in DaVinci Resolve will elevate your editing capabilities and help you create compelling, visually stunning content. So, embrace the challenge, refine your technique, and let DaVinci Resolve be your ally in the quest for smooth and steady footage.


