Unleashing the Groove: Mastering Disco Tiles in Photoshop for Dazzling Designs
Introduction:
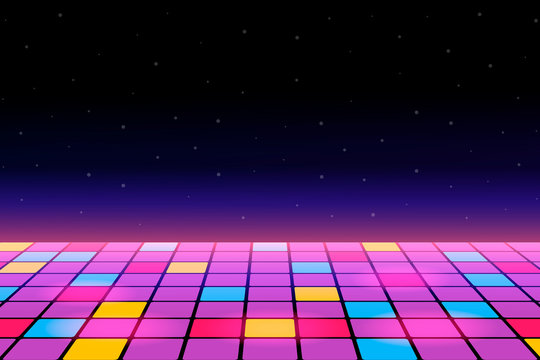
Step into the vibrant world of disco with the electrifying charm of disco tiles. A fusion of dazzling colors, geometric patterns, and a touch of retro nostalgia, disco tiles have become an iconic design element that radiates energy and excitement. In this extensive guide, we will embark on a creative journey through Photoshop, unraveling the step-by-step process of crafting disco tiles that pulsate with rhythm and style. From selecting the perfect color palette to mastering intricate patterns, this guide is your ticket to infusing your designs with the irresistible allure of the disco era.
Section 1: The Disco Aesthetic
Before diving into the creation of disco tiles, it’s crucial to grasp the essence of the disco aesthetic. Born in the late 20th century, disco culture is characterized by its bold colors, dynamic patterns, and a sense of unbridled celebration. Reflect on iconic disco imagery, from glittering dance floors to vibrant light displays, as you prepare to translate these elements into a digital canvas.
Section 2: Setting the Stage: Creating the Canvas
Open Adobe Photoshop and create a new canvas to begin your disco tile adventure. Consider the intended use of your design – whether it’s for a background, poster, or digital artwork – as this will influence the size and resolution of your canvas. Aim for a canvas size that accommodates the scale and intricacy of the disco tile pattern you have in mind.
Section 3: Selecting the Perfect Color Palette
The heart of disco tiles lies in their vivacious color palette. Channel the spirit of disco by opting for bold, high-saturation colors that evoke a sense of energy and vibrancy. Experiment with neon pinks, electric blues, and radiant yellows to capture the unmistakable glow of disco lights. Use the Color Picker in Photoshop to fine-tune your palette, ensuring a harmonious blend of hues that sets the stage for the dance of your disco tiles.
Section 4: Crafting the Base Tile
Start building your disco tiles by creating the base tile – the foundation upon which the rhythm of your design will unfold. Use the Rectangle Tool in Photoshop to draw a square, representing a single tile. Fill the square with one of your chosen colors, setting the stage for the mesmerizing patterns that will follow.
Section 5: Designing Dynamic Patterns
The hallmark of disco tiles lies in their intricate patterns that seem to dance across the surface. Dive into the creation of these patterns using a combination of geometric shapes, lines, and gradients. Experiment with the Pen Tool to draw dynamic shapes, apply gradients to add depth, and use the Brush Tool for freeform accents that mimic the spontaneity of disco lights.
Consider incorporating elements like circles, triangles, and zigzag lines, drawing inspiration from disco ball reflections and the kinetic energy of dance. Layering and arranging these elements will bring your disco tiles to life, creating a visual symphony that captures the essence of disco’s rhythmic beats.
Section 6: Embracing Symmetry and Repetition
The beauty of disco tiles lies in their repetitive and symmetrical nature. Duplicate and arrange your base tile, ensuring that each repetition seamlessly connects with its neighbors. Embrace the power of symmetry to create mesmerizing visual continuity, allowing your disco tiles to unfold like an endless dance floor.
Experiment with different arrangements and orientations, exploring variations in scale and rotation. This step adds dynamism to your design, ensuring that each tile contributes to the overall rhythm of the composition.
Section 7: Playing with Opacity and Blending Modes
Elevate the visual complexity of your disco tiles by playing with opacity and blending modes. Adjust the opacity of individual elements within each tile to create subtle transitions and overlaps. Experiment with blending modes such as Overlay, Screen, or Multiply to enhance the interaction between colors and shapes, infusing your design with depth and dimension.
This step allows you to fine-tune the luminosity and transparency of your disco tiles, achieving a nuanced and visually engaging result.
Section 8: Adding Glows and Highlights
To amplify the disco magic, introduce glows and highlights that evoke the radiant atmosphere of a dance floor bathed in light. Create a new layer and use the Brush Tool with a soft, vibrant color to paint glows around key elements of your disco tiles. Experiment with different brush sizes and opacities to achieve a subtle yet impactful effect.
Consider using the Outer Glow layer style to enhance the luminosity of specific elements, adding an extra layer of brilliance to your disco tiles. This step contributes to the overall radiance and dynamism of your design.
Section 9: Experimenting with Textures and Filters
Elevate your disco tiles by experimenting with textures and filters that add depth and character to the composition. Introduce subtle noise or grain to evoke the tactile feel of disco lights reflecting off a dance floor. Consider applying filters such as Gaussian Blur or Radial Blur to simulate the dynamic motion inherent in disco visuals.
This step provides an opportunity to infuse your disco tiles with a tactile quality, creating a design that not only dazzles the eyes but also resonates with a multisensory experience.
Section 10: Fine-Tuning and Refinement
As you approach the final stages of creating your disco tiles, take the time to review and refine the composition. Pay attention to the overall balance of colors, patterns, and highlights. Zoom in to inspect smaller details, ensuring that the intricacies of your design hold up at various levels of magnification.
Consider adjusting the overall brightness and contrast to achieve the desired level of visual impact. Fine-tune any elements that may appear too dominant or subtle, striving for a harmonious and cohesive result.
Section 11: Saving and Exporting Your Disco Tiles
Once satisfied with your disco tiles, it’s time to save and export your masterpiece. Consider saving your Photoshop project file (.PSD) to retain all layers and editable elements for future adjustments. Additionally, export your disco tiles in a suitable format for your intended use, such as JPEG or PNG.
If your disco tiles are intended for a digital platform or social media, optimize the file size while preserving image quality. For print projects, ensure that your exported file meets the resolution requirements for high-quality reproduction.
Section 12: Sharing the Disco Vibe
Celebrate your disco tile creation by sharing it with the world. Showcase your design on social media, in online portfolios, or as part of a digital art community. Consider creating variations or incorporating your disco tiles into larger compositions to explore different creative possibilities.
Encourage feedback and engage with the community to expand your understanding of disco aesthetics and discover new inspirations. Your disco tiles have the potential to bring joy, energy, and a touch of retro glamour to a global audience.
Conclusion:
Crafting disco tiles in Photoshop is a celebration of color, rhythm, and creativity. From the selection of a vibrant color palette to the intricate dance of patterns and the addition of glows and highlights, each step contributes to the mesmerizing allure of disco aesthetics. This extensive guide serves as a roadmap for digital artists and enthusiasts alike, providing the tools and insights needed to master the art of disco tiles in Photoshop.
Unleash your creativity, experiment with geometric patterns, and infuse your designs with the timeless energy of disco. Whether you’re creating a dazzling background, a retro-inspired poster, or a visual masterpiece that pays homage to the disco era, let the rhythm guide your hands as you dance through the steps of crafting disco tiles in Photoshop. Groove on, and may your designs radiate the infectious joy of disco’s golden era.


