Unveiling Creativity: A Comprehensive Guide to Creating Clipping Masks in Adobe Illustrator

Clipping masks are a powerful and versatile feature in Adobe Illustrator, allowing designers to control the visibility of artwork and create intricate compositions with precision and ease. Whether you’re looking to crop images, apply textures, or achieve complex layering effects, mastering the art of clipping masks can elevate your design workflow and unlock new possibilities for creative expression. In this comprehensive guide, we’ll explore everything you need to know about creating clipping masks in Adobe Illustrator, from the basics to advanced techniques and creative applications.
Understanding Clipping Masks:
Before diving into the intricacies of creating clipping masks, let’s first understand what they are and how they work:
- Definition: A clipping mask is a non-destructive method of hiding portions of artwork within a defined shape or path. The artwork inside the clipping mask is only visible within the boundaries of the mask, allowing you to control the visibility and composition of your designs.
- Clipping Path vs. Clipping Mask: While similar in functionality, clipping paths are applied to individual objects, while clipping masks can contain multiple objects and layers within a single mask. Clipping masks offer greater flexibility and versatility in managing complex compositions.
Step-by-Step Guide to Creating Clipping Masks:
- Prepare Your Artwork: Start by arranging the elements you want to include in your composition. This could be shapes, text, images, or any other objects you wish to combine.
- Create Your Masking Object: Draw the shape or path that will serve as your clipping mask using the Shape Tool (such as the Rectangle Tool or Ellipse Tool) or the Pen Tool. This shape will define the area of visibility for the artwork beneath it.
- Arrange Layers: Arrange the layers in your Layers panel so that the artwork you want to clip is positioned directly below the masking object in the layer stack.
- Select All: Select both the masking object and the artwork you want to clip by clicking and dragging over them with the Selection Tool (V) or by holding down the Shift key while clicking on each object.
- Create Clipping Mask: With the objects selected, go to Object > Clipping Mask > Make, or use the keyboard shortcut Ctrl/Cmd + 7. Illustrator will apply the clipping mask, hiding the portions of the artwork outside the boundaries of the masking object.
- Edit Your Mask: To edit the clipping mask, double-click on it with the Selection Tool to enter Isolation Mode. You can now move, resize, or modify the masking object and the artwork within the mask without affecting the rest of the artwork on the artboard.
- Exit Isolation Mode: To exit Isolation Mode and return to the main artwork, simply click outside the clipping mask or press the Esc key. You can also double-click on the background of the artboard.
Advanced Techniques and Tips for Clipping Masks:
- Nested Clipping Masks: Create complex compositions by nesting clipping masks within each other. Simply create a clipping mask within an existing clipping mask to apply additional masking effects and create intricate layering effects.
- Opacity Masks: Combine clipping masks with opacity masks to create gradient or texture-based transparency effects. Apply an opacity mask to the clipping mask group to control the transparency of the masked artwork.
- Release Clipping Mask: To release a clipping mask and revert the artwork to its original state, select the clipping mask group and go to Object > Clipping Mask > Release, or use the keyboard shortcut Ctrl/Cmd + Alt/Option + 7.
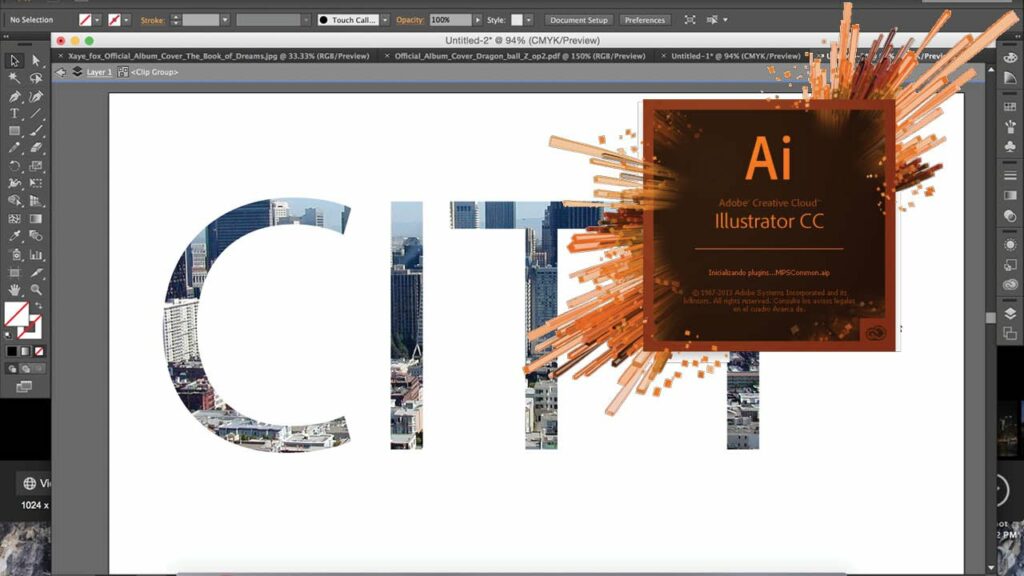
- Use Type as a Mask: Convert text into a clipping mask by placing it on top of the artwork you want to clip and selecting both the text and the artwork before creating the clipping mask. This allows you to create intricate text-based designs with custom imagery.
- Explore Transparency Options: Experiment with different blending modes and opacity settings for the masking object and the artwork to create unique blending effects and compositions.
- Save Clipping Masks: Save clipping mask groups as symbols or graphic styles for reuse in other projects. This allows you to apply complex masking effects with a single click, saving time and streamlining your workflow.
Creative Applications of Clipping Masks:
- Image Cropping: Use clipping masks to crop images or photographs to custom shapes or paths, allowing you to create unique framing effects and compositions.
- Text Effects: Apply textures, patterns, or imagery to text by using text as a clipping mask for other artwork. This technique allows you to create intricate text effects with custom imagery and textures.
- Layering Effects: Create depth and dimension in your designs by layering multiple elements within clipping masks. Experiment with overlapping shapes, textures, and patterns to achieve complex layering effects.
- Collage Art: Combine photographs, illustrations, and textures to create digital collages using clipping masks. This technique allows you to blend and overlay multiple images seamlessly, creating visually stunning compositions.
- Pattern Design: Design seamless patterns by using clipping masks to repeat and arrange motifs within a defined shape or path. This technique allows you to create intricate patterns with precise control over the placement and arrangement of elements.
Conclusion:
In conclusion, mastering the art of creating clipping masks in Adobe Illustrator opens up a world of creative possibilities for designers and artists alike. By understanding the basic principles of clipping masks, practicing the step-by-step techniques outlined in this guide, and exploring advanced tips and creative applications, you’ll be able to leverage this powerful feature to enhance your designs and bring your creative visions to life. So, roll up your sleeves, unleash your imagination, and let clipping masks be your gateway to limitless creativity in Adobe Illustrator!


