Using LabVIEW with Arduino and Raspberry Pi
LabVIEW (Laboratory Virtual Instrument Engineering Workbench) is a graphical programming environment widely used for data acquisition, instrument control, and automation. When combined with popular microcontrollers and single-board computers like Arduino and Raspberry Pi, LabVIEW can significantly enhance the capabilities of these platforms. This article explores the integration of LabVIEW with Arduino and Raspberry Pi, covering the setup, programming techniques, and various application examples.
Introduction to LabVIEW, Arduino, and Raspberry Pi
LabVIEW
LabVIEW, developed by National Instruments, is a powerful tool for developing complex systems using a graphical programming approach. It is especially popular in industries requiring data acquisition, instrumentation, and control due to its ease of use and extensive library of functions.
Arduino
Arduino is an open-source electronics platform based on simple, easy-to-use hardware and software. It is widely used for creating interactive projects, including prototypes and embedded systems, due to its affordability and wide community support.
Raspberry Pi
Raspberry Pi is a small, affordable single-board computer designed to promote computer science education. It has grown in popularity for a variety of applications, from home automation to industrial control, thanks to its powerful processing capabilities and versatile GPIO (General-Purpose Input/Output) pins.
Setting Up LabVIEW with Arduino
Hardware Requirements
- Arduino board (e.g., Arduino Uno, Arduino Mega)
- USB cable for Arduino
- Computer with LabVIEW installed
- NI-VISA drivers (required for serial communication)
Software Requirements
- LabVIEW software
- Arduino IDE (for programming the Arduino)
- NI-VISA (for communication between LabVIEW and Arduino)
- LabVIEW Interface for Arduino (LIFA) or LINX (for easier integration)
Installing the Required Software
- LabVIEW Installation:
- Install LabVIEW from the National Instruments website. Ensure you have a valid license.
- Arduino IDE Installation:
- Download and install the Arduino IDE from the official Arduino website.
- NI-VISA Installation:
- Download and install the NI-VISA drivers from the National Instruments website.
- LIFA/LINX Installation:
- LIFA has been largely replaced by LINX. Install LINX from the LabVIEW MakerHub website. LINX supports both Arduino and Raspberry Pi.
Setting Up Arduino with LabVIEW
- Configure Arduino IDE:
- Open the Arduino IDE.
- Connect your Arduino board to your computer using the USB cable.
- Select your Arduino board model and the appropriate COM port from the Tools menu.
- Install LINX Firmware:
- Open the LINX Firmware Wizard in LabVIEW.
- Follow the prompts to upload the LINX firmware to your Arduino board.
- Verify Communication:
- Use the LINX examples in LabVIEW to verify that communication between LabVIEW and Arduino is working correctly.
Programming Arduino with LabVIEW
- Creating a VI (Virtual Instrument):
- Open LabVIEW and create a new VI.
- Use the LINX palette to access various functions for digital I/O, analog I/O, and communication.
- Basic Example: Blinking an LED:
- Connect an LED to one of the digital pins on the Arduino.
- Use a While Loop in LabVIEW to create a continuous operation.
- Use the LINX Digital Write function to turn the LED on and off.
While Loop:
 LINX Digital Write:
 Channel: Digital Pin (e.g., D13)
 Value: True (ON)
 Wait (e.g., 500 ms)
 Value: False (OFF)
 Wait (e.g., 500 ms)
- Reading Analog Input:
- Connect a potentiometer to one of the analog pins on the Arduino.
- Use the LINX Analog Read function to read the value from the potentiometer.
- Display the value on a LabVIEW front panel indicator.
While Loop:
 LINX Analog Read:
 Channel: Analog Pin (e.g., A0)
 Value: Display on Front Panel
 Wait (e.g., 100 ms)
Setting Up LabVIEW with Raspberry Pi
Hardware Requirements
- Raspberry Pi (e.g., Raspberry Pi 4)
- MicroSD card with Raspbian OS installed
- Power supply for Raspberry Pi
- HDMI cable and monitor (optional)
- Keyboard and mouse (optional)
- Computer with LabVIEW installed
Software Requirements
- LabVIEW software
- NI-VISA drivers
- LINX (for integration with Raspberry Pi)
- Raspbian OS on Raspberry Pi
Installing the Required Software
- LabVIEW Installation:
- Ensure LabVIEW is installed on your computer with a valid license.
- Raspbian OS Installation:
- Install Raspbian OS on your Raspberry Pi. This can be done using tools like Raspberry Pi Imager.
- NI-VISA Installation:
- Ensure NI-VISA drivers are installed on your computer.
- LINX Installation:
- Install LINX from the LabVIEW MakerHub website.
Setting Up Raspberry Pi with LabVIEW
- Prepare Raspberry Pi:
- Boot up Raspberry Pi with Raspbian OS.
- Ensure it is connected to the same network as your computer.
- Install LINX Software on Raspberry Pi:
- Open the LINX Firmware Wizard in LabVIEW on your computer.
- Follow the prompts to deploy the LINX software to the Raspberry Pi.
- Verify Communication:
- Use the LINX examples in LabVIEW to verify that communication between LabVIEW and Raspberry Pi is working correctly.
Programming Raspberry Pi with LabVIEW
- Creating a VI (Virtual Instrument):
- Open LabVIEW and create a new VI.
- Use the LINX palette to access various functions for GPIO, I2C, SPI, and other peripherals.
- Basic Example: Blinking an LED:
- Connect an LED to one of the GPIO pins on the Raspberry Pi.
- Use a While Loop in LabVIEW to create a continuous operation.
- Use the LINX Digital Write function to turn the LED on and off.
While Loop:
 LINX Digital Write:
 Channel: GPIO Pin (e.g., GPIO17)
 Value: True (ON)
 Wait (e.g., 500 ms)
 Value: False (OFF)
 Wait (e.g., 500 ms)
- Reading Sensor Data:
- Connect a sensor (e.g., temperature sensor) to the Raspberry Pi.
- Use the appropriate LINX function to read data from the sensor.
- Display the sensor data on a LabVIEW front panel indicator.
While Loop:
 LINX Analog Read:
 Channel: Sensor Pin (e.g., GPIO4)
 Value: Display on Front Panel
 Wait (e.g., 100 ms)
Advanced Applications
Data Logging
- Set Up Data Logging:
- Use LabVIEW to create a data logging application that reads sensor data from Arduino or Raspberry Pi.
- Store the data in a file or a database for analysis.
- Example: Temperature Monitoring:
- Connect a temperature sensor to Arduino or Raspberry Pi.
- Read the temperature data and log it to a CSV file.
While Loop:
 LINX Analog Read:
 Channel: Temperature Sensor Pin (e.g., A0 for Arduino, GPIO4 for Raspberry Pi)
 Value: Append to CSV File
 Wait (e.g., 1000 ms)
Home Automation
- Control Home Appliances:
- Use LabVIEW to create an interface for controlling home appliances connected to Arduino or Raspberry Pi.
- Use relays to switch appliances on and off.
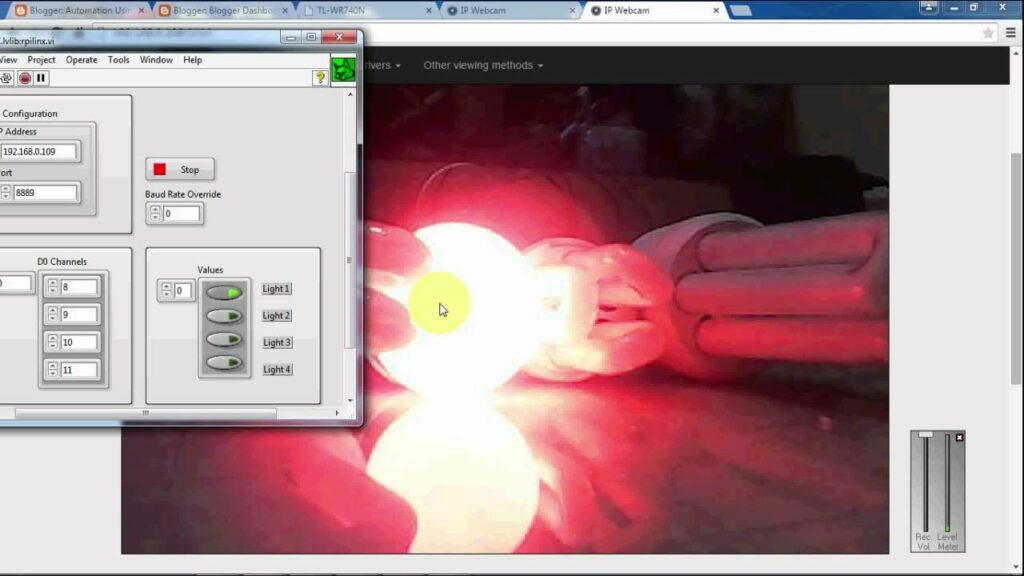
- Example: Smart Lighting:
- Connect a relay module to control lights.
- Use LabVIEW to turn lights on or off based on input from sensors (e.g., motion sensors).
While Loop:
 LINX Digital Read:
 Channel: Motion Sensor Pin (e.g., D2 for Arduino, GPIO17 for Raspberry Pi)
 If Motion Detected:
 LINX Digital Write:
 Channel: Relay Pin (e.g., D13 for Arduino, GPIO27 for Raspberry Pi)
 Value: True (Turn ON)
 Else:
 LINX Digital Write:
 Channel: Relay Pin (e.g., D13 for Arduino, GPIO27 for Raspberry Pi)
 Value: False (Turn OFF)
 Wait (e.g., 100 ms)
Robotics
- Robot Control:
- Use LabVIEW to develop control algorithms for robots using Arduino or Raspberry Pi.
- Interface with motors, sensors, and other actuators.
- Example: Line Following Robot:
- Connect line sensors and motors to Arduino or Raspberry Pi.
- Use LabVIEW to process sensor data and control motor speeds.
While Loop:
 LINX Analog Read:
 Channel: Line Sensor Pins (e.g., A0, A1, A2 for Arduino)
 If Line Detected on Left Sensor:
 LINX PWM Write:
 Channel: Motor Control Pins (e.g., D9, D10 for Arduino)
 Value: Adjust Speed for Right Turn
 If Line Detected on Right Sensor:
 LINX PWM Write:
 Channel: Motor Control Pins (e.g., D9, D10 for Arduino)
 Value: Adjust Speed for Left Turn
 Wait (e.g., 50 ms)
Internet of Things (IoT)
- IoT Applications:
- Use LabVIEW with Arduino or Raspberry Pi to develop IoT applications.
- Connect sensors and actuators to the internet for remote monitoring and control.
- Example: Remote Temperature Monitoring:
- Connect a temperature sensor to Arduino or Raspberry Pi.
- Use LabVIEW to read the temperature data and upload it to a cloud server.
While Loop:
 LINX Analog Read:
 Channel: Temperature Sensor Pin (e.g., A0 for Arduino, GPIO4 for Raspberry Pi)
 Value: Upload to Cloud Server
 Wait (e.g., 5000 ms)
Troubleshooting and Debugging
Common Issues and Solutions
- Communication Errors:
- Ensure the correct COM port is selected in LabVIEW.
- Check USB cable connections and try different cables if necessary.
- Ensure the correct firmware is uploaded to Arduino or Raspberry Pi.
- Incorrect Sensor Readings:
- Verify sensor connections and wiring.
- Check sensor calibration and adjust if necessary.
- Ensure the sensor is compatible with the voltage levels of Arduino or Raspberry Pi.
- Performance Issues:
- Optimize the LabVIEW code for better performance.
- Reduce the frequency of data acquisition if the system is overloaded.
- Ensure the power supply to Arduino or Raspberry Pi is stable and sufficient.
Debugging Techniques
- Use Indicators:
- Place indicators on the LabVIEW front panel to monitor variables and signals.
- Use them to verify that the correct values are being read and written.
- Error Handling:
- Implement error handling in LabVIEW to catch and display error messages.
- Use the error clusters to debug communication and data acquisition issues.
- Serial Monitor:
- Use the Serial Monitor in the Arduino IDE to check the data being sent and received by Arduino.
- This can help diagnose issues with data formatting and communication protocols.
Future Trends and Developments
Integration with Advanced Technologies
- Machine Learning and AI:
- Integrate machine learning algorithms with LabVIEW to develop intelligent systems using Arduino and Raspberry Pi.
- Use platforms like TensorFlow and PyTorch to run machine learning models on Raspberry Pi.
- Edge Computing:
- Implement edge computing solutions using LabVIEW and Raspberry Pi.
- Process data locally on Raspberry Pi to reduce latency and improve response times.
- 5G Connectivity:
- Utilize 5G networks to enhance the connectivity of IoT applications developed with LabVIEW and Raspberry Pi.
- Achieve faster data transfer rates and more reliable communication.
Enhancements in LabVIEW and LINX
- Enhanced Libraries:
- Expect more comprehensive libraries and tools for integrating LabVIEW with Arduino and Raspberry Pi.
- Improved support for new sensors, actuators, and communication protocols.
- Simplified Deployment:
- Streamlined processes for deploying LabVIEW applications to Arduino and Raspberry Pi.
- Enhanced tools for remote monitoring and updating of deployed systems.
- Community Contributions:
- Continued growth of the LabVIEW MakerHub community, contributing new examples, libraries, and tutorials.
- Increased sharing of knowledge and best practices among users.
Conclusion
Using LabVIEW with Arduino and Raspberry Pi opens up a world of possibilities for developing powerful and versatile applications. Whether you are working on data acquisition, home automation, robotics, or IoT, the combination of these platforms provides a robust and flexible solution. By following the guidelines and examples provided in this article, you can harness the full potential of LabVIEW, Arduino, and Raspberry Pi to create innovative and efficient systems. As technology continues to evolve, staying up-to-date with the latest trends and advancements will ensure your projects remain cutting-edge and impactful.