A Comprehensive Guide to Inserting Text Boxes in Microsoft Word
Text boxes serve as versatile tools in Microsoft Word, allowing users to add emphasis, organization, and visual appeal to their documents. Whether you’re creating a professional report, designing a flyer, or crafting a presentation slide, knowing how to insert and customize text boxes can elevate the quality and effectiveness of your work. In this extensive guide, we’ll explore the intricacies of inserting text boxes in Microsoft Word, equipping you with the knowledge and skills to leverage this feature with confidence and creativity.
Understanding the Purpose of Text Boxes:
Before diving into the practical aspects of inserting text boxes, it’s essential to understand their purpose and potential applications. Text boxes are rectangular shapes that can contain text, graphics, or a combination of both. They can be inserted anywhere within a Word document and offer flexibility in terms of size, position, and formatting. Text boxes are commonly used for highlighting important information, creating callouts, labeling diagrams, or adding decorative elements to documents.
Basic Text Box Insertion:
Inserting a text box in Microsoft Word is a straightforward process that can be accomplished using the “Text Box” tool. Here’s how to do it:
- Open Microsoft Word: Launch the Microsoft Word application on your computer to begin working on your document.
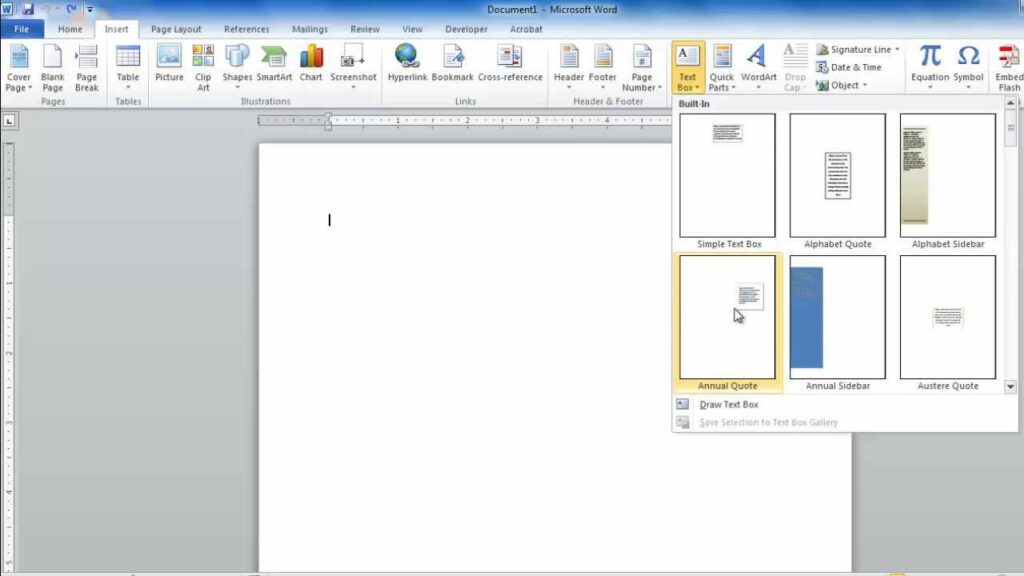
- Navigate to the “Insert” Tab: Once Word is open, navigate to the “Insert” tab located in the top menu bar. Click on this tab to access various insertion options.
- Click on “Text Box”: In the “Insert” tab, locate the “Text Box” option. Clicking on this option will reveal a dropdown menu with different text box styles and insertion options.
- Choose a Text Box Style: From the dropdown menu, select the desired text box style or simply click on “Draw Text Box” to draw a custom text box shape.
- Draw or Click to Insert: If you chose “Draw Text Box,” click and drag your mouse cursor to draw a text box on the document canvas. Alternatively, if you selected a predefined text box style, click anywhere on the document canvas to insert the text box.
- Enter Text: Once the text box is inserted, click inside it to begin typing your desired text. You can also copy and paste text from elsewhere in your document or from external sources.
Advanced Text Box Customization:
While inserting a basic text box suffices for many purposes, Microsoft Word offers advanced customization options to tailor text boxes to specific requirements. Here are some additional features you may explore:
- Resize and Position:
After inserting a text box, you can resize it by clicking and dragging the resizing handles located on the sides and corners of the box. You can also move the text box to a different location by clicking and dragging it to the desired position within the document.
- Format Text and Box Style:
Word provides a range of formatting options for text boxes, allowing you to customize the font, size, color, alignment, and style of the text within the box. You can also adjust the fill color, outline color, and border style of the text box itself to complement your document’s design aesthetic.
- Linking Text Boxes:
In documents with multiple text boxes or pages, you may need to link text boxes to ensure continuity of text flow. To link text boxes, click on the first text box, then click on the “Create Link” button in the Text Box Tools tab. Next, click on the second text box to establish a link between them. This allows text to automatically flow from one text box to another.
- Wrap Text Around Text Boxes:
To integrate text boxes seamlessly into your document layout, you can set text wrapping options to allow text to flow around the text box. Right-click on the text box, select “Wrap Text,” and choose the desired wrapping style from the dropdown menu. Options include “In Line with Text,” “Square,” “Tight,” “Through,” and “Top and Bottom.”
Best Practices for Text Box Usage:
While text boxes offer versatility and creativity in document design, it’s essential to use them judiciously and in accordance with best practices. Here are some tips to consider:
- Maintain Consistency:
Use text boxes consistently throughout your document to maintain a cohesive visual style. Consistency in text box size, style, and formatting enhances readability and professionalism.
- Avoid Overcrowding:
Resist the temptation to overcrowd your document with text boxes. Use them sparingly to highlight key information or add visual interest, but ensure that they don’t overwhelm the overall design.
- Test Compatibility:
When sharing or exporting your document, ensure that text boxes are compatible with the intended output format. Some text box formatting options may not translate well to certain file formats or viewing platforms.
Conclusion:
Inserting text boxes in Microsoft Word is a valuable skill that empowers users to enhance the visual appeal, organization, and effectiveness of their documents. By mastering the basic insertion process and exploring advanced customization options, you can leverage text boxes to communicate your ideas with clarity and creativity. Whether you’re designing a professional report, crafting a marketing brochure, or preparing a presentation, text boxes offer versatility and flexibility to elevate your document’s impact. So, the next time you embark on a document creation journey in Word, remember to wield the power of text boxes to create visually compelling and engaging content.


