Mastering the Art of Undoing Changes in Microsoft Word

Microsoft Word is a versatile tool that empowers users to create, edit, and format documents with ease. However, in the process of crafting a document, it’s not uncommon to make mistakes or unintended changes that can alter the content or formatting. Fortunately, Word offers a powerful feature known as “Undo” that allows users to reverse these changes and restore their document to a previous state. In this comprehensive guide, we’ll delve into the intricacies of undoing changes in Microsoft Word, equipping you with the knowledge and skills to navigate your document with confidence and precision.
Understanding the Undo Feature:
Before delving into the practical aspects of undoing changes in Microsoft Word, it’s essential to understand the concept of the Undo feature. Undoing changes refers to the process of reverting the document to its previous state, effectively “undoing” any edits, deletions, or formatting changes that have been made. The Undo feature in Word allows users to step backward through the editing history of their document, providing a safety net against errors and enabling seamless experimentation with different formatting options.
Basic Undo Operations:
Undoing changes in Microsoft Word is a straightforward process that can be accomplished using keyboard shortcuts or the Undo button in the toolbar. Here’s how to do it:
- Using Keyboard Shortcuts:
- To undo the most recent change, simply press
Ctrl + Zon your keyboard. This action will revert the document to its state before the last edit. - To undo multiple changes, continue pressing
Ctrl + Zrepeatedly until you’ve reached the desired point in the editing history. Word allows you to undo multiple actions, allowing for precise control over the undo process.
- To undo the most recent change, simply press
- Using the Undo Button:
- Alternatively, you can use the Undo button located in the toolbar at the top of the Word interface. The Undo button typically displays a curved arrow pointing to the left. Clicking on this button will undo the most recent change, similar to using the keyboard shortcut
Ctrl + Z. - To undo multiple changes, click on the dropdown arrow next to the Undo button. This will reveal a list of recent actions that can be undone. Simply click on the action you wish to undo, and Word will revert the document to its state before that change was made.
- Alternatively, you can use the Undo button located in the toolbar at the top of the Word interface. The Undo button typically displays a curved arrow pointing to the left. Clicking on this button will undo the most recent change, similar to using the keyboard shortcut
Advanced Undo Operations:
While the basic Undo feature in Word suffices for most scenarios, there are additional options and techniques for more advanced undo operations. Here are some tips to consider:
- Redo Changes:
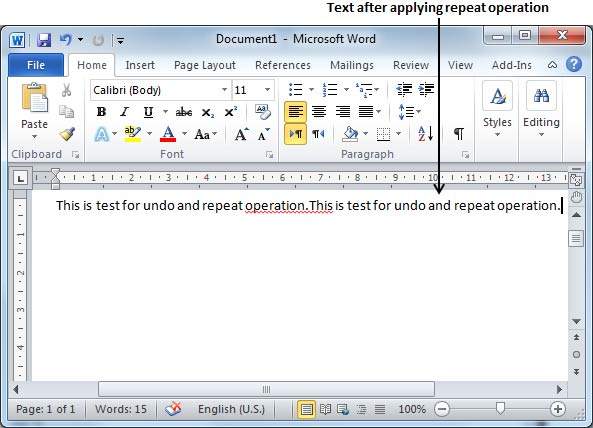
In addition to undoing changes, Word also offers a Redo feature that allows users to reapply undone actions. After undoing a change, you can press
Ctrl + Yon your keyboard or click the Redo button in the toolbar (typically represented by a curved arrow pointing to the right) to reapply the last action that was undone. - Adjust Undo Levels:
By default, Word allows users to undo up to 100 actions. However, you can adjust the number of undo levels to increase or decrease the number of actions that can be undone. To adjust the undo levels, navigate to the “File” tab, select “Options,” and then click on “Advanced.” Under the “Editing options” section, you’ll find the option to adjust the number of undo levels.
- Use the History Pane:
Word’s History pane provides a visual representation of your document’s editing history, allowing you to see a list of recent actions and navigate directly to specific points in the editing history. To access the History pane, click on the “View” tab in the Word ribbon, and then select “History” from the dropdown menu.
Best Practices for Undoing Changes:
While the Undo feature in Microsoft Word is a powerful tool for correcting mistakes and experimenting with different editing options, it’s essential to use it judiciously and in conjunction with other editing techniques. Here are some best practices to consider:
- Save Your Document Frequently:
Although the Undo feature can help correct mistakes, it’s always a good idea to save your document frequently to prevent data loss. Get into the habit of saving your work after making significant edits or completing a section of your document.
- Preview Changes Before Undoing:
Before undoing a change, take a moment to preview the document and ensure that the change you’re undoing is indeed the one you want to revert. This can help prevent unintended consequences and ensure a smoother editing process.
- Experiment with Redo:
In addition to using the Undo feature, don’t hesitate to experiment with the Redo feature to reapply undone actions. Redoing changes can be particularly useful when fine-tuning formatting or trying out different editing options.
Conclusion:
The Undo feature in Microsoft Word is a powerful tool that empowers users to correct mistakes, experiment with different editing options, and navigate their documents with confidence. By mastering the basic and advanced techniques for undoing changes, you can streamline your editing process, enhance productivity, and ensure the integrity of your documents. Whether you’re a student, professional, or creative writer, incorporating the Undo feature into your workflow can help you work more efficiently and effectively in Word. So, the next time you make a mistake or want to revert a change in your document, remember to wield the power of Undo and navigate your editing journey with ease.


