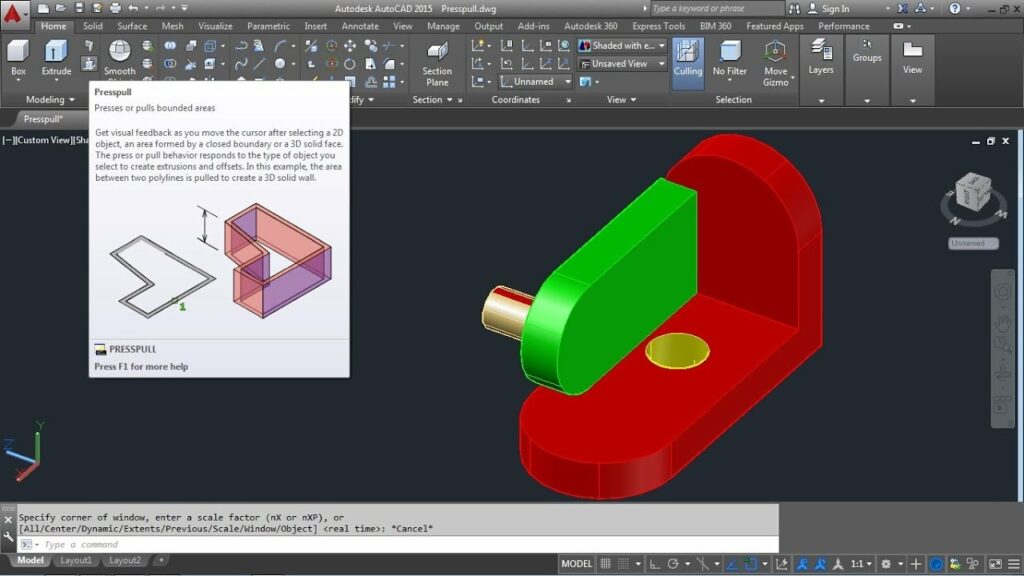
AutoCAD 3D Presspull Command Tutorial: Transforming 2D to 3D Excellence

AutoCAD, a stalwart in the field of computer-aided design (CAD), empowers designers to transition seamlessly from 2D to 3D with a plethora of powerful tools at their disposal. Among these, the “Presspull” command emerges as a pivotal player, bridging the gap between flat 2D entities and robust 3D structures. In this comprehensive tutorial, we embark on a journey through the intricacies of the AutoCAD 3D Presspull command, unraveling its functionalities, step-by-step procedures, and the transformative role it plays in elevating design from the two-dimensional realm to the immersive third dimension.
I. Introduction to the AutoCAD 3D Presspull Command
A. What is the Presspull Command?
The Presspull command in AutoCAD is a dynamic tool designed to extrude or cut through 2D regions, transforming them into 3D solids or voids. It streamlines the process of converting closed geometries, such as polylines, circles, or closed splines, into three-dimensional entities. The Presspull command offers a user-friendly approach to adding depth and volume to 2D objects, making it an essential tool for designers across various disciplines.
B. When to Use the Presspull Command
The Presspull command proves particularly useful in scenarios where designers need to:
- Extrude Shapes: Elevate flat shapes like rectangles, circles, or irregular closed polylines to create three-dimensional solids.
- Create Voids: Carve voids or openings through closed regions, essential for designing architectural elements like windows, doors, or intricate patterns.
- Modify 3D Models: Refine existing 3D models by adding or subtracting material through extrusion or void creation.
II. Accessing the AutoCAD 3D Presspull Command
A. Command Line Activation
To activate the Presspull command using the command line:
- Type “PRESSPULL” or its abbreviated form “PR” in the command line.
- Press Enter to initiate the command.
B. Ribbon Panel Access
Alternatively, users can access the Presspull command through the ribbon panel:
- Navigate to the “Home” tab on the ribbon.
- Locate the “Solid Editing” or “3D Modeling” panel.
- Click on the “Presspull” icon to activate the command.
III. Step-by-Step Tutorial: How to Use the AutoCAD 3D Presspull Command
A. Extruding 2D Shapes into 3D Solids
- Draw a 2D Shape:
- Create a simple closed 2D shape using commands like “Rectangle,” “Circle,” or “Polyline.”
- Access the Presspull Command:
- Type “PRESSPULL” in the command line or click on the “Presspull” icon in the ribbon panel.
- Select the 2D Shape:
- Click on the closed region or polyline you want to extrude.
- Specify the Height:
- Enter the desired extrusion height or drag the cursor to dynamically adjust the height.
- Press Enter to confirm the extrusion.
- View the 3D Solid:
- The 2D shape is now transformed into a 3D solid, visible in the modeling space.
B. Creating Voids and Openings
- Draw a 2D Shape:
- Draw a closed 2D shape representing the desired void or opening.
- Access the Presspull Command:
- Type “PRESSPULL” in the command line or click on the “Presspull” icon in the ribbon panel.
- Select the 2D Shape:
- Click on the closed region or polyline you want to turn into a void.
- Specify Negative Height:
- Enter a negative value as the extrusion height, indicating a cut or void.
- Press Enter to confirm.
- Verify the Void:
- The selected region now functions as a void, creating an opening through the existing geometry.
C. Modifying Existing 3D Solids
- Access the Presspull Command:
- Type “PRESSPULL” in the command line or click on the “Presspull” icon in the ribbon panel.
- Select an Existing 3D Solid:
- Click on the 3D solid you want to modify.
- Specify the New Height:
- Enter the desired extrusion height or drag the cursor to dynamically adjust the height.
- Press Enter to confirm the modification.
- Review the Adjusted Solid:
- The selected 3D solid is now modified based on the new extrusion height.
IV. Advanced Techniques with AutoCAD 3D Presspull Command
A. Multiple Selections
The Presspull command supports the extrusion or void creation of multiple closed regions simultaneously. Simply select all the desired regions before activating the command, and AutoCAD will process each one accordingly.
B. Reference Edges
When using the Presspull command, users can leverage reference edges or faces for precision. By specifying a reference, the extrusion or void creation aligns with existing geometry, ensuring accuracy in complex designs.
C. Combine with Other Commands
Integrate the Presspull command with other 3D modeling tools in AutoCAD for enhanced versatility. Combine extrusions with the Union, Subtract, or Intersect commands to create intricate 3D compositions.
V. Troubleshooting and Considerations
A. Closed Geometry Requirement
Ensure that the 2D geometry selected for the Presspull command is closed. Open geometries, such as open polylines or lines that do not form a closed loop, may result in unexpected outcomes.
B. Handling Complex Geometries
For intricate designs or regions with multiple intersections, it may be necessary to break down the geometry into simpler closed shapes before using the Presspull command. This ensures smoother extrusions and void creations.
C. Managing Negative Heights
When creating voids or openings, entering a negative extrusion height is crucial. Positive heights result in extrusions, while negative values cut voids through the geometry.
VI. Future Trends and Advancements in AutoCAD 3D Modeling
As AutoCAD continues to evolve, the Presspull command is likely to witness enhancements and additional features. Anticipate improvements in user interfaces, real-time feedback during extrusions, and seamless integration with emerging technologies like augmented reality (AR) and virtual reality (VR) for more immersive design experiences.
VII. Conclusion: Presspull Command – A Gateway to 3D Brilliance
The AutoCAD 3D Presspull command stands as a testament to the software’s commitment to providing designers with intuitive and efficient tools for transitioning from 2D to 3D. By unlocking the potential within closed 2D shapes, this command serves as a gateway to a new dimension of design possibilities.
Aspiring and seasoned AutoCAD users alike can harness the transformative power of the Presspull command to sculpt intricate 3D landscapes, architectural wonders, and mechanical innovations. This tutorial provides a foundation for users to master the Presspull command, paving the way for the creation of immersive 3D models that transcend the boundaries of traditional design.
In the ever-evolving landscape of digital design, the Presspull command in AutoCAD remains a beacon, guiding designers towards new horizons and pushing the boundaries of what can be achieved in the third dimension. Armed with the knowledge imparted in this tutorial, designers can embark on a journey of creativity and innovation, transforming their 2D visions into stunning 3D realities with precision and flair.


