Creating a Double Exposure Effect in Corel PHOTO-PAINT X8
Creating Double Exposure and Collages in CorelDRAW is not a very difficult affair. These double exposure techniques and collages are very inspiring and create some amazing and strong visual impression. Collage is a term that has been coined by Pablo Picasso (A legendary Spanish painter and sculptor) and Georges Braque (One of the major French painter, collagist and sculptor)in the beginning of 20th Century. It is actually an artwork where multiple images are assembled into one. You can also learn about Searching Your Files with Search and Libraries in Windows 7.
In order to create Double Exposure and Collages you need to follow these steps.
- 1st of all you need to create a new image document by selecting File>New.
- Now import two photos through Corel CONNECT>Content Exchange>Photos>Animals. For this tutorial we will select the images of a lion and a wolf.
- Now you have to remove the background of both the photos.
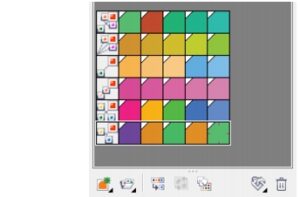
- After removing the backgrounds you need to select the photos in Object ManagerDocker and then click on Combine Icon located at the bottom of the Docker for combining the images into one object.
- Now extend the object below by using Paint Tool and then paint black underneath the area of lion and wolf.
- Now use the Lightness Merge Mode from the Object Manager Docker this will be used for blending the effect.
- Now use a combination of Channels and Contrast Enhancement effects for creating a good contrast. The main objective is to isolate the area which you need to keep and remove the remianing ones.
- If you are using a photo with a complex background then you need to try the Greyscale Lens Object or you can try the Desaturate Lens in combination with Tone Curve Lens or Contrast Enhancement Lens.
- Now drag the handle for creating big black objects.
- Now pick the Magic Wand Tool (W) for selecting the entire object.
- Select Inverse Mask (Ctrl+Shift+I) if needed.
- Click Delete from your keyboard.
- Now you need to import a new photo and place that image below the Lion and Wolf objects.
- Select the Lion and Wolf object by clicking Ctrl+M from your keyboard. This will create a mask.
- Now select the 3rd photo and then right-click and select Copy.
- Right click once again and select Paste>Into Selection.
- With this a new object will be placed on top in the Object Manager Docker.
- Now drag the object down and then place it just above the Background Object.
- The 3rd object is now underneath the Lion and Wolf objects.
- Now select the original Lion-Wolf object and then pick the Eraser Tool (X) and erase by using a soft fluffy nib. This action will unleash the 3rd photo situated underneath.
- Now in order to brighten the image you need to create a new Object in the Object Manager Docker and place this underneath the bicycle photo object. Now pick the Paint Tool and then paint it white with a round, soft nib on the new object.

