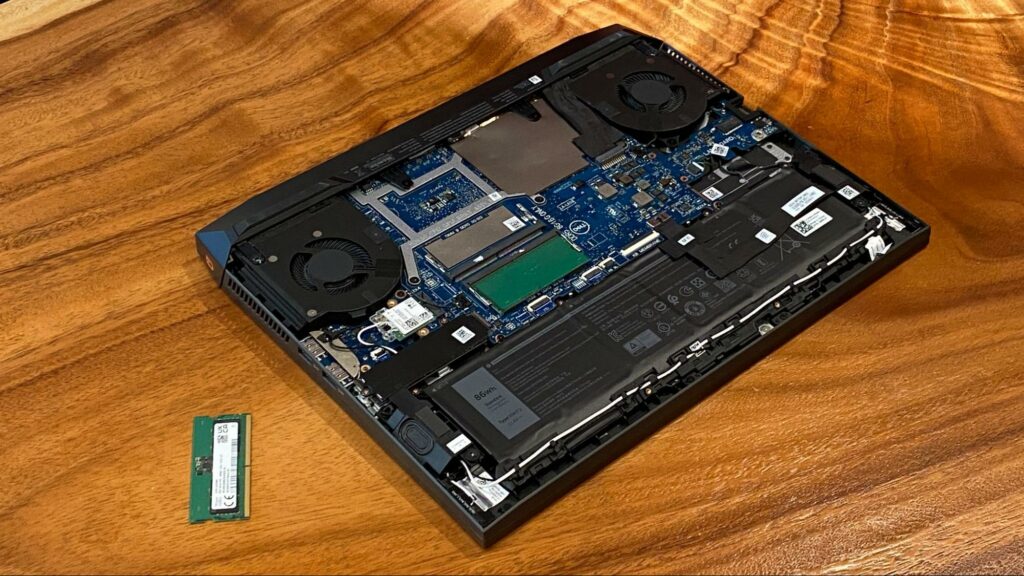
How to upgrade RAM

Introduction to Upgrading RAM
Upgrading RAM involves replacing existing memory modules with higher-capacity ones or adding additional modules to increase total memory capacity. This guide will walk you through the process of safely upgrading your computer’s RAM, ensuring compatibility and optimal performance.
Preparation
Before you begin upgrading your RAM, gather the necessary tools and information:
- Compatibility Check:
- Identify your computer’s motherboard model and consult the manufacturer’s specifications to determine supported RAM types, speeds, and maximum capacities.
- Check the current RAM configuration (number of slots used, type of RAM installed) to plan your upgrade.
- Purchase RAM Modules:
- Choose compatible RAM modules based on your motherboard specifications. Consider factors such as DDR type (e.g., DDR3, DDR4), speed (e.g., 2400 MHz, 3200 MHz), and capacity (e.g., 8GB, 16GB per module).
- Tools Needed:
- Screwdriver (typically Phillips-head, if needed to open case)
- Anti-static wrist strap (recommended to prevent static electricity damage)
- Cleaning cloth or compressed air (optional, for cleaning inside the case)
- Safety Precautions:
- Power off your computer and unplug it from the power source.
- Ground yourself by wearing an anti-static wrist strap or periodically touching a metal part of the case to prevent static electricity discharge.
Step-by-Step Guide to Upgrade RAM
Step 1: Prepare Your Computer
- Open Computer Case:
- Depending on your computer case, use a screwdriver to remove the side panel. Some cases may have thumbscrews or a latch mechanism for easy access.
- Locate RAM Slots:
- Identify the location of RAM slots on your motherboard. Most motherboards have RAM slots near the CPU socket, often color-coded for dual-channel configuration.
Step 2: Remove Existing RAM Modules
- Release Retention Clips:
- If upgrading existing RAM, press down on the retention clips at the ends of the RAM slots to release the modules. The clips will pop up to allow removal.
- Remove RAM Modules:
- Gently pull the RAM modules straight out of their slots. Handle them by the edges to avoid touching the gold contacts or circuitry.
Step 3: Install New RAM Modules
- Align and Insert RAM Modules:
- Align the notch on the RAM module with the key in the RAM slot. Ensure the module is oriented correctly before applying gentle pressure evenly to insert it into the slot.
- You may need to press firmly until the retention clips click into place on both ends of the module.
- Repeat for Additional Modules:
- If adding more RAM modules, insert each module into an available RAM slot following the same alignment and insertion process.
Step 4: Close Your Computer Case
- Replace Side Panel:
- Carefully slide the side panel back onto the case and secure it with screws or latches. Ensure all screws are tightened to prevent vibrations.
- Connect Cables and Power On:
- Reconnect all cables to your computer, including monitor, keyboard, and mouse.
- Plug your computer back into the power outlet and power it on.
Step 5: Verify RAM Installation
- Check System Recognition:
- After booting into your operating system, verify that the new RAM capacity is recognized. Check in BIOS/UEFI setup or use system information tools in Windows (e.g., Task Manager > Performance tab) or macOS (e.g., About This Mac > System Report).
- Test System Stability:
- Use your computer normally to ensure the new RAM modules are functioning correctly. Monitor performance and stability, especially when running memory-intensive applications or multitasking.
Troubleshooting
If your computer encounters issues after installing new RAM, consider the following troubleshooting steps:
- Re-seat RAM Modules: Turn off your computer and re-insert RAM modules to ensure they are properly seated in the slots.
- Check Compatibility: Verify that the new RAM modules are compatible with your motherboard specifications (type, speed, capacity).
- Update BIOS/UEFI: Ensure your motherboard’s BIOS/UEFI firmware is up-to-date to support new RAM configurations.
Conclusion
Upgrading RAM can significantly improve your computer’s performance and multitasking capabilities. By following this step-by-step guide and taking necessary precautions, you can successfully upgrade RAM and enjoy enhanced system responsiveness and efficiency for various computing tasks.
Always refer to the specific instructions provided by your motherboard and RAM manufacturers for detailed guidance and recommendations specific to your hardware.


