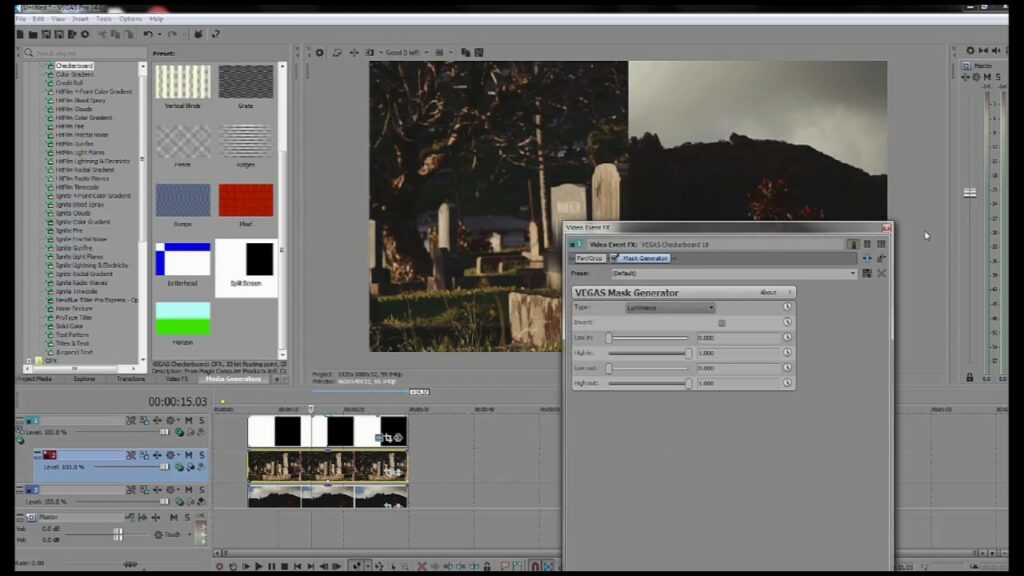
Mastering the Split-Screen Effect in Sony Vegas Pro: A Comprehensive Guide

The split-screen effect is a creative technique that divides the screen into multiple sections, allowing for simultaneous display of different video clips or images. Whether used for storytelling, comparison, or visual interest, the split-screen effect adds depth and complexity to video projects. Sony Vegas Pro, a versatile video editing software, offers a range of tools and features to easily create split-screen effects. In this comprehensive guide, we’ll explore the intricacies of creating split-screen effects in Sony Vegas Pro, unveiling techniques, workflows, and expert tips to help you master this dynamic editing technique.
Understanding the Split-Screen Effect
Before we delve into the practical aspects, let’s take a moment to understand the split-screen effect and its applications. The split-screen effect involves dividing the video frame into multiple sections, each displaying different content simultaneously. This technique allows editors to juxtapose scenes, convey multiple perspectives, or create visually engaging compositions within a single frame.
Step-by-Step Guide to Creating Split-Screen Effects in Sony Vegas Pro
- Import Your Footage: Begin by importing the video clips or images you wish to use for the split-screen effect into Sony Vegas Pro. Organize your media in the project media bin for easy access.
- Create a New Project: Open a new project timeline in Sony Vegas Pro and drag the desired footage onto the timeline.
- Organize Your Timeline: Arrange the clips on the timeline according to the desired layout for your split-screen effect. Determine the size and position of each section within the frame.
- Use Event Pan/Crop: Select the first video clip on the timeline and open the Event Pan/Crop window by clicking on the corresponding icon in the video track header. This window allows you to manipulate the size and position of the clip within the frame.
- Adjust Size and Position: In the Event Pan/Crop window, resize and reposition the first clip to occupy the desired section of the split-screen layout. Use the anchor points and controls to adjust the size and position with precision.
- Repeat for Additional Clips: Repeat the process for each additional clip in your split-screen layout. Use separate instances of the Event Pan/Crop window for each clip to customize the size and position independently.
- Overlap and Blend Clips: If desired, overlap the edges of adjacent clips to create seamless transitions between sections of the split-screen. Use opacity and blending modes to blend the clips together for a cohesive look.
- Add Borders or Frames: Enhance the visual appeal of your split-screen effect by adding borders or frames around each section. Use the Media Generators or solid color layers to create borders of varying thickness and styles.
- Apply Transitions: To further enhance the transitions between sections of the split-screen, apply transitions such as fades, wipes, or slides. Experiment with different transition styles to find the most suitable effect for your project.
- Fine-Tune and Preview: Continuously preview your split-screen effect in the Sony Vegas Pro timeline to assess its visual impact. Make adjustments to clip sizes, positions, or transitions as needed to achieve the desired result.
- Add Text or Graphics: To complement your split-screen effect, consider adding text overlays, graphics, or annotations to provide context or enhance storytelling. Use the Text or Titles & Text presets in Sony Vegas Pro to create dynamic text elements.
- Review and Export: Once satisfied with your split-screen effect, review the final composition in the Sony Vegas Pro timeline. Ensure that all elements are aligned correctly and transitions are smooth. Finally, export your project in the desired format for distribution or further editing.
Tips and Best Practices for Creating Split-Screen Effects
- Plan Your Layout: Before diving into the editing process, sketch out the desired layout and composition for your split-screen effect. Consider the size and position of each section, as well as the overall visual balance.
- Maintain Visual Consistency: Aim for visual consistency across all sections of the split-screen effect. Use similar color grading, lighting, and framing for cohesive and harmonious results.
- Experiment with Layouts: Don’t be afraid to experiment with different layouts and arrangements for your split-screen effect. Explore variations in size, position, and orientation to find the most visually compelling composition.
- Use Contrast and Contrast: Incorporate contrast and juxtaposition into your split-screen effect to create visual interest and convey meaning. Contrasting elements can highlight differences or similarities between sections, adding depth to your composition.
- Consider Audio Integration: If your split-screen effect includes audio, ensure that audio elements are synchronized and balanced across all sections. Pay attention to audio levels and transitions to maintain a seamless auditory experience.
Conclusion
The split-screen effect is a versatile editing technique that offers endless creative possibilities in video production. With Sony Vegas Pro as your tool of choice, you have the power to bring your split-screen visions to life with ease and precision. By following the steps outlined in this guide and embracing best practices, you’ll be well-equipped to create dynamic and engaging split-screen effects that captivate and resonate with your audience. So, unleash your creativity, experiment fearlessly, and let Sony Vegas Pro be your canvas for split-screen storytelling.


