Creating Custom Brush Tips from Photographic Textures for Realistic Digital Painting and Texturing Workflows
Creating Custom Brush Tips from Photographic Textures for Realistic Digital Painting and Texturing Workflows
Custom brush tips based on photographic textures give digital artists a strong tool to add realistic surface detail to Adobe Photoshop illustrations, concept art, product visualizations and digital paintings. Artists can create reusable painting tools from pictures of paper fibers, stone, clouds, vegetation, cloth, scratches and other natural surfaces, instead of only using basic brush presets. These brushes assist generate irregular patterns that are hard to do by hand and make digital art look more organic and visually believable. But the quality of a bespoke brush is dependent on a number of criteria including the contrast of the source image, the resolution of the texture, background separation, brush tip definition and spacing settings. Poorly produced texture may yield muddy strokes, repeating patterns or undesired edges. A correctly processed image can become a versatile asset for various applications. Photoshop has tools to turn information in grayscale images into brush tips and to modify their behavior in the Brush Settings panel. By understanding the entire process from creating photographic textures, to optimizing brushes, to managing libraries, artists end up with a workable set of bespoke brushes that enhance efficiency and broaden creative choices.
Photographic Textures and Brush Tip Customization
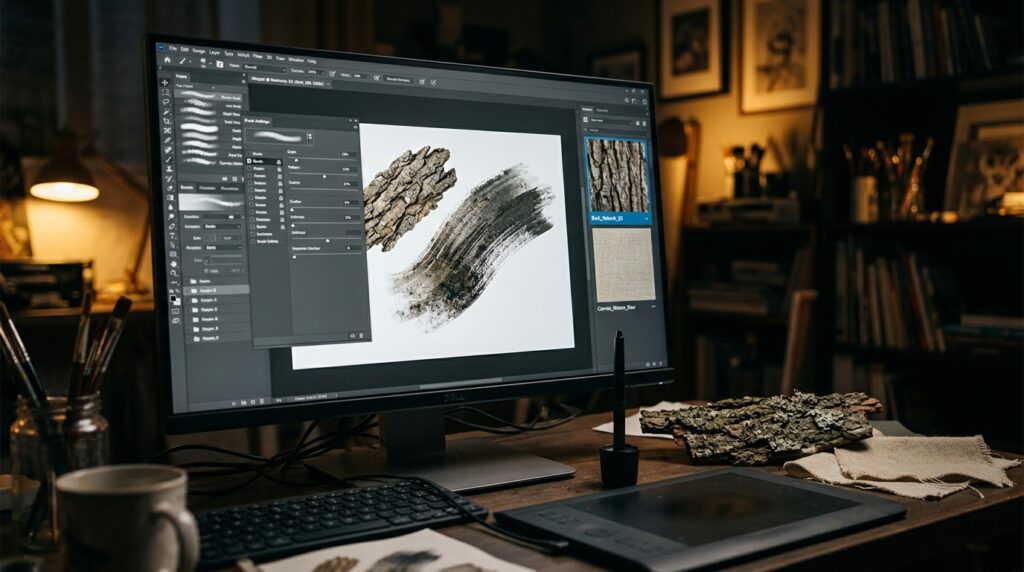
Photographic textures have uneven patterns, tonal changes and surface characteristics that can be turned into effective brush shapes. Illustrations of this are the grain of wood, the roughness of concrete, the fibers of handmade paper, the patterns of tree bark, the scattered forms of natural vegetation. When handled correctly, Photoshop can take that tonal information and use it to create a bespoke brush tip. Generally, the lighter and darker areas will affect how the brush impression is rendered, thus the source image should be produced with the desired effect in mind. The contrast used for a texture that is meant to give a subtle surface grain may be different from that used for a texture that is meant to make strong scratches or rough paint marks. Artists should also be familiar with the difference between a brush tip and a whole brush preset. The shape of the stamp is determined by the tip, and the preset can include other variables that vary size, spacing, dispersion, roughness and transfer behavior. Understanding this difference helps to build brushes which are visually different and technically reliable. A good photographic texture can be the base for a lot of variations of brush, so you do not have to repeat the same surface features manually.
Choosing High-Quality Photographic Source Material
The first step in designing an excellent custom brush is to choose a photographic texture. Good source photos have enough detail to handle different brush sizes without creating obtrusive artifacts. Pictures of stone, sand, leaves, clouds, rough paper, worn paint, etc., can provide interesting irregular patterns for natural surface brushes. The image should have tonal contrasts that are easily identifiable, even after conversion to a brush tip. Evenly illuminated photos are often easier to work with since you minimize undesirable shadows from the original lighting conditions. Uneven illumination, however, can be advantageous when the desired brush should make markings or impressions that vary significantly in direction. Examine the quality, sharpness and overall contrast of the texture before importing it into Photoshop. Stay away from source pictures with heavy compression, apparent watermarks, or noticeable objects that will form undesired forms in the completed brush. Cropping an image to the most useful part removes extraneous detail and gives you a more regulated starting point. It is also vital to use photos that the artist owns or has permission to use. Building your own texture library from original photography means more creative flexibility and less certainty of usage rights.
Gray Scale Texture Images
Conversion to grayscale is a critical stage in preparation, because Photoshop custom brush tips depend largely on tonal information to establish how they look. By reducing unwanted color fluctuation, artists may focus on the structure, contrast and distribution of light and dark sections of the texture. Open the chosen photograph in Photoshop and convert a working copy to gray scale using the appropriate adjustment or image mode. Adjustment layers allow more freedom and control over the relative brightness of different colors before the image is converted to a monochromatic appearance. This is particularly handy when the original texture contains multiple colors which have similar brightness levels. Increasing the contrast can make key surface elements more prominent, but too much contrast might erase delicate detail or create harsh unconnected marks. Levels and Curves adjustments provide the artist precise control over the tonal range and enable for the highlighting of the texture areas of interest. Delete unnecessary shadows, isolated objects and distracting edges, where need be. The goal is to establish a defined tonality pattern that will convert easily to a brush impression. Save an unaltered copy of the original photograph, so that you can perform other grayscale treatments later without having to redo the whole preparation procedure.
Custom Brush Tip Definition and Creation
Once the photographic texture is made the next step is to define the region that will serve as the brush tip. Photoshop has a tool that is sometimes called Define Brush Preset that allows you to take a suitable image or selected region and transform it into a reusable brush. Make sure the document matches the application’s requirements for brush-tip size and picture mode before executing this command. Very large source images may need to be downsized and very small textures may not have enough information to work well with larger painting applications. Select the area of the texture you want to use with the Rectangular Marquee tool or any other selection method that is acceptable. Make sure you check your selection boundaries very carefully, as you can get undesirable borders if you stamp the brush over and over again. After defining the preset, give it a meaningful name that describes the texture type or intended function. Following this, the created brush should be tested on a blank document with different brush sizes and stroke directions. A texture that looks plausible as a still image may act differently when tiled along a stroke. Testing at this point allows you to see if the brush needs more contrast tweaks, cropping, or spacing refinement before it is added to the permanent brush collection.
Set the brush settings for a natural distribution of the texture
A custom brush tip is more adaptable when you tweak its behavior in the Brush Settings panel of Photoshop. The Spacing regulates how far between repeated brush strokes are. Shape Dynamics can add some fluctuations in size, angle, and other attributes. Scattering spreads brush traces along the main stroke line, which is great for foliage, dust, particles and uneven surface effects. In the case of the brushes based on photographic textures, the spacing is too large and you can see a series of stamps instead of a painted surface. Lower values reduce spacing to provide a more linked texture, but may require more processing. Scattering is beneficial if the source texture has a minor repeating pattern that would otherwise be noticeable. Variation in size can also assist break up monotony and create more organic outcomes. Compatible pen-pressure settings on pressure sensitive tablets can create natural variations in brush size or opacity. But not all dynamic settings are useful for all texture brushes. A fine scratch brush may not need much scattering, whereas a foliage brush may need a lot of diversity in distribution. Adjust each option slowly and examine the outcomes with several passes, instead of adjusting multiple controls at once.
Using Texture Controls for More Realistic
The Texture settings of Photoshop make it possible to make the behavior of custom brushes more complex by combining a brush stroke with a specified texture pattern. This capability is not the same as producing a brush tip straight from a photo, however both features can be used in conjunction. The photographic brush tip defines each imprint. The Texture settings can affect the brush interaction with a repeating texture pattern. The combination can create believable dry-brush effects, rough pigment dispersion, aged surfaces, and irregular paint coverage. Choose a suitable pattern and use the scale, depth, and other related options in the version of Photoshop installed on your computer to improve the effect. The depth of the texture should not be too excessive, this might cause harsh discontinuities in the stroke, too little depth and the effect is hardly evident. The pattern you choose should compliment the brush tip, not conflict with it. For example, a rough paper texture might work well with a wide paintbrush, whereas a small grainy pattern might be better for fine stone or concrete details. Try the brush on light and dark backgrounds since the contrast might influence how well the texture is visible. Having the texture settings balanced will assist produce plausible surface variation without making the painted result too loud.
Making Special Brushes for Different Materials
A good brush library will have special-purpose presets for specific materials and artistic needs. Vegetation irregularity can be achieved using photographic leaf clusters or genuine plant textures with scattering and angle variation in foliage brushes. Stone brushes may benefit from high contrast black and white pictures showing fractures, pits and rough mineral surfaces. For fabric brushes modest fiber patterns with quite limited scattering may be used to prevent destroying the directional structure of the material. Cloud brushes demand softer tonal transitions and broader, irregular brush marks to provide structure to the atmosphere without visible repetitive borders. Weathering brushes can be created using photos of peeling paint, scratches, rust patterns or damaged surfaces. Each brush should be customized for its specific use, instead of using a single generic preset for all materials. Artists can generate many variations of the same source texture by altering contrast, brush size, spacing, and dynamics. These variations allow flexibility without the need for different images. Naming presets by material and function makes them easier to find in production. A good collection can save you from doing the same work over and over again and will also make for consistent texturing between illustrations, environment concepts and digital painting jobs.
Solving Common Custom Brush Issues
Custom photographic brushes have a number of expected difficulties, including obvious repetition, muddy strokes, undesirable rectangular borders, and variable texture density. Repetition can happen if a unique element in the source image shows up too often along a stroke. This impact can be mitigated by increasing dispersion, by adding controlled size variation, or by further brush-tip variations. Muddy results can mean that the original image does not have enough contrast, or that the brush is being applied too heavily. Refine the conversion to grayscale and lower the brush opacity to retain surface detail. Usually, rectangular borders that are visible suggest that the source material was not clipped or masked properly enough before the brush was formed. Return to the source image, eliminate any distracting edge features and create a new preset if necessary. If a brush feels sluggish, try reducing the tip size, simplifying any extraneous dynamics, or increasing the spacing just a little. Very intricate textures and huge brushes can be very taxing on processing resources. If the brush looks different against different backdrops, check its tonal range, and try other blending modes if suitable. The artist can save off different versions before making any big modifications and then compare the results and restore a useful configuration without having to rebuild the brush from begin.
Create, store, and maintain a reusable brush library
A custom brush collection is infinitely more useful if its presets are structured for reuse in projects time and again. Photoshop has a Brushes panel that lets users manage brush presets with import, export, and preset-management capabilities depending on the version. Group related brushes in a logical manner such as Natural Surfaces, Foliage, Atmosphere, Fabric, and Weathering. Use descriptive names that tell you the kind of texture and what it will be used for. A preset name can refer to a hard stone texture or a gentle cloud formation, rather than just some generic names. Keep backup copies of exported brush collections, so that you may restore valuable presets following changes in software, or while moving to another work station. Also useful is to include the source photos and significant settings for brushes that are regularly utilized in commercial work. If you add third-party textures to a shared library, make sure to check the license to ensure that you are allowed to do so. Keep the collection reasonable by removing duplicates or inefficient presets from time to time. Reliable custom brushes allow digital artists to increase realism, improve painting efficiency and support a broader range of professional texturing workflows by combining carefully prepared photographs, controlled brush dynamics, specialized texture settings and consistent library management.