How to Troubleshoot and Fix Liquify Filter Displacements and Mesh Distortion Errors on Complex Vector Shapes
How to Troubleshoot and Fix Liquify Filter Displacements and Mesh Distortion Errors on Complex Vector Shapes
Adobe Photoshop’s Liquify filter is a powerful editing tool that can transform photos, smooth out outlines, and tweak visual aspects with pinpoint accuracy. Applying Liquify to complicated vector forms, layered compositions, and high-resolution design materials, however, might result in unanticipated displacements, uneven edges, and mesh distortion issues. These difficulties can occur when vector objects are rasterized, smart objects are processed wrongly, selections contain undesirable areas, or the editing document exerts excessive demands on system resources. Before doing any major alterations, designers who work with logos, typography, product mockups, illustrations and composite artwork need to know how Liquify behaves with different layer types. Liquify uses image-based deformation, unlike conventional vector editing tools, which can result in some limits when working with scaling routes and strong geometric boundaries. Therefore, a reliable workflow needs thorough preparation, proper objects conversion, regulated deformation settings and constant quality checks. Being aware of how the Liquify mesh corresponds to source pixels, layer masks, and the structure of the document can assist avoid unintended harm and facilitate recovery. By using systematic troubleshooting techniques, Photoshop users can adjust for distortion problems without sacrificing the flexibility needed for professional design work.
Learn how the Liquify filter works with complex shapes
The Liquify filter alters the look of the image contents by moving pixels around inside a deformation field. The user can push, restore, soften, or extend chosen portions with tools such as Forward Warp, Reconstruct, Smooth, and Bloat. This filter works especially well for organic alterations to faces, cloth, product curves, and illustrated forms. This introduces other problems for vector shapes, as their defining routes are expressed mathematically, rather than represented solely by a fixed grid of pixels. If you are passing a vector object via a pixel based Liquify processing, Photoshop may require a rasterized version or a supported smart object setup. This conversion may influence sharpness of edges and scalability, especially if the item has narrow outlines, complicated curves or minor geometric elements. Distortion mistakes can also arise when several elements are overlapping or when there are transparent areas in the editing area that are difficult to visually analyze. Recognition of these limits helps the designer to choose an adequate processing strategy prior to the use of deformation. Liquify may give enough control for modest organic tweaks, but for exact geometric modifications, vector path editing or transformation tools are frequently superior. The right technique is employed to reduce any unwanted distortion and to preserve the complicated shape.
Preparing Vector Objects Before Applying The Liquify
To be able to use Liquify with vector artwork, you need to prepare it correctly. Keep an editable copy of the vector shapes and save the original project before you start. This guaranties the original pathways are still accessible in case the distortion causes undesired outcomes. If the vector layer needs to be transformed to pixels for the desired operation, make a copy beforehand and rasterize only the working copy. Or, keep the shape in a smart object, if the version of Photoshop and the filter workflow that you’ve selected can do the processing you require. Smart objects keep the original embedded information and may enable the adjustment of supporting filters later, although the specific behavior relies on the contents of the object and the operation being performed. Look for unneeded hidden layers, complicated clipping masks, and overlapping items in the document that could make the result difficult. If you’re working with several distinct forms in your artwork, instead of applying Liquify to the entire composition, try isolating the piece you want to distort. 56 alternatively, as seen below, translucent padding around the item may also allow for some controlled movement along the edges. When the working layer is ready, check the size and check the edges with the appropriate zoom level. This planning decreases the risk of surprises and makes it easier to fix any mistakes later on.
Diagnosing Distortion and Displacement Errors in Liquify Mesh
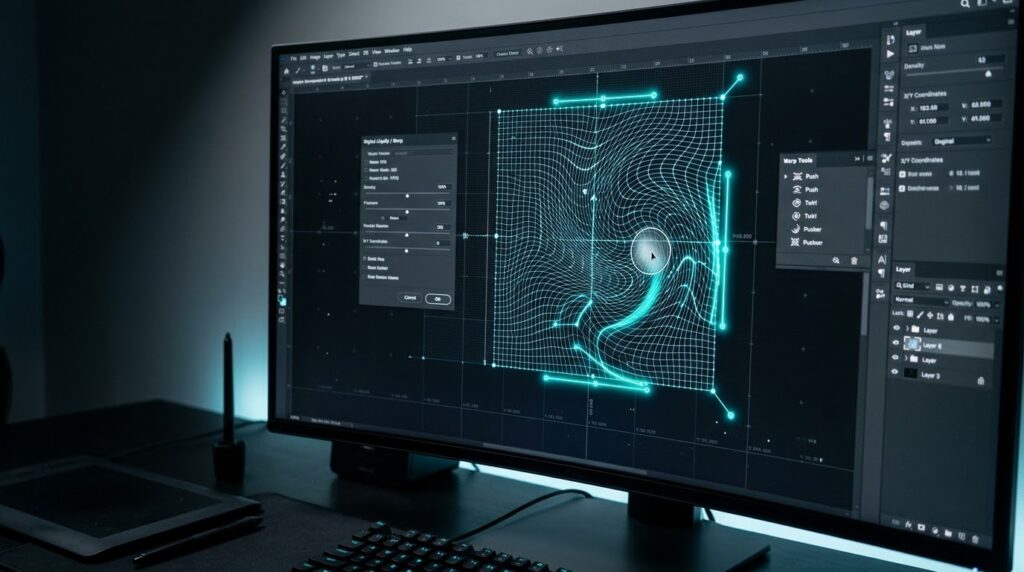
However, the most common indications of mesh distortions include abrupt stretching, irregular curves, detached edges, or deformations that go outside the pre-established region. The first step in troubleshooting these issues is to discover if the problem is with brush settings, source layer, selection edges or document performance. Too broad a brush can impact surrounding areas and too much pressure can push tight shapes outside their intended contours. If the distortion happens suddenly after a certain stroke, use the Reconstruct tool or a suitable restoration control to reverse a portion of the deformation. Photoshop versions that reveal mesh-related settings may additionally provide options to save or load a mesh, so that the deformation information can be reused or recovered when appropriate. Supported processes and mesh controls are according to version and object type. Compare the damaged area with the original artwork and see if the distortion follows the brush stroke or appears unconnected to it. If the preview becomes unstable or doesn’t update correctly, test the procedure on a smaller document or duplicated layer. This helps to know whether the problem is due to computational limits and not due to the deformation parameters itself. The underlying reason is identified prior to the repeat procedure to prevent further damage.
Adjusting brush size, pressure and deformation strength
Accuracy of shape deformation is highly dependent on liquify brush settings. Brush Size affects the area that is influenced by a stroke, Brush Pressure governs the strength of the movement applied in supported instruments. Brush Rate and similar parameters may affect how fast some deformation effects build up when the brush is held still. Large brushes might lead to undesired modifications of nearby curves or narrow details in complicated vector-based artwork. A smaller brush gives you more concentrated control, but if it’s too small, you can end up with uneven transitions and apparent kinks. Start with little pressure and short, deliberate strokes rather than trying to create a big change in one move. When using rounded shapes, move along the desired contour gradually, instead of pushing straight across the whole item. With thin strokes or delicate typography, check the outcome periodically and avoid pressing repeatedly on the same area. If the brush is creating extreme distortions, reduce the brush size or power and rebuild the distorted area, and then proceed. The best settings will depend on the size of the item, the complexity of the edges and the look you want. Incremental consistent modifications help keep smooth outlines, thereby avoiding extreme distortion.
Protecting areas not affected by masks and selections
You can use selections and masks to limit Liquify edits to the area of the composition you want to work in. Deformation can influence surrounding objects, or overlapping elements or transparent boundaries that should not be affected without proper isolation. Before starting Liquify make a selection around the object you wish to manipulate, or isolate the target layer so that no other artwork is affected. The borders of the selection should be close enough to the outlines of the object to protect adjoining elements, but not so close as to hinder necessary movement. If the shape needs to be moved significantly, provide enough space around it for the pixels to move freely. A excessively narrow selection may generate abrupt edges, or may restrict the deformation around the border. Layer masks allow even more versatility , because you can hide anything you do n’t want without really erasing the underlying material . Then apply the filter and look for halos, gaps and strange overlaps at the margins. If the mask seems to be the source of the distortion, temporarily turn it off to see if the problem lies with the mask or with the Liquify procedure. The original object, deformation result and surrounding artwork are kept in distinct layers which makes it easier to isolate faults and restore undamaged sections without the need to rebuild the composition.
Troubleshooting Performance and Graphics Processing Issues
Liquify can be resource-intensive when applied to huge photos, complicated smart objects, or papers with high-resolution content. If the preview lags, the distortion is erratic or the interface is unreliable, evaluate the performance requirements of the document before editing the artwork. Start by closing any superfluous programs and verify that there is enough RAM and disk space available. Big brushes and complex source layers might also contribute to the processing. Testing Liquify on a smaller replica might show if the difficulty is due to document complexity. Photoshop includes performance settings that govern memory allocation and graphics processing. These controls are available and behave differently depending on the version of Photoshop you have installed and your hardware. If you suspect a graphics-related problem, make sure that the graphics driver is compatible with the operating system, and that Photoshop is recognizing the graphics processor you wish to use. You might be able to fix some display difficulties by temporarily altering GPU acceleration settings, but this is not a fix that will work for everyone. Save the document before experimenting with various options and revert any settings which do not enhance stability. whether Photoshop crashes often when working with Liquify, try simplifying the test document and see whether the same problem occurs with a plain raster layer. This regulated procedure is useful to decouple software instability from deformation problems particular to the object.
Repairing Damaged Shapes and Restoring Smooth Outlines
If a Liquify operation results in an unpleasant outcome, reconstruction techniques can be used to restore specific sections without rejecting all successful adjustments. The Reconstruct tool allows users to restore part of the original shape by reducing deformation in the regions where it is applied. The Smooth tool can be used to smooth out sharp abnormalities, but it will also soften sharp corners so use it with care on geometric artwork. A useful approach of recovery is to repair the most noticeable distortions first, by inverting them, then use smaller corrective strokes round the affected contour. If the form is twisted up to a large extent it may be better to revert to a previous state or to reopen a saved duplicate than to try to fix every detail. Smart object workflows can also give a way back to the original source when the filter is still modifiable and supported. For important vector art it could be better to replace the damaged element with its preserved vector counterpart, and then re-apply the deformation with more conservative settings. Compare after rebuilding with the original silhouette. Inspect critical connections, corners and narrow places. The goal is to recover intended geometry while keeping useful distortion. More frequent checking during editing means less extensive rebuilding later.
Improved Workflow Management to Prevent Repeated Distortion
Many displacement issues can be avoided before they occur by using a repeatable Liquify workflow. First, save the document as a copy and save the original vector paths and layer structure. Copy the target element and detach it from other artwork before performing any distortion. Work in brief steps with controlled brush settings and analyze the effect after each major adjustment. For designs with several independent shapes, process each object separately when practical. This minimizes the risk that a deformation will damage surrounding elements or cause complex recovery work. Keep the informative layer names so you can readily discern the initial copy that works and the end version. If you wish to duplicate the same deformation on numerous identical objects, test the approach on a representative element before applying it to the others. Saved deformation meshes can be beneficial in supported workflows, but should be tested as different object dimensions and structures can generate varied outcomes. Regularly saving incremental versions also gives you a dependable recovery point in case a difficult procedure fails. Isolation, controlled deformation, and consistent document organization all help the designer to reduce unintentional distortions, and keep the editing process more predictable.
Picking the Right Alternative for Fine Vector Editing
Liquify works great for organic reshaping but isn’t always the best tool for modifying complex vector geometry. If you need to tweak a curve on a logo, change a letterform, move an anchor point, or keep edges mathematically clean, vector path tools usually provide you more control. Photoshop form layers can be modified via path-editing techniques, while tools built exclusively for vector graphics may provide more complete node manipulation and curve modification. Transform controls can scale, rotate, and change perspective without using the same localized pixel deformation that Liquify requires. A hybrid technique could be more efficient for artwork that has organic textures and geometric components. Vector tools maintain structural fidelity whereas Liquify is ideal for raster details that can benefit from flexible warping. Before you decide which method to use, consider if the finished asset needs to be scalable, if sharp edges are important, and whether the transformation needs to be altered afterward. Keeping the original vector artwork makes it easy to make changes later on if the rasterized version becomes outdated. Choosing the right tool for the job will enhance edge quality and limit the possibility of distortion, and will produce a more uniform workflow when building complicated Photoshop compositions.