Unveiling the Powerhouse: Top 5 Tools You Can’t Just Miss in CorelDRAW

CorelDRAW, a stalwart in the graphic design realm, stands as a beacon of creativity and innovation. At its core, this software is a treasure trove of tools that empowers designers to bring their visions to life. In this in-depth exploration, we’ll uncover the top 5 tools within CorelDRAW that are indispensable for designers seeking to unlock the full potential of their creativity.
1. PowerTRACE: Transforming Raster to Vector Brilliance
In the dynamic world of graphic design, versatility is paramount. PowerTRACE, a standout tool within CorelDRAW, exemplifies this principle by offering a seamless solution for converting raster images into editable vector graphics. This tool is a game-changer for designers who frequently work with bitmap images and desire the flexibility and scalability of vector graphics.
How PowerTRACE Works:
- Import Raster Image: Start by importing a raster image into CorelDRAW. This could be a scanned illustration, a logo, or any image in bitmap format.
- Access PowerTRACE: Navigate to the PowerTRACE feature, which is conveniently located within the software. This tool can be found in the toolbar or the menu, depending on the version of CorelDRAW.
- Adjust Settings: PowerTRACE provides a range of customization options. Adjust settings such as color mode, detail, and smoothing to achieve the desired level of precision in the vectorization process.
- Trace and Edit: Initiate the tracing process, and PowerTRACE will convert the raster image into editable vector paths. After the conversion, designers can further refine and edit the vector elements as needed.
- Seamless Integration: The vectorized image seamlessly integrates into the CorelDRAW workspace, allowing designers to leverage the full range of vector editing tools for fine-tuning and enhancement.
PowerTRACE not only saves time but also preserves the integrity of the original artwork, making it an indispensable tool for designers who often work with a combination of raster and vector elements.
2. Mesh Fill: Infusing Depth and Realism into Designs
For designers aiming to add depth and realism to their creations, the Mesh Fill tool in CorelDRAW is a potent ally. This advanced feature allows users to apply intricate color transitions to objects, creating nuanced shading and highlighting effects.
Key Features of Mesh Fill:
- Grid-Based Color Control: The Mesh Fill tool divides an object into a grid of nodes, each of which can be individually manipulated to control color and transparency. This grid-based approach provides unparalleled precision in color blending.
- Customizable Nodes: Designers can adjust the position and color of each node, allowing for the creation of complex gradients and realistic shading. This level of customization grants a high degree of control over the final appearance of the artwork.
- Three-Dimensional Effects: Mesh Fill isn’t confined to two-dimensional designs. By strategically placing nodes and adjusting their properties, designers can simulate three-dimensional effects, adding a layer of sophistication to illustrations and graphics.
- Texture and Realism: The Mesh Fill tool goes beyond basic color transitions, enabling designers to incorporate texture and intricate patterns into objects. This feature is particularly beneficial for artists aiming to replicate the look of natural elements or materials.
- Interactive Editing: The interactive nature of the Mesh Fill tool allows designers to see real-time changes as they manipulate nodes. This live feedback enhances the creative process, enabling quick experimentation and refinement.
Mesh Fill is a testament to CorelDRAW’s commitment to providing tools that empower designers to push the boundaries of their creativity and produce visually stunning, lifelike designs.
3. Blend Tool: Creating Seamless Transitions and Artistic Flourishes
The Blend Tool in CorelDRAW is a dynamic feature that enables designers to create smooth transitions between objects, shapes, or colors. This tool is a favorite among artists seeking to add artistic flair and create visually striking compositions.
How to Harness the Blend Tool:
- Select Objects: Begin by selecting the objects you want to blend. These could be shapes, text, or any other design elements.
- Access Blend Tool: Locate the Blend Tool in the Toolbox or the menu, depending on your CorelDRAW version. The icon typically resembles two overlapping shapes, symbolizing the blending process.
- Define Blend Steps: Specify the number of steps or increments between the selected objects. This parameter determines the smoothness of the transition.
- Instant Preview: CorelDRAW provides an instant preview of the blend as you adjust the settings. This real-time feedback allows designers to fine-tune the blend to achieve the desired effect.
- Edit and Refine: Once the blend is applied, designers can further edit and refine the objects involved. This includes adjusting the position, size, or color of individual elements to enhance the overall composition.
The Blend Tool is not limited to creating simple transitions; it can be used to generate intricate patterns, simulate motion, or add a touch of whimsy to designs. Its versatility makes it a must-have for designers who wish to inject a sense of fluidity and continuity into their artwork.
4. Artistic Media: Brushing on Creativity and Texture
Artistic Media in CorelDRAW is a toolkit that opens up a world of creative possibilities. From brush strokes to calligraphy, this toolset allows designers to infuse their artwork with unique textures, styles, and strokes.
Exploring Artistic Media Features:
- Extensive Brush Library: CorelDRAW provides an extensive library of artistic brushes, ranging from traditional brushes to special effects brushes. Designers can choose brushes that emulate pencils, inks, oils, and more.
- Customizable Brush Properties: Each brush comes with a set of customizable properties, allowing designers to adjust size, pressure, opacity, and other parameters. This level of customization ensures that artists have full control over the appearance of their strokes.
- Calligraphy and Line Styles: Artistic Media isn’t limited to brushes alone. The toolset includes calligraphy options, enabling designers to create expressive, flowing lines. Various line styles, such as dashes and dots, further enhance the diversity of artistic expressions.
- Pressure-Sensitive Strokes: For users with pressure-sensitive devices, Artistic Media responds to the nuances of pressure. This means that lighter strokes produce thinner lines, while applying more pressure results in broader, bolder strokes.
- Real-Time Preview: As designers experiment with different brushes and settings, the real-time preview feature provides immediate feedback. This allows for intuitive exploration and refinement of artistic elements.
Whether it’s adding hand-drawn details, creating expressive linework, or applying textured effects, Artistic Media serves as a gateway to a more organic and personalized approach to graphic design.
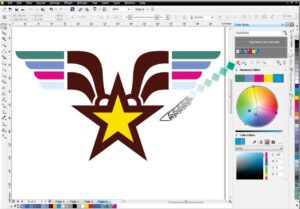
5. Interactive Fill Tool: Color Your Imagination
Color is the soul of design, and CorelDRAW’s Interactive Fill Tool is a powerhouse when it comes to infusing vibrant hues and gradients into artwork. This tool goes beyond basic color application, offering designers an interactive and intuitive way to create captivating fills.
Mastering the Interactive Fill Tool:
- Select Object: Begin by selecting the object or area you want to fill. This could be a shape, text, or any other design element within your workspace.
- Access Interactive Fill Tool: Locate the Interactive Fill Tool in the Toolbox or the menu. The icon typically represents a fountain fill, symbolizing the flowing and interactive nature of this feature.
- Choose Fill Type: The Interactive Fill Tool offers a variety of fill types, including linear, radial, and conical gradients. Designers can choose the type that best suits their vision.
- Adjust Nodes and Colors: With the Interactive Fill Tool active, designers can click and drag nodes to adjust the direction and shape of the fill. Additionally, the tool allows users to choose and customize colors within the fill, providing granular control over the gradient.
- Live Feedback: The real-time feedback from the Interactive Fill Tool allows designers to see the impact of their adjustments instantly. This live preview ensures that the final fill aligns with the intended vision.
The Interactive Fill Tool is not limited to traditional gradient fills; it also supports bitmap and texture fills, opening up a myriad of creative possibilities. This tool is a go-to for designers who wish to breathe life into their designs through rich and dynamic color schemes.
Conclusion: A Symphony of Tools for Design Mastery
In the grand orchestra of graphic design, CorelDRAW’s top 5 tools play the role of virtuoso instruments, each contributing to the creation of a harmonious masterpiece. From the precision of PowerTRACE to the fluidity of the Blend Tool, these tools are indispensable for designers seeking to elevate their craft.
As technology advances and design trends evolve, CorelDRAW continues to be a frontrunner in providing tools that not only keep pace with the industry but also set new standards. Whether you’re a seasoned professional or an aspiring artist, embracing the power of these tools will undoubtedly unlock new realms of creativity and innovation within the dynamic landscape of graphic design. As you embark on your design journey, let these tools be your trusted companions, guiding you towards unparalleled artistic expression and design mastery.