Mastering Artistry: A Comprehensive Exploration of CorelDRAW’s Mesh Fill Tool
Introduction
CorelDRAW, a powerhouse in the realm of graphic design software, boasts a myriad of tools that empower designers to bring their creative visions to life. Among the arsenal of features, the Mesh Fill Tool stands out as a versatile and powerful instrument for adding depth, realism, and intricate color gradients to vector graphics. In this extensive guide, we will embark on a comprehensive journey into the Mesh Fill Tool of CorelDRAW, unraveling its functionality, customization options, and practical applications in elevating digital artwork.
Understanding the Mesh Fill Tool
The Mesh Fill Tool is a sophisticated feature in CorelDRAW that allows designers to apply complex color blends to objects and shapes, creating a realistic and visually compelling effect. Unlike traditional flat color fills, the Mesh Fill Tool enables users to define multiple nodes within an object, each capable of hosting a unique color, creating a seamless transition between shades and tones.
Accessing the Mesh Fill Tool
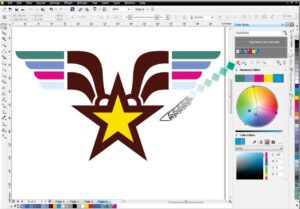
Located within the toolbox of CorelDRAW, the Mesh Fill Tool is easily accessible to users. Once selected, it opens up a world of possibilities for creating nuanced color gradients and intricate shading within vector artwork.
Customization and Node Control
The Mesh Fill Tool’s true power lies in its customization options and the ability to control individual nodes within the mesh. Let’s delve into the key aspects of customization:
- Mesh Grid Placement:
- Before applying colors, designers can control the placement and density of the mesh grid. A denser grid allows for more precise control over color transitions, while a sparser grid simplifies the overall effect.
- Node Manipulation:
- Nodes within the mesh can be manipulated individually, allowing for precise control over color placement, intensity, and blending. This level of detail makes the Mesh Fill Tool ideal for creating realistic gradients, shadows, and highlights.
- Color Blending:
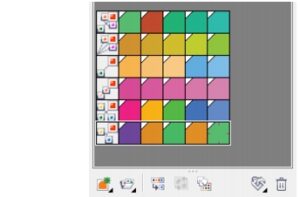
- Each node in the mesh can host a unique color, and the Mesh Fill Tool seamlessly blends these colors together. This feature is particularly beneficial for achieving smooth transitions and gradients, adding depth and dimension to artwork.
- Transparency and Opacity:
- Beyond colors, nodes can also control transparency and opacity, allowing designers to create translucent effects and intricate overlays within the mesh.
Practical Applications
The Mesh Fill Tool proves invaluable across a spectrum of design projects, enhancing the visual appeal and realism of vector graphics:
- Digital Illustrations:
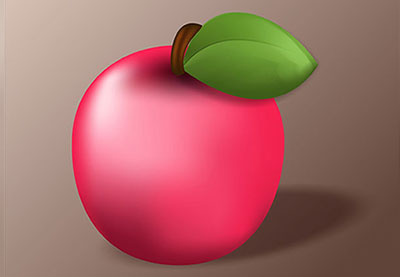
- In digital illustrations, the Mesh Fill Tool can be used to simulate complex lighting conditions, adding realism to characters, objects, and scenes.
- Logo Design:
- Elevate logo designs by incorporating nuanced color gradients, giving logos a dynamic and polished appearance.
- Product Rendering:
- When creating product mockups or digital renderings, the Mesh Fill Tool can simulate materials like metal, glass, or fabric with lifelike color variations.
- Portrait Art:
- Portrait artists can use the Mesh Fill Tool to add subtle shading and highlights, achieving a lifelike and dimensional quality in their work.
- Text Effects:
- Transform typography by applying the Mesh Fill Tool to text elements, creating captivating and intricate color blends within letters and characters.
Advanced Techniques
To truly master the Mesh Fill Tool, designers can explore advanced techniques that push the boundaries of its capabilities:
- Gradient Mapping:
- Experiment with gradient mapping, where the Mesh Fill Tool is used to map complex gradients onto irregular surfaces, creating mesmerizing effects.
- 3D Effects:
- Combine the Mesh Fill Tool with CorelDRAW’s 3D effects to achieve realistic three-dimensional appearances, adding depth and perspective to vector objects.
- Artistic Textures:
- Use the Mesh Fill Tool to apply artistic textures and patterns to objects, enhancing the tactile quality of digital artwork.
- Interpolation:
- Explore interpolation techniques to create smooth color transitions between nodes, achieving a seamless and polished look in your designs.
Tips for Efficient Workflow
To streamline your workflow and maximize efficiency when using the Mesh Fill Tool, consider the following tips:
- Save Custom Mesh Presets:
- Save time by creating and saving custom mesh presets for specific textures, gradients, or styles that you frequently use.
- Utilize Mesh Cloning:
- Clone existing meshes to maintain consistent color schemes and shading across multiple objects or elements within a project.
- Experiment with Node Types:
- Explore different node types, such as smooth or symmetrical nodes, to achieve varied effects and control over color transitions.
- Combine Mesh Fills with Other Tools:
- Integrate the Mesh Fill Tool with other CorelDRAW tools and features, such as the Transparency Tool or the Blend Tool, to create complex and captivating effects.
Conclusion
In conclusion, the Mesh Fill Tool in CorelDRAW is a remarkable asset for designers seeking to infuse their vector artwork with depth, realism, and intricate color gradients. Its versatility, coupled with a robust set of customization options, makes it an indispensable feature for a wide range of design projects. Whether you’re a seasoned graphic artist or a budding designer, mastering the Mesh Fill Tool opens up a realm of creative possibilities, allowing you to breathe life into your digital creations with unparalleled precision and sophistication. So, dive into the Mesh Fill Tool, experiment with its features, and witness the transformative impact it can have on the visual richness of your CorelDRAW projects.