How to Target and Remove Chromatic Noise Using LAB Color Mode Without Losing Image Sharpness
How to Target and Remove Chromatic Noise Using LAB Color Mode Without Losing Image Sharpness
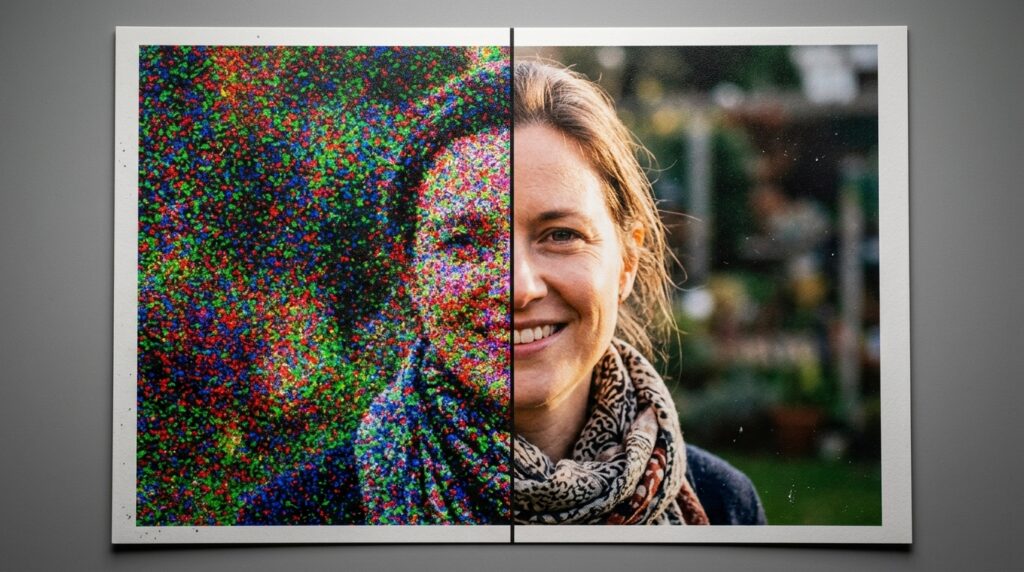
Chromatic noise is one of the most persistent issues in digital image processing, especially in low-light photography or high ISO images. Image processing may be difficult because of this. Choric noise, on the other hand, manifests itself as random color speckles that disturb the natural color balance of a picture. This is in contrast to luminance noise, which has an effect on the brightness values. As a result of treating all pixel fluctuations in the same manner, standard noise reduction approaches often result in a loss of sharpness. This causes minute details to become blurry. At this point, the LAB color mode emerges as a versatile and effective option. Through the process of separating luminance from color information, LAB enables you to identify and target chromatic noise without compromising the image’s quality. This method is particularly useful in professional editing processes, where it is essential to preserve the clarity and roughness of the edges. It is possible to considerably enhance noise reduction outcomes by gaining an understanding of how the LAB color space operates and how to efficiently modify its channels. Through the use of the appropriate method, it is possible to remove undesirable color artifacts while maintaining the integrity of the picture.
Acquiring Knowledge about the Organization of the LAB Color Mode
The LAB color mode is essentially unique from the RGB color mode because it divides the data of the picture into three independent channels: L, which represents the brightness, and A and B, which provide the color information. It is the L channel that holds all of the luminance information, which includes the definition of edges, contrast, and texture. When it comes to color, the A channel represents the axis that goes from green to magenta, while the B channel represents the axis that goes from blue to yellow. Because of this separation, LAB is an excellent choice for the elimination of chromatic noise in certain areas. Due to the fact that chromatic noise is predominantly present in the color channels, you may concentrate on cleaning the A and B channels without having any impact on the L channel. Consequently, this guarantees that the structural detail of the picture is not altered in any way. Before making any repairs, it is necessary to have a thorough understanding of this channel independence, since it enables exact alterations that do not affect the overall picture quality.
Finding Chromatic Noise in Color Channels and Identifying It
In order to properly make any adjustments, it is essential to precisely identify the locations where chromatic noise is present. Being able to separate the noise inside the A and B channels makes this task much simpler when using the LAB mode. When each of these channels is viewed separately, chromatic noise manifests itself as grainy, uneven color patterns that do not correlate to the real picture detail. In dark regions and smooth gradients, these artifacts are often more noticeable than in other locations. It is possible to ascertain the magnitude of the noise as well as its distribution if you proceed to analyze each channel in isolation. The purpose of this stage is to verify that the modifications you make are accurate and not excessive. A correct identification helps to avoid over-processing, which may result in color transitions that are not realistic or the loss of minor tonal variations.
How to Apply Blur Techniques to the A Channel and the B Channel
The use of controlled blur to the A and B channels is one of the most successful approaches for reducing chromatic noise while working in LAB mode. The blurring of these channels does not have an effect on the clarity of the picture since they solely convey information about color channels. It is usual practice to employ Gaussian Blur for this purpose since it eliminates random color changes while maintaining the overall color structure. It is essential to add a level of blur that is just right in order to get rid of noise without making the picture too smooth. This necessitates making a careful modification to the blur radius, taking into consideration the resolution and the amount of noise present in the picture. Maintaining the L channel in its original state allows you to preserve all of the small features and edges, which ultimately results in a final output that is clean and crisp.
It is possible to preserve edge detail by using L channel isolation.
Utilizing the LAB color mode for noise reduction has a number of benefits, the most important of which is the ability to safeguard edge detail by providing L channel isolation. Due to the fact that it stores all of the luminance information, the L channel serves as a protection against the elimination of details. Although the A and B channels are being smoothed down, the L channel is not being altered in any way, which allows for the preservation of contrast, fine lines, and textures. This separation guarantees that the final picture will keep its clarity even after subjecting it to a significant amount of chromatic noise reduction. Traditional approaches that are based on RGB, on the other hand, often result in blurry edges since they do not differentiate between color and brightness characteristics. Utilizing the L channel in an efficient manner enables the production of high-quality outcomes that are in accordance with professional standards.
Making Adjustments to the Color Balance Following Noise Reduction
Following the elimination of chromatic noise, it is often required to make adjustments to the overall color balance of the picture. By blurring the A and B channels, it is possible to occasionally reduce the intensity of the color, which may result in somewhat subdued tones. Adjustments made inside the LAB mode, such as curves or levels, may assist in restoring vibrancy without reintroducing noise. It is possible to make these modifications with precision, targeting particular color ranges without impacting brightness, since LAB is able to differentiate between color and luminance. By doing this step, you assure that the picture will not only continue to be clean but will also be visually beautiful. Adjusting the color balance to perfection is necessary in order to achieve a finished product that is both natural and polished.
The Integration of LAB Workflow with Intelligent Filters
The combination of LAB color mode approaches with Smart Filters results in more versatility while yet preserving a process that is non-destructive. You will be able to maintain the ability to make adjustments to the settings at any time if you convert layers into Smart Objects before applying blur to the A and B channels. This comes in especially handy in professional settings, where it is common to make changes and adjustments. Smart Filters provide you the ability to fine-tune the settings of noise reduction without creating any permanent changes to the picture. Using this method also gives you the opportunity to experiment with various blur intensities and observe the impact that they have in real time for yourself. Not only does the combination of LAB processing and non-destructive editing guarantee accuracy, but it also guarantees versatility.
Consistently preserving the natural texture while avoiding excessive processing
Despite the fact that LAB mode offers powerful tools for noise reduction, there is still the possibility of overprocessing occurring. The application of an excessive amount of blur to the A and B channels can result in the production of color banding or the loss of subtle gradients. The removal of noise and the preservation of texture are two aspects that must be carefully considered and balanced. It is helpful to evaluate the impact of adjustments and to avoid pushing the image too far if you toggle the visibility of adjustments on a regular basis. When it comes to areas such as skin, fabric, or fine surfaces, where intricate details contribute to realism, it is especially important to preserve the natural texture of the surface. Rather than making drastic changes, it is more effective to make subtle, incremental adjustments.
Including Noise Reduction in Laboratory Operations as Part of Professional Workflows
When included into a more comprehensive editing process, chromatic noise reduction that is based on LAB has the potential to dramatically increase both efficiency and output quality. Using this method in conjunction with other alterations, such as sharpening, contrast improvement, and color grading, yields excellent results. You may establish a clearer foundation for future edits by addressing chromatic noise at an earlier stage in the process instead of waiting until later. It is less likely that noise will be amplified at subsequent phases as a result of this. It is possible to employ LAB mode selectively for the purpose of noise reduction before switching back to RGB mode for further modifications and export. When you include this strategy into your usual process, you guarantee that the results you produce are consistent and of excellent quality across a variety of projects and varieties of images.