Using Photoshop’s “Blend If” to Seamlessly Overlay Tech Logos onto Hardware Textures

Using Photoshop’s “Blend If” to Seamlessly Overlay Tech Logos onto Hardware Textures
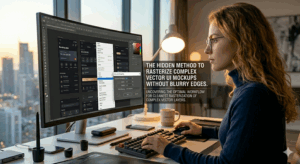
It is possible to significantly improve the aesthetic appeal of graphics used on technology blogs by blending technology logos into hardware surfaces like as metal panels, plastic casings, or glass finishes. The placement of a logo on top of a picture is not enough to provide a realistic look; there are other steps that must be taken. It is common for flat overlays to have an unnatural appearance since they disregard the natural lighting, shadows, and texture of the surface that they are applied on. When this occurs, the “Blend If” function transforms into a potent instrument that may be used to create seamless integrations. The ability to interact between layers based on tonal ranges makes it easier to incorporate logos in a natural way into the material that lies underneath them. When it comes to exhibiting branding on graphics processing units (GPUs), laptops, or bespoke PC designs, this method is quite handy. Using it appropriately allows for the preservation of highlights and shadows, which gives the impression that the logo is a part of the original material. The necessity for intricate masking is also eliminated in many instances as a result of this. By gaining an understanding of how to make efficient use of the “Blend If” tool, you may considerably increase the quality and realism of your technological images.
Comprehending the Function of the “Blend If” Function in Layer Blending
This layer blending function is called “Blend If,” and it allows you to customize how one layer interacts with another layer depending on the brightness levels of both layers. It does not depend primarily on blending modes or opacity to determine visibility; rather, it makes use of tonal ranges. The highlights and shadows of the base picture may be used to selectively conceal or show elements of a logo. This allows you to customize the appearance of the logo. It is possible, for instance, for brighter sections of a metal surface to be seen through the logo, while darker areas will continue to be more noticeable. This results in a natural integration that is a representation of the behavior of materials in the actual world. This interaction may be precisely controlled via the use of the sliders that are included in the blending settings. The delicate and realistic effects that you want to accomplish may be achieved by carefully modifying them. Having a solid grasp of this process is essential to become an expert in the approach. Compositing is presented in a manner that is both more sophisticated and versatile thanks to this.
Making preparations for the blending of the logo and the hardware image
It is essential to ensure that the logo and the hardware image are correctly prepared before performing the “Blend If” command. The resolution of the logo need to be good, and ideally, it ought to be generated in a format that allows for transparency. It is possible to assure that the logo layer will continue to be changeable throughout the process by converting it into a smart object. Considering that the lighting and texture of the base picture will have an impact on the blending effect, it is important that the base image has clear lighting. It is possible to get a better end result by adjusting the contrast and exposure settings up front. In addition, the logo must be scaled and aligned correctly in order to provide a realistic appearance. When the logo is positioned in the appropriate perspective, it is easier for it to blend in with the surface it is being applied on. Preparation is the foundation upon which successful mixing is built. Each step of the procedure is made easier and more precise by a file that has been meticulously created.
Use of Highlight and Shadow Sliders to Achieve a Realistic Effect
The adjustment of the highlight and shadow sliders is the fundamental component of the “Blend If” method in Photoshop. Through the use of these sliders, you may choose which tonal ranges of the layer underneath the logo have an effect on its visibility. Utilizing the sliders, you have the ability to let highlights to travel through the logo, so producing an appearance that is reflective or worn. In a similar vein, altering the shadow sliders may assist in blending the logo into darker portions of the surface. The sliders may be split in order to provide smoother transitions between parts that are visible and areas that are concealed. This eliminates the need for sharp edges and results in a more natural appearance. When it comes to attaining realism, fine-tuning these variables is really necessary. Adjustments of a minor nature might have a huge impact on the overall look of the finished product. By mastering these settings, one may get outcomes that are both exact and believable.
Improving the Integration of Textures Without Utilising Complicated Masking
employing “Blend If” allows you to combine textures without having to depend extensively on manual masking, which is one of the most significant benefits of employing this functionality. When it comes to masking, traditional methods may be time-consuming and need meticulous brushwork in order to produce realistic effects. The “Blend If” function makes this procedure more straightforward by automatically blending the logo with the material that is behind it. The use of this technique is very helpful for surfaces that have intricate patterns or imperfections. It is possible for the inherent features of the hardware to have an effect on the look of the logo thanks to this method. Consequently, this results in an impact that is more genuine and visually attractive. Additionally, the amount of time needed for editing is decreased. You will be able to concentrate on perfecting the overall design if you reduce the number of manual tweaks. It is very necessary to have efficient processes in order to provide consistent content.
The use of “Blend If” in conjunction with Blending Modes
It is possible to combine the “Blend If” option with more conventional blending modes in order to get even more realistic results. Increasing the interaction between the logo and the surface may be accomplished via the use of modes such as overlay, soft light, or multiply. The way in which colors and brightness levels are blended is altered by these modes, which results in an increase in the composition’s depth. These tools, when used with the “Blend If” function, provide for more control over the final appearance. Experimenting with a variety of various combinations is helpful in achieving the impact that is sought. To prevent the picture from being over-processed, it is essential to strike a balance between these parameters. Subtlety is essential to preserving a sense of reality. The creation of more nuanced images is possible via the stacking of several editing processes. Your process will have more opportunities for creative expression if you use this method.
Modifying the Opacity and Color in Order to Achieve Natural Results
Once the “Blend If” function has been used, more changes could be required to ensure that the logo seems natural. When the opacity of the logo is decreased, it may assist it blend in more smoothly with the surface. In addition, it is possible that color modifications will be required in order to match the lighting conditions of the underlying picture. Adding a touch of desaturation or shifting colors might give the impression that the logo is more integrated. Through these improvements, any fake look that may have been left behind is eliminated. At this point, attending to the details is quite necessary. Small errors may have a significant impact on the overall sense of reality. You are able to produce a unified appearance by carefully harmonizing the opacity and color of the image. Once this stage is complete, the logo will have the appearance of being a part of the original picture.
Applying Surface Distortion and Perspective to the Situation
Perspective and distortion are two factors that must be taken into consideration in order to successfully incorporate a brand into a surface of hardware. It’s possible that flat logos won’t match properly with surfaces that are curved or inclined. When transformations are applied, it is easier to have the shape and orientation of the object line up. The appearance of a logo on actual hardware may be imitated via the use of subtle distortions. The composition is given an additional depth of reality as a result of this. Enhancing the overall impression is accomplished by combining perspective modifications with the “Blend If” function. By doing so, it guarantees that the logo will conform to the surface’s overall curves. For visually compelling content, accurate alignment is very necessary. It is at this point that the integration procedure is finished.
Making a Workflow That Can Be Used Again and Again for Consistent Branding
After you have achieved mastery of the “Blend If” approach, it is useful to design a process that can be reused for future projects. The ability to save presets or actions may assist in the rapid replication of the same effect. The ability to retain a consistent brand identity over several blog articles is a particularly valuable use of this. Having a method that is standardized cuts down on the amount of time needed for each new picture. More than that, it guarantees that all of the graphics adhere to the same quality criteria. When you document your process, it becomes much simpler to continue to tweak and enhance it over time. For the purpose of developing a visually distinctive style, consistency is essential. Streamlining your design process may be accomplished by designing a method that can be easily repeated. The use of this strategy contributes to both successful efficiency and professional presentation.